
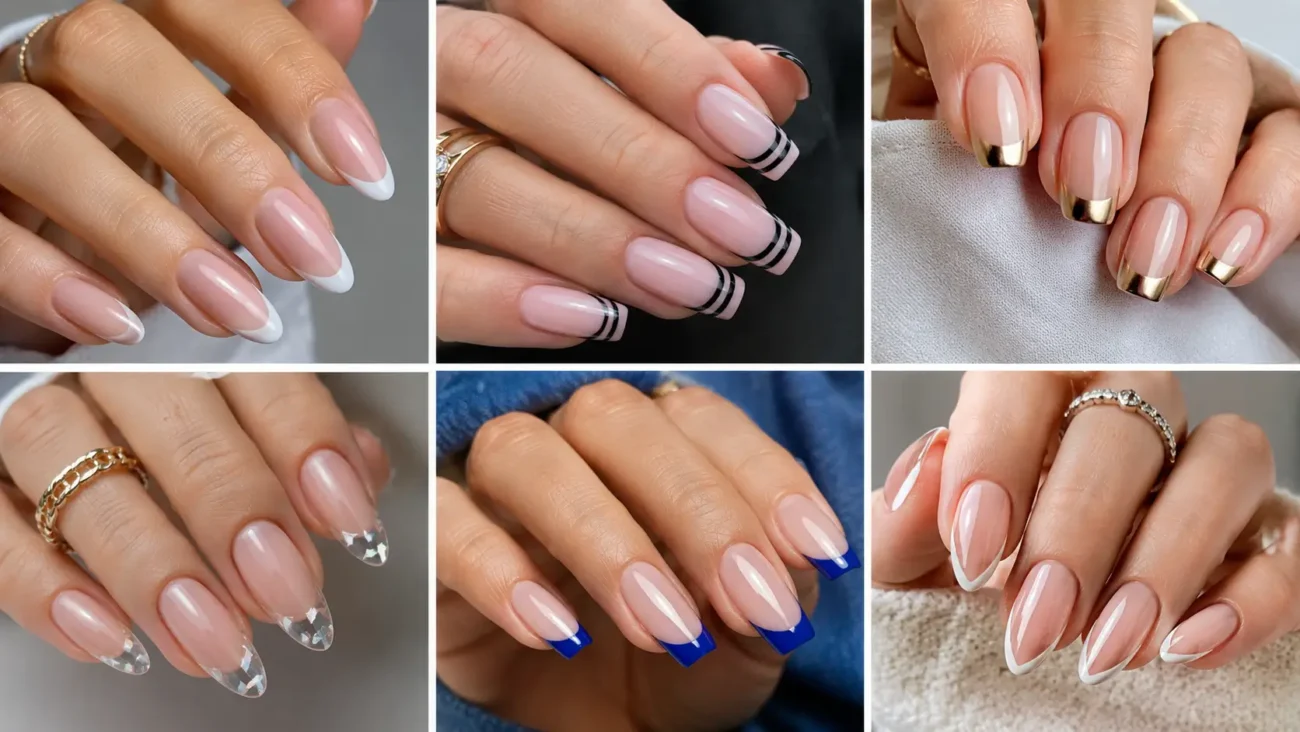
Nail tips can carry the entire personality of a manicure when the design focuses on proportion, movement, and a carefully finished edge. A narrow detail can make short nails look intentional, while a larger graphic treatment can give almond, oval, square, or sculpted shapes a stronger identity. The best result begins with a smooth base and repeats one visual element across both hands without copying every finger.
Sheer color, fine lines, compact texture, and selective shine keep unusual references wearable. The six ideas below explore fountain pen nibs, folding rulers, escalator comb plates, louvered shutters, crown caps, and sundials. Each concept includes three ways to refine the edge while preserving comfort, balance, and enough open space for the design to remain clear.
Fountain Pen Nib Nail Tips With Inked Precision
Fountain pen nib nail tips use tapered metal shapes, narrow channels, and concentrated ink color to make the free edge appear elegant and technical. The idea works especially well on oval and almond nails because their natural direction supports the pointed nib silhouette.
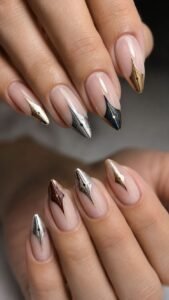
Short rounded nails can carry a cropped version with only the split line and circular detail. Choose brushed silver, warm gold, charcoal, midnight blue, or oxblood over a sheer cream or pale rosy base. Keep the artwork flat and smooth so the manicure looks polished rather than heavily decorated.
Divide the Nib With a Fine Center Channel
Paint a slim line beginning at the center of the free edge and extending a short distance toward the middle of the nail. Add two gently curved side lines that narrow toward the tip, creating the recognizable body of a pen nib. Keep the central channel thinner than the outline so it looks functional rather than decorative.
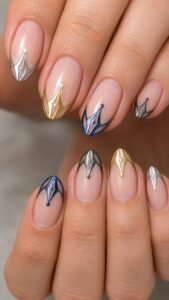
On shorter nails, use only the channel and two compact curves. Repeating the same line width across every finger will make changing nib sizes feel connected.
Add a Tiny Breather Mark Near the Edge
Place one small circle or rounded opening just above the center split. Use black inside a gold nib, deep blue inside silver, or a clear opening within a colored metallic shape.
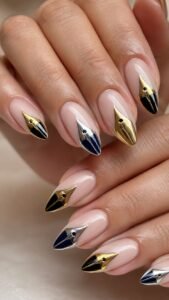
The mark should remain small enough to preserve open space around it. Shift its height slightly across selected nails so the set feels individually drawn. A glossy upper layer can make the circle look recessed beneath the metal surface without requiring bulky gel.
Let Ink Rise From the Underside
Apply a translucent pool of color beneath the nib edge and fade it gently toward the center of the nail. Oxblood, bottle green, indigo, or smoky violet can suggest fresh ink without covering the pale base.
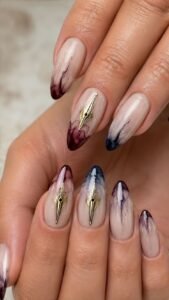
Keep the darkest concentration close to the free edge and allow a few narrow streaks to travel upward. Use the complete ink effect on two accent nails, then repeat only a faint stain on the remaining tips for balance.
Folding Ruler Nail Tips With Hinged Geometry
Folding ruler nail tips transform measured segments, small pivots, and alternating blocks into an organized edge design. Mustard, cream, black, red, and weathered wood tones create a graphic palette that remains warm and wearable. Square and squoval nails naturally support the straight divisions, while oval shapes can carry ruler sections that curve gently with the free edge.
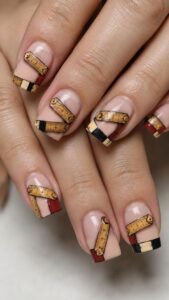
The design should suggest an object that can bend and open, so changing angles across the hand are more effective than placing identical horizontal bands on every finger.
Divide the Edge Into Measured Segments
Create two or three narrow rectangular sections across the free edge, changing the length of each block while keeping their height consistent. Add tiny measurement marks to only one side so the design stays readable on a compact surface.
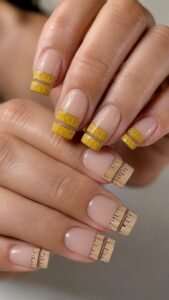
Cream markings over mustard feel nostalgic, while black over pale wood tones looks more precise. Leave a narrow strip of base color between selected segments to suggest separate ruler pieces rather than one continuous stripe.
Place Small Pivot Circles Between Sections
Add one tiny circle where two ruler blocks meet, using brass, black, or deep red for contrast. The circle can sit directly on the joint or slightly below it, depending on the nail shape.
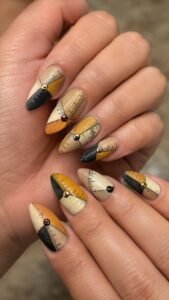
Repeat the pivot on several fingers but change the angle of the adjoining segments. A low glossy dot over a satin ruler surface will make the hinge visible while remaining smooth enough for practical daily wear.
Open One Ruler Into a Sharp Angle
On one accent nail, arrange two measured sections so they meet in a shallow angle instead of following the free edge. Let one block point toward the side wall and the other continue toward the center.
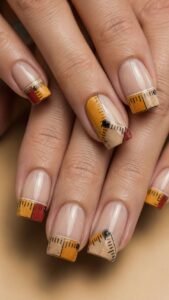
Keep the marks aligned with each separate piece so the change in direction feels believable. Nearby nails can use straight segments and single pivots, allowing the angled ruler to become the main movement within the manicure.
Escalator Comb Nail Tips With Graphic Teeth
Escalator comb nail tips use narrow repeating teeth, safety color, and fine parallel grooves to create a crisp industrial edge. The pattern is bold enough for short square nails but can also curve across almond and oval shapes when the teeth remain delicate.
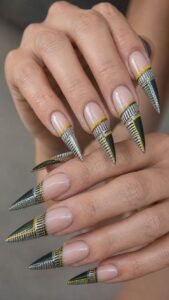
Pale metal, charcoal, signal yellow, cream, and dark green create strong contrast. Keep the pointed elements visually sharp but physically sealed beneath a smooth top layer, ensuring the finished edge never catches on clothing or feels rough against the skin.
Form a Narrow Row of Comb Teeth
Paint a compact sequence of slim triangular teeth directly along the free edge, keeping their height and spacing even. Use charcoal over pale silver, cream over black, or muted yellow over gray.
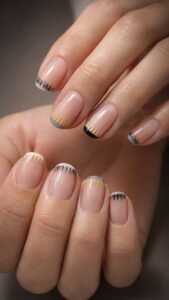
The teeth can face outward on every nail or reverse direction on selected fingers for a more varied set. Leave most of the nail sheer so the repeated edge remains easy to see and does not compete with additional pattern.
Add a Controlled Safety Stripe
Place one straight stripe immediately behind the comb detail in yellow, orange, or red. Keep it narrow enough to support the teeth rather than covering the design. On two nails, interrupt the stripe with a small dark rectangle to suggest a service section.
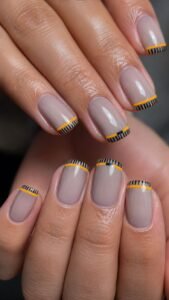
Repeating the same bright color through both hands creates cohesion, while the pale or smoky base prevents the manicure from becoming excessively loud.
Shift the Groove Direction Across the Hand
Draw several fine parallel grooves behind the safety stripe and change their direction from nail to nail. Vertical grooves can appear on the index finger, diagonal grooves on the middle finger, and horizontal marks on the ring finger.
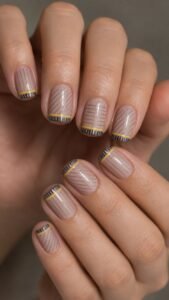
Maintain equal spacing and use one neutral line color throughout. The changing direction creates movement like a working mechanical surface while the repeated comb edge keeps the full set organized.
Louvered Shutter Nail Tips With Layered Slats
Louvered shutter nail tips create depth through overlapping slats, narrow shadow gaps, and controlled angles. Sage, clay, cream, tobacco brown, dusty blue, and dark plum give the idea an architectural but comfortable palette.
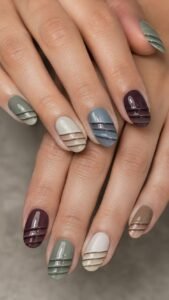
Medium oval and squoval nails provide room for several slats, while shorter shapes can show only two broad panels. A mixture of satin color and selective gloss will help the layers appear separate without requiring thick raised pieces.
Stack Angled Slats Along the Edge
Paint three or four narrow bands at the free edge, tilting each one in the same direction and leaving a thin darker gap between them. Use related shades such as cream, biscuit, and warm gray so the overlap appears through value rather than strong contrast.
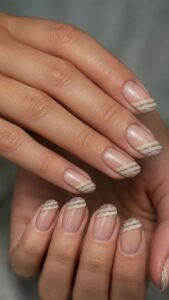
Keep the outermost slat aligned with the nail edge. This repeated construction gives every finger a clear rhythm while allowing the slat width to change with the available space.
Open One Section to Reveal Color
On one or two accent nails, leave a wider gap between two slats and fill the opening with a brighter color such as saffron, teal, mulberry, or coral red. The hidden shade should appear like light or painted wall seen through an opened shutter.
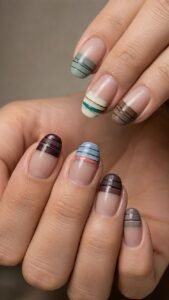
Repeat a tiny amount of that color on another nail through one narrow line. This controlled repetition keeps the brighter opening from looking disconnected.
Cast a Soft Interior Shadow
Add a translucent shadow beneath the lower edge of each slat, using smoky brown, gray violet, or muted blue. Keep the shadow soft and narrow so the design retains a clean architectural appearance.
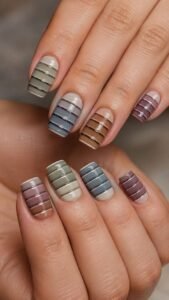
Place the deepest shadow on the side opposite the imagined light source and maintain that direction across both hands. A satin finish on the slats and gloss in the gaps will strengthen the layered effect.
Crown Cap Nail Tips With Crimped Metal Rhythm
Crown cap nail tips take inspiration from the folded metal edge of a bottle cap, using rounded crimps, printed inner rings, and compact reflective details. Cherry red, bottle green, cream, silver, and cobalt create a playful palette without depending on logos or readable packaging.
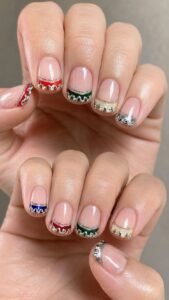
The design suits round, squoval, and short square nails because the repeating crimps can follow a compact curve. Keep the metal effect thin and avoid sharp physical points by sealing every detail beneath a smooth protective finish.
Shape a Row of Rounded Crimps
Paint a sequence of small rounded folds along the free edge, alternating one outward curve with one narrow inward notch. Silver over red looks lively, while cream over bottle green feels softer.
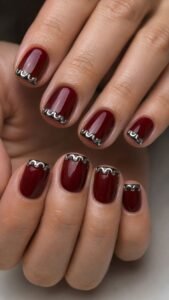
Keep every crimp similar in size but adapt the count to each nail width. The pattern should read as a repeated metal rhythm rather than ordinary scallops, so include a narrow dark line behind the folded edge.
Reveal a Printed Underside Ring
Add a curved band just behind the crimps and fill it with tiny blocks, dots, or abstract marks that suggest printing inside the cap. Avoid real words, symbols, or recognizable packaging.
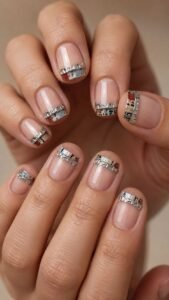
Use cream marks over red, pale blue over silver, or black over warm white. Leave small gaps in the ring so the decoration appears worn and partly hidden beneath the folded metal edge.
Flatten One Crimp as an Accent
Choose one fold on an accent nail and paint it pressed inward, using a broader shape and a darker shadow. The irregular section makes the edge feel handled rather than perfectly manufactured.
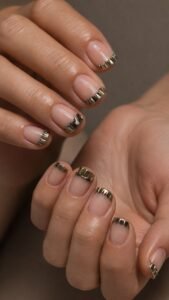
Repeat only the shadow color on nearby nails, keeping their crimps regular. This tiny disruption gives the manicure personality and encourages a closer look without adding extra objects or large surface artwork.
Sundial Nail Tips With Moving Shadow Marks
Sundial nail tips use radial measurements, warm transparent color, and a single moving shadow to create an elegant time inspired edge. Sand, terracotta, black, cream, muted gold, and clear amber work beautifully over natural nail tones.
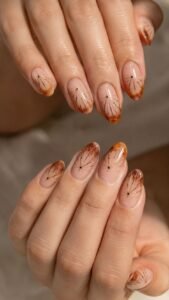
Oval and almond shapes support the radiating lines, while square nails can carry a cropped semicircle. The design feels most refined when the central point remains small and the measurement marks become gradually longer toward the outer sides.
Arrange Radial Marks From One Center
Choose a point near the middle of the free edge and paint fine lines spreading outward like sections of a fan. Alternate short and long marks so the spacing suggests measured time rather than decorative rays.
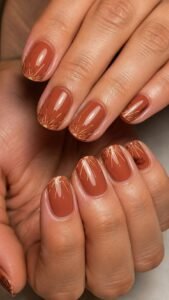
Use dark brown over sand, cream over black, or muted gold over terracotta. Keep the lines delicate and allow some to disappear beyond the side edges for a larger imagined circle.
Angle a Transparent Shadow Wedge
Place a narrow translucent wedge across part of the radial marks, beginning at the central point and fading before it reaches the cuticle. Smoke gray, violet brown, or deep amber can create the shadow without covering the underlying measurements.
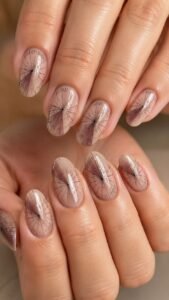
Change the angle slightly from finger to finger so the shadow appears to move across time. Repeat the same opacity throughout for a cohesive set.
Raise One Central Pin Detail
Add a tiny low dot or narrow triangular mark at the origin of the radial lines. Use brushed gold, charcoal, or cream depending on the surrounding palette.
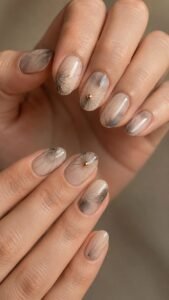
The detail should remain compact and smoothly sealed so it suggests the pin that casts the shadow without becoming uncomfortable. Place the raised version on only two nails and keep the remaining centers flat for a more practical balance.
Make the Nail Tips the Detail Everyone Remembers
The most distinctive nail tips do more than add a stripe of color at the edge. Fountain pen nibs bring refined linework, while folding rulers introduce measured geometry and movable hinges. Escalator comb plates create graphic rhythm, louvered shutters add layered depth, and crown caps turn repeated metal folds into playful texture. Sundials finish the collection with warm color and changing shadow.
Choose the idea that complements your nail length, then simplify the pattern or limit it to accent fingers when you prefer a quieter result. Related inspiration for nail colors, nail shapes, extensions, nail art, stickers, manicure care, and outfit styling can help you plan a complete beauty look around the final edge design.