
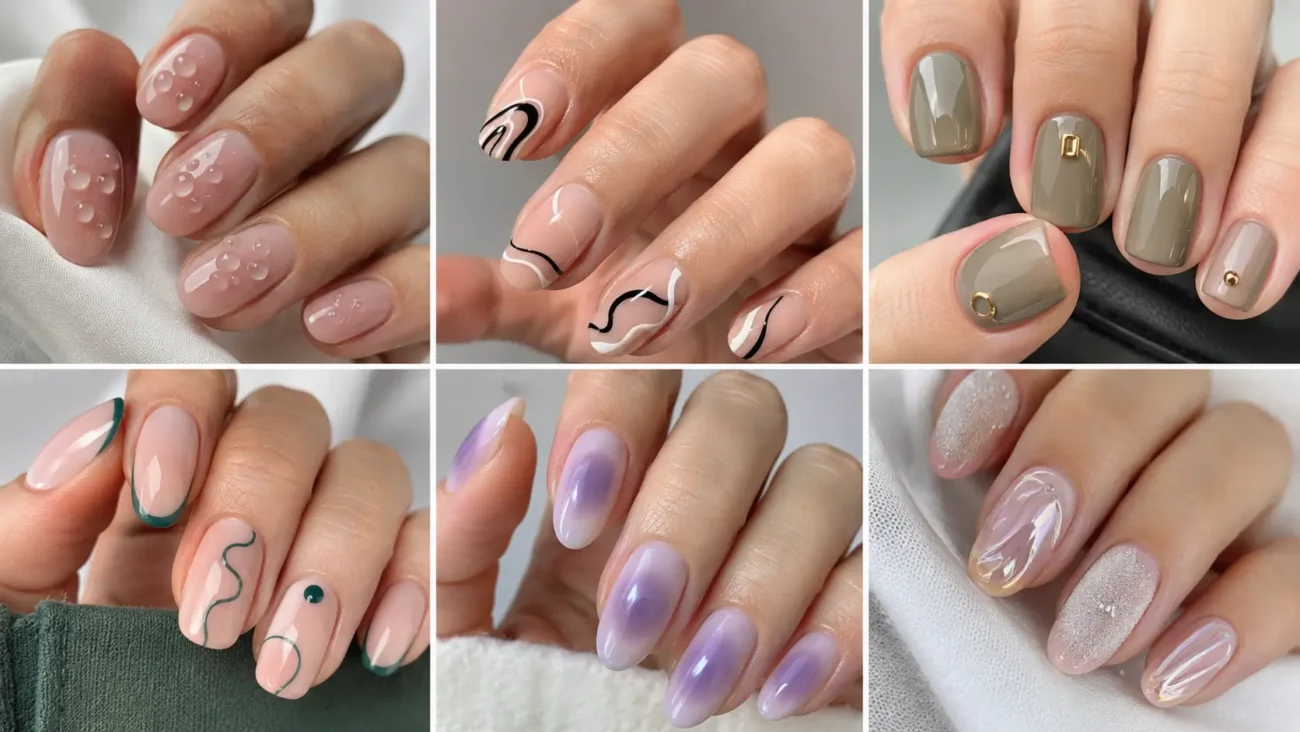
Nail polish designs become more memorable when the inspiration is unusual but the finished manicure remains easy to understand. Transparent layers, precise linework, saturated color, and changing compositions can make short natural nails feel just as expressive as longer shapes. The strongest sets also repeat one visual rule across both hands, such as a shared palette, consistent line weight, or one recurring accent.
The six ideas below explore banknote engraving, airport taxiways, wind tunnel testing, overlapping diagrams, screen printing, and frozen climate samples. Every concept can be simplified for rounded or square nails or expanded across oval, almond, and medium sculpted shapes.
Banknote Guilloché Designs With Interlaced Polish Lines
Banknote guilloché patterns use looping curves, tightly repeated borders, and balanced intersections to create detail that feels refined rather than busy. The inspiration comes from decorative engraving, but the manicure does not need currency symbols, portraits, or readable numbers.
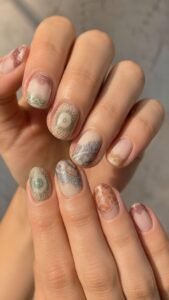
Forest green, wine, parchment, faded blue, and muted copper work beautifully over sheer cream or soft gray. Keep the lines thin and allow open areas around them so the design remains clear on short nails.
Weave Two Curves Through the Center
Begin with one elongated loop that travels from the cuticle area toward the free edge, then cross it with a second curve in a contrasting shade. Repeat the crossing at even intervals so the lines appear woven rather than randomly tangled.
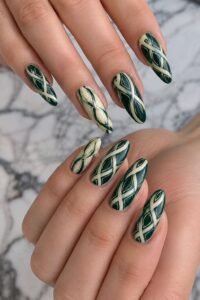
Deep green with cream feels traditional, while cobalt with rust creates stronger contrast. Use the complete pattern on two accent nails and place only one loop on nearby fingers to preserve visual breathing space.
Frame the Edge With a Fine Engraved Border
Paint two narrow lines near the side and free edges, then connect them with tiny arches or repeated leaf shapes. Keep the border slim enough that the natural base remains visible through the center.
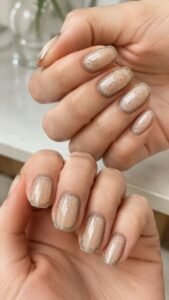
A dark brown outline over parchment polish looks warm, while silver gray over smoky blue feels cooler. Round the corners of the border to follow the nail shape instead of forcing every design into a rigid rectangle.
Add a Transparent Watermark Window
Leave one oval or irregular section nearly clear inside the linework and surround it with softer curves. Add a faint symbol, tiny star, or abstract profile using a polish only slightly deeper than the base.
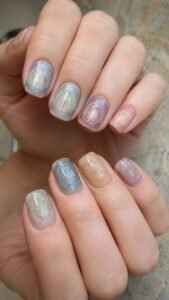
The image should appear and disappear as light moves across the nail. A glossy seal strengthens the impression of a protected window while keeping the surface smooth and practical.
Airport Taxiway Designs With Directional Color
Airport taxiway nail polish designs transform runway lines, holding bars, edge lights, and directional turns into compact graphic compositions. The look feels energetic without relying on logos or travel labels.
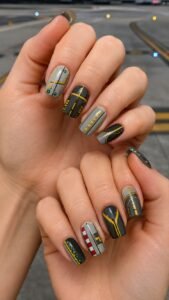
Charcoal, concrete gray, signal yellow, white, red, and green create a convincing palette. Square and squoval nails support straight lanes, while oval and almond shapes make sweeping turns especially attractive.
Curve a Yellow Centerline Across the Hand
Paint one narrow yellow line that enters each nail from a different edge and curves toward the next finger. When the hand rests naturally, the separate sections should suggest one continuous route.
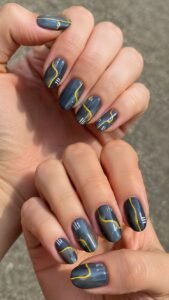
Keep the base charcoal, smoky blue, or sheer gray so the line remains easy to follow. Add only a few short white marks beside selected curves, allowing the main yellow path to control the movement.
Mark One Holding Position With Bold Bars
Choose one accent nail and place two broad yellow bars across the lower portion, followed by two narrower dashed marks. Keep the arrangement crisp and leave open space above it.
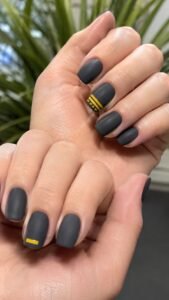
Repeat a tiny yellow rectangle on another finger to balance the color. A satin base with glossy bars can create subtle material contrast without introducing glitter or raised decoration.
Dot the Outer Edge With Signal Lights
Place tiny red, green, and white dots along one side of selected nails, spacing them evenly like lights viewed from above. Use no more than three colors and keep each dot equal in size.
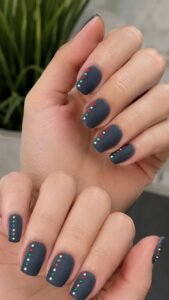
Allow one line of lights to disappear beyond the tip so the imagined taxiway feels larger than the nail. A clear upper coat will brighten the small points and protect their clean edges.
Wind Tunnel Streamline Designs With Fluid Precision
Wind tunnel designs use controlled curved lines that bend around a clear central form, showing how air might move across a surface. The result feels scientific, airy, and surprisingly elegant.
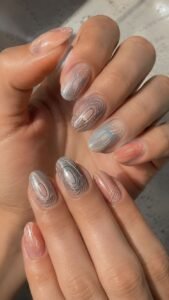
White, pale blue, coral, black, and translucent smoke are especially effective. The concept suits every nail length because the central object can be reduced to a small oval on compact nails or stretched vertically on longer shapes.
Bend Parallel Lines Around a Clear Void
Paint several thin lines entering from one side, then guide them smoothly around an unpainted oval before bringing them together again. Maintain similar spacing so the movement appears measured rather than wavy.
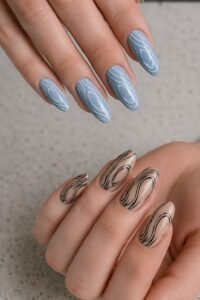
White lines over mist blue feel soft, while black over sheer beige creates a sharper editorial effect. Change the size of the central void across the hand while keeping the line direction consistent.
Introduce One Turbulent Curl Near the Tip
On a single accent nail, allow two streamlines to break away and curl into a compact spiral near the free edge. Keep the remaining lines smooth so the turbulent section looks intentional.
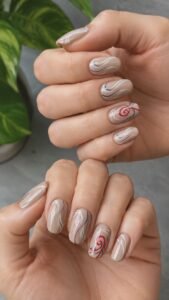
Use a contrasting color such as red, cobalt, or dark plum only within the curl. Repeat that accent shade as one tiny mark elsewhere, connecting the disruption to the rest of the manicure.
Fade the Flow Into Transparent Color
Begin with opaque lines near one side and gradually soften them into a translucent wash as they travel across the nail. The fade can move from blue into clear, coral into pale peach, or charcoal into smoke.
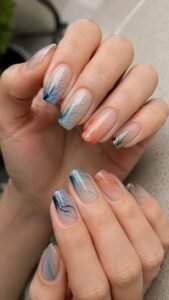
Keep the transition gentle and leave part of the base untouched. This technique adds depth without covering the structure and makes the flow appear to dissolve into air.
Venn Diagram Designs With Transparent Color Logic
Venn diagram nail polish designs use overlapping circles and color mixing to create a manicure that is both graphic and playful. The concept works best with transparent polish because every intersection forms a new shade.
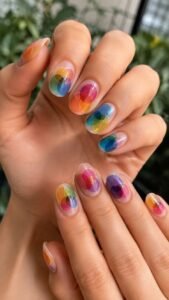
Choose three related colors, such as raspberry, amber, and violet, or aqua, lime, and blue. Short nails can carry two circles, while longer shapes can show a larger cluster with more complex overlap.
Overlap Two Sheer Circles Off Center
Paint one transparent circle near the cuticle and another closer to the side wall, allowing them to cross through a clear central area. Apply each color in thin layers so the overlap creates a visible third shade.
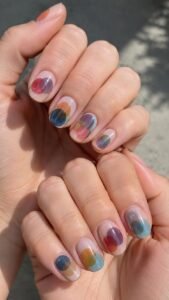
Keep the outlines soft and avoid placing the circles perfectly in the middle. The shifted composition feels more modern and leaves enough open space for the natural nail to remain part of the design.
Connect Three Nails Into One Diagram
Place one partial circle on each of three neighboring nails, arranging them so the full diagram appears when the fingers touch. Use the same transparent color for the outer forms and a deeper shade where the imagined circles intersect.
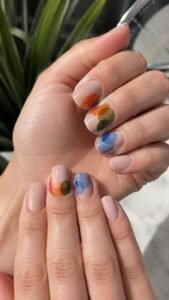
When the fingers separate, every nail should still look complete. This shared composition gives the manicure an interactive quality without requiring symbols or text.
Highlight the Shared Center With Gloss
Keep the circles in a soft satin finish, then apply clear gloss only to the overlapping center. The change in reflection will make the shared area visible even when the polish colors are subtle.
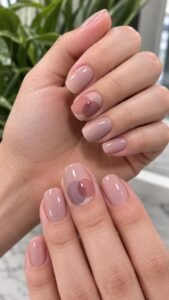
Use this finish contrast on two accent nails and keep the others fully glossy for easier maintenance. A small difference in texture can create the logic of the diagram without adding another color.
Screen Printing Pull Designs With Layered Ink Movement
Screen printing inspired nail polish designs combine flat color blocks, dragged edges, and slight registration shifts. The goal is not to reproduce a poster but to capture the moment when ink moves beneath a screen.
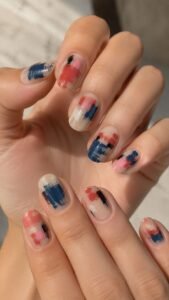
Tomato red, ultramarine, pale pink, black, and warm cream create strong combinations, while softer green and clay produce a quieter version. Keep the polish layers thin so overlapping areas remain crisp.
Drag One Color Into a Clean Rectangle
Paint a broad rectangle across part of the nail, then soften only one edge with a controlled brush pull. The other three edges should remain straight, creating contrast between structure and movement.
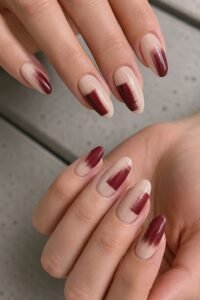
Change the direction of the dragged edge across the hand. A rich color over a sheer base works well, while cream over charcoal creates a reversed and more dramatic interpretation.
Shift a Second Layer Slightly Out of Register
Place another transparent or opaque shape over the first but move it a little to one side. The narrow gap and new overlap color will suggest a screen that did not align perfectly.
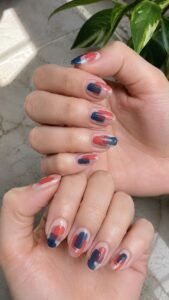
Keep the shift consistent in direction on most nails, then reverse it on one accent finger. Limiting the palette to two main colors prevents the layered shapes from becoming visually crowded.
Leave a Fine Squeegee Ridge
Add one narrow line along the end of a color block, using a deeper version of the same shade. The ridge should look like a small concentration of ink left after a printing pull.
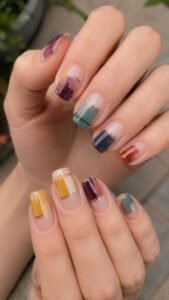
Keep it flat beneath the final seal and allow it to extend slightly beyond the rectangle on one side. This minor imperfection gives the design a handmade quality while preserving a smooth manicure surface.
Ice Core Sample Designs With Frozen Layer History
Ice core sample nail polish designs use vertical bands, trapped bubbles, and faint sediment lines to create depth inspired by frozen layers. Pale blue, cloudy white, smoke gray, muted green, and one dark mineral tone form a cool palette.
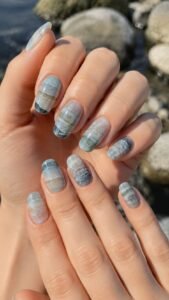
The concept is especially beautiful over clear or milky bases because the natural nail becomes part of the translucent structure. Square nails show the bands clearly, while almond shapes make them appear longer.
Stack Cloudy Bands From Cuticle to Tip
Paint several translucent bands across the nail, changing their width and opacity as they move toward the free edge. Some layers can be nearly clear, while others appear milky or softly blue.
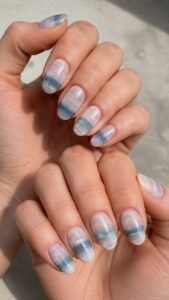
Keep the borders slightly uneven so the sample feels naturally compressed rather than perfectly striped. Repeat one darker band across several fingers to connect the full set.
Trap Tiny Air Bubbles Between Layers
Add a few small clear circles inside selected cloudy sections, keeping them irregular in size and placement. Surround each bubble with a faint pale outline so it appears enclosed beneath the polish.
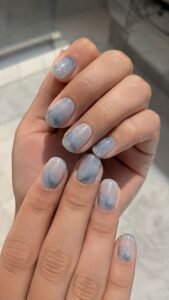
Avoid scattering them evenly across every nail. One cluster on an accent finger and two isolated bubbles elsewhere will create a more believable frozen depth.
Insert a Dark Sediment Line
Place one thin charcoal, olive, or brown line between two pale layers, allowing it to break in several places. The darker mark can represent dust or mineral material captured within the sample.
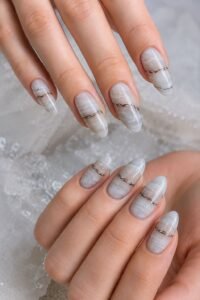
Shift its height from nail to nail while keeping the color consistent. A glossy finish will make the line look suspended beneath ice instead of painted directly on the surface.
Choose the Polish Design That Changes With Every Look
The strongest nail polish designs combine a clear visual rule with enough variation to keep every finger interesting. Guilloché lines add refined movement, while airport taxiways create graphic direction. Wind tunnel streamlines bring fluid precision, overlapping diagrams introduce transparent color logic, and screen printing effects celebrate controlled imperfection. Ice core layers complete the collection with cool depth and delicate trapped detail.
Choose one concept that suits your nail length and preferred maintenance level, then simplify it through fewer colors or selected accent nails when needed. Related inspiration for nail colors, nail shapes, nail tips, extensions, stickers, manicure care, and outfit styling can help you build a complete beauty look around the finished polish design.