
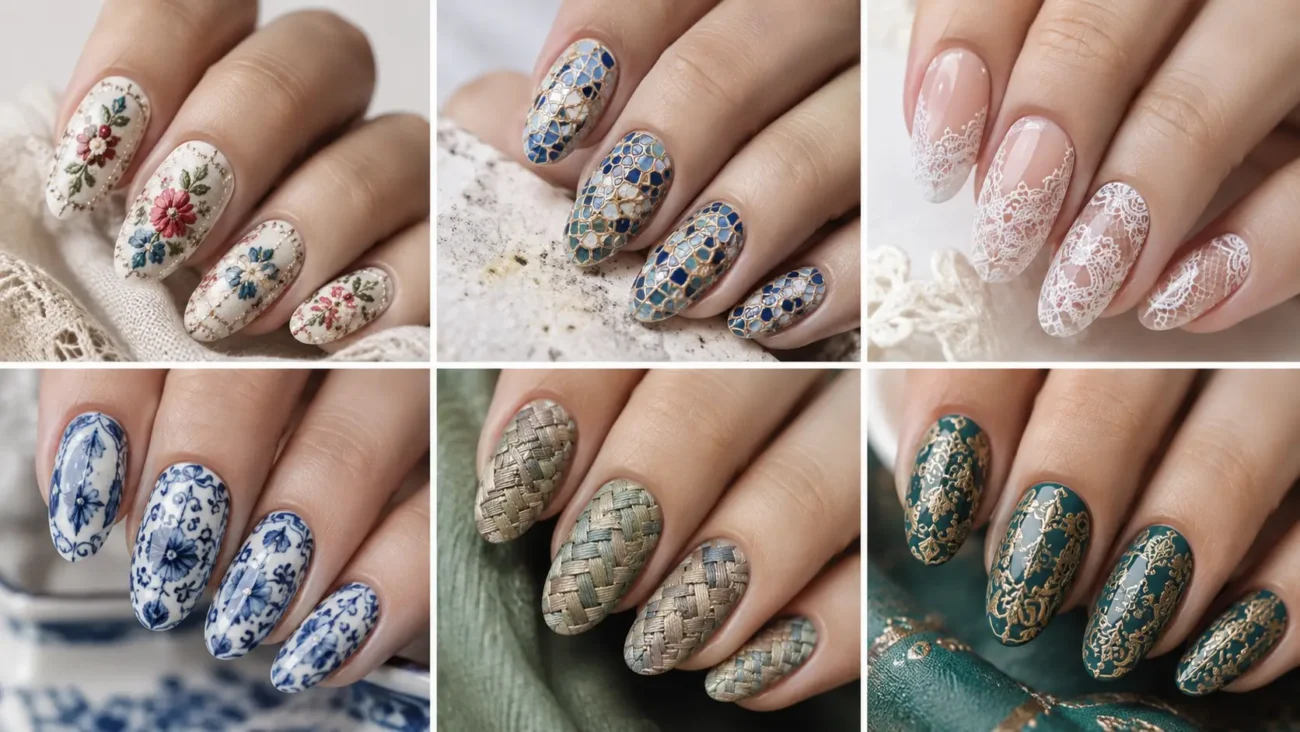
Regular nail polish designs can look detailed and expressive without gel, extensions, charms, or a curing lamp. The key is choosing artwork that benefits from natural brush marks, translucent layers, and slight variations between fingers. Thin coats also make it easier to build color while keeping the surface smooth.
The six ideas below explore fresco fragments, carbon paper transfers, chalkboard eraser marks, paint roller overlaps, photocopier ghosts, and pumice stone patterns. Each theme can be simplified for short rounded nails or expanded across square, oval, and almond shapes. Allow every layer to dry before adding the next detail, keep the palette controlled, and let a clear top coat bring the separate marks together.
Fresco Fragment Designs With Mineral Color
Fresco fragment designs recreate the beauty of old painted walls through faded color fields, worn edges, and small areas that appear newly uncovered. The look works naturally with regular nail polish because perfectly smooth coverage is not required.
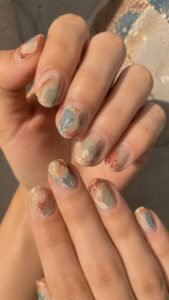
Chalky cream, mineral blue, clay red, olive, and faded apricot create a soft palette that can remain bright enough for warm weather. Leave sections of the natural base visible and vary the fragments across the hand so the manicure feels collected rather than printed.
Paint Uneven Blocks With Soft Borders
Place two or three irregular color blocks on each nail, allowing the shapes to stop before they reach every edge. Use a nearly dry brush to soften selected borders while keeping one side more defined.
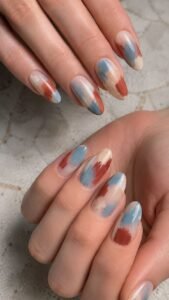
Pale blue beside clay red creates contrast, while cream between the colors prevents them from merging. Change the scale from finger to finger, but repeat the same shades so every fragment appears to come from one larger painted surface.
Add Fine Missing Plaster Areas
Use a small brush to create cream or pale beige patches inside the colored sections. Keep the patches angular in some places and softly rounded in others, as though parts of the painted layer have worn away over time.
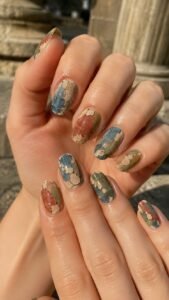
A few tiny dots near the larger gaps can extend the weathered effect. Avoid filling the whole nail with damage marks because open color makes the worn sections easier to notice.
Trace One Preserved Border Motif
Choose one accent nail and add a narrow repeating border through part of the fresco. Small arches, stepped squares, or simple leaf shapes can provide detail without forming a complete illustration.
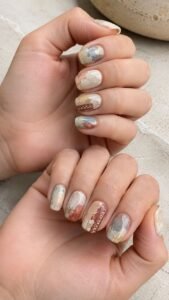
Use a deeper version of one existing color so the motif belongs to the palette. Let part of the border disappear beneath a cream patch, suggesting that only one section of the original decoration remains visible.
Carbon Paper Transfer Designs With Layered Impressions
Carbon paper transfer designs use blurred duplicates, pressure lines, and deep blue marks to create a manicure that feels graphic but not rigid. Indigo, violet, black, pale gray, and warm white work especially well, although burgundy can replace blue for a softer result.
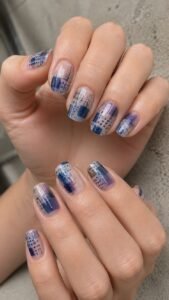
Regular polish makes the slightly imperfect transfer effect easier because a dry brush can create broken edges. Keep the background sheer or lightly tinted so each copied mark remains easy to read.
Repeat One Shape With Fading Pressure
Paint a small oval, bracket, or curved rectangle near one side of the nail, then repeat it twice with less polish on the brush. The first impression should appear darkest, while the final copy becomes broken and pale.
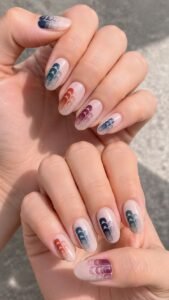
Shift the repeated shapes slightly in one direction to suggest paper moving during transfer. Use the full sequence on several nails and only one faint copy on the others for balance.
Drag a Blue Smudge Beneath the Mark
Add a narrow indigo or violet smudge below selected impressions using a nearly dry flat brush. Keep the movement short and allow the base to show through the streak.
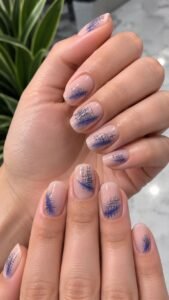
The smudge should look like pressure left behind rather than a smooth painted stripe. Change its direction across the hand while maintaining the same color and width. A glossy top coat will deepen the blue without removing its uneven character.
Frame One Copy With Registration Corners
Place four tiny corner marks around one transferred shape, leaving plenty of space between the guides and the image. Use pale gray, cream, or muted red so the frame supports the darker impression.
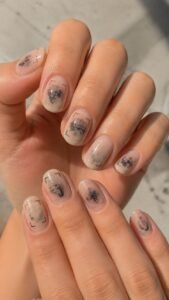
The corners do not need to connect into a full box. This incomplete registration detail gives the accent nail a precise finish while allowing the transferred center to remain slightly blurred and handmade.
Chalkboard Eraser Designs With Powdery Geometry
Chalkboard eraser designs combine dark polish, pale powder marks, and partially removed geometry. The idea suits regular nail polish because dry brushing and stippling create the softened surface without special products.
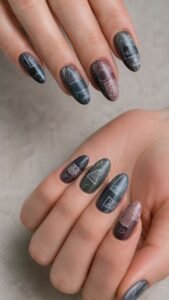
Charcoal, deep green, dusty plum, cream, pale blue, and muted pink can build a classroom inspired palette that still feels modern. Use a satin top coat when available or keep selected areas glossy to create contrast between the board and the remaining chalk.
Sweep a Broad Eraser Path
Paint the nail in charcoal or dark green, then use a lightly loaded brush to sweep a cloudy cream path across one section. Keep the center of the path clearer and leave powdery traces along both edges.
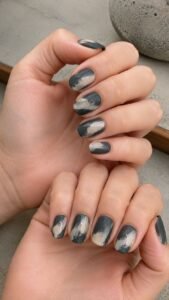
Change the angle on every finger so the marks feel like separate cleaning movements. One nail can show a nearly erased surface, while another keeps more dark color visible around the sweep.
Leave Part of a Diagram Behind
Add a simple circle, triangle, number line, or intersecting set of curves before painting the eraser path. Once the pale sweep is added, cover or soften part of the diagram so only fragments remain.
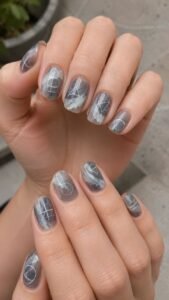
Keep the linework fine and use one chalk color throughout the hand. The unfinished shape becomes more interesting than a complete symbol and gives the manicure a quiet sense of movement and revision.
Dust the Corners With Tiny Chalk Specks
Use a small dotting tool or the tip of a fine brush to scatter pale specks near one or two corners. Concentrate the dots close to the erased path and reduce their number as they move outward.
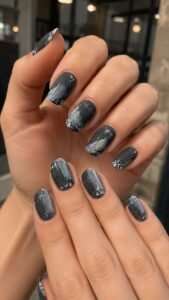
Avoid equal spacing because chalk dust should appear loose and irregular. A few muted blue or pink particles can brighten the cream marks while keeping the dark base dominant.
Paint Roller Overlap Designs With Saturated Bands
Paint roller overlap designs turn broad swaths of color, visible edge pressure, and repeated passes into a bold manicure that still works with ordinary lacquer. The concept is especially useful for anyone who enjoys bright polish but wants more depth than a solid coat.
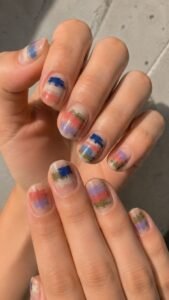
Cobalt, coral, lilac, moss, cream, and dark brown can be combined in pairs. Use a small flat brush and remove excess polish before each pass so the bands stay thin enough to dry evenly.
Roll a Wide Band Through the Center
Paint one broad vertical or diagonal band through the nail, allowing the outer edges to appear slightly lighter than the middle. A flat brush can create the effect in one controlled pass.
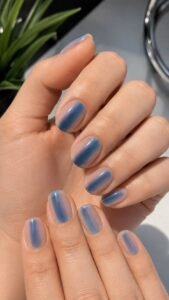
Keep part of the base visible on both sides so the band retains a clear shape. Change the direction on neighboring fingers and repeat the same main color to give the manicure an organized rhythm.
Overlap a Second Color at One End
Add another band that crosses only part of the first, creating a new shade where the colors meet. Transparent coral over lilac produces warm depth, while blue over moss creates a cooler intersection.
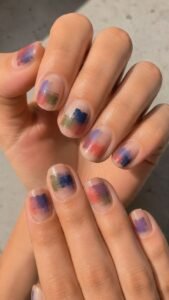
Keep the second pass shorter and narrower so the original band remains visible. Let the layers dry fully before crossing them, which helps prevent dragging and preserves the changing color at the overlap.
Show a Dry Roller Edge
Use a nearly dry brush to extend a broken trail from one end of the main band. The marks should begin close together and gradually separate into small rectangular traces.
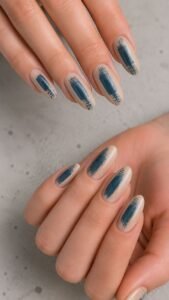
Place the dry edge near the tip on one finger and near the cuticle on another. This rough finish contrasts with the saturated center and makes the design feel painted by hand rather than applied as a perfect stripe.
Photocopier Ghost Designs With Toner Shadows
Photocopier ghost designs use pale duplicates, dark toner blocks, and interrupted scan lines to create a monochrome manicure with subtle movement. Black, graphite, cool gray, blue black, and paper white form the clearest palette, although one bright accent can appear on a single nail.
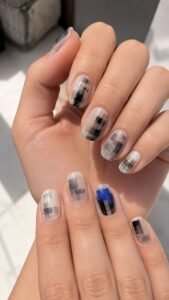
Regular polish is ideal for building the faded copies through increasingly thin layers. Short nails suit cropped images, while longer shapes provide room for several shifted impressions.
Duplicate a Silhouette With a Pale Echo
Paint one compact abstract silhouette near the center, then add a lighter copy slightly above or beside it. The second shape should match the main outline without appearing perfectly aligned.
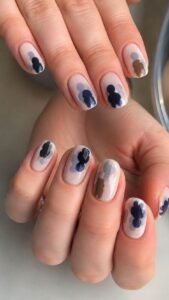
Use black with gray, navy with cloudy blue, or brown with beige. Repeat the echo direction across several nails, then reverse it on one accent finger to create a small visual interruption.
Break the Image With Scan Lines
Draw several narrow horizontal lines through part of the silhouette, leaving small gaps where the image seems to skip. Keep the lines parallel and vary their length so they do not resemble ordinary stripes.
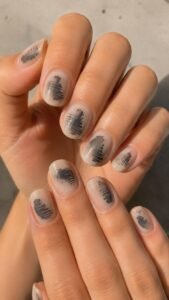
Use a pale shade over a dark shape or a deeper tone across a light background. Concentrating the lines in one section gives the design a convincing copied texture without making the nail look overly busy.
Add One Toner Heavy Corner
Deepen one corner with an irregular dark patch that fades into tiny specks. The patch can touch the side wall or free edge, making the copied image appear overprinted.
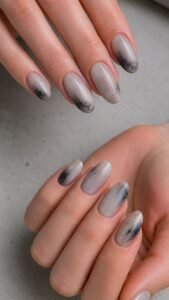
Use a sponge or nearly dry brush to keep the transition uneven. Repeat only a few dark specks on another nail so the heavy corner remains the focal point rather than becoming a full smoky manicure.
Pumice Stone Designs With Porous Color
Pumice stone designs use airy pores, faded mineral shades, and uneven density to create a light textured appearance while remaining completely flat. Gray, sand, pale coral, dusty lavender, and mineral green make the pattern wearable with many outfits.
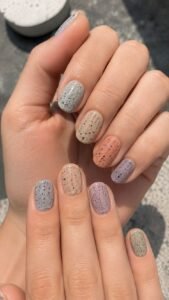
The design looks especially effective on short rounded and squoval nails because the scattered openings soften the compact shape. Apply thin polish and use small tools so the surface dries smoothly beneath the final top coat.
Sponge a Cloudy Mineral Base
Apply a pale base, then tap a second related color over selected areas with a small piece of sponge. Keep the center more opaque and allow the edges to break into scattered marks.
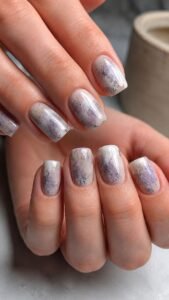
Sand over cream feels natural, while lavender over cool gray creates a more expressive version. Each nail can carry a different cloud shape as long as the same two or three colors continue across the set.
Open Irregular Pores Through the Color
Use a fine brush to place small circles and uneven gaps inside the cloudy sections. Some pores can remain clear, while others can be filled with a lighter shade than the base.
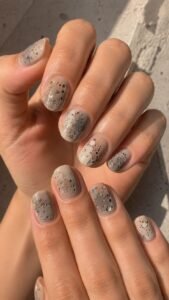
Change their size and avoid arranging them in rows. Cluster several openings near one side and leave the opposite area calmer. This changing density creates the porous effect without needing raised gel or decorative particles.
Deepen One Volcanic Pocket
Choose one accent nail and add a darker mineral pocket surrounded by smaller pale pores. Charcoal within sand, plum within lavender, or deep green within gray can give the pattern a stronger center.
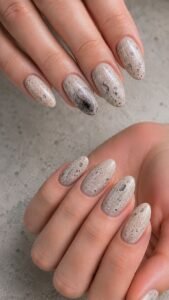
Blend the outer edge with tiny broken dots rather than a smooth gradient. Repeat only one dark pore on nearby nails to distribute the accent color without losing the airy overall appearance.
Let Regular Polish Make the Design Feel More Personal
The best regular nail polish designs celebrate the qualities of lacquer instead of trying to imitate thick gel art. Fresco fragments use imperfect color beautifully, while carbon paper transfers turn fading impressions into graphic detail.
Chalkboard marks bring powdery geometry, paint roller bands create saturated overlap, and photocopier ghosts introduce shifted shadows. Pumice stone patterns finish the collection with airy mineral texture that remains smooth and practical.
Choose the idea that matches your available colors and preferred nail length, then simplify it with fewer accent fingers when you want an easier manicure. Related inspiration for nail polish colors, short nail ideas, nail shapes, nail tips, stickers, manicure care, and outfit styling can help you plan a complete look around the finished design.