
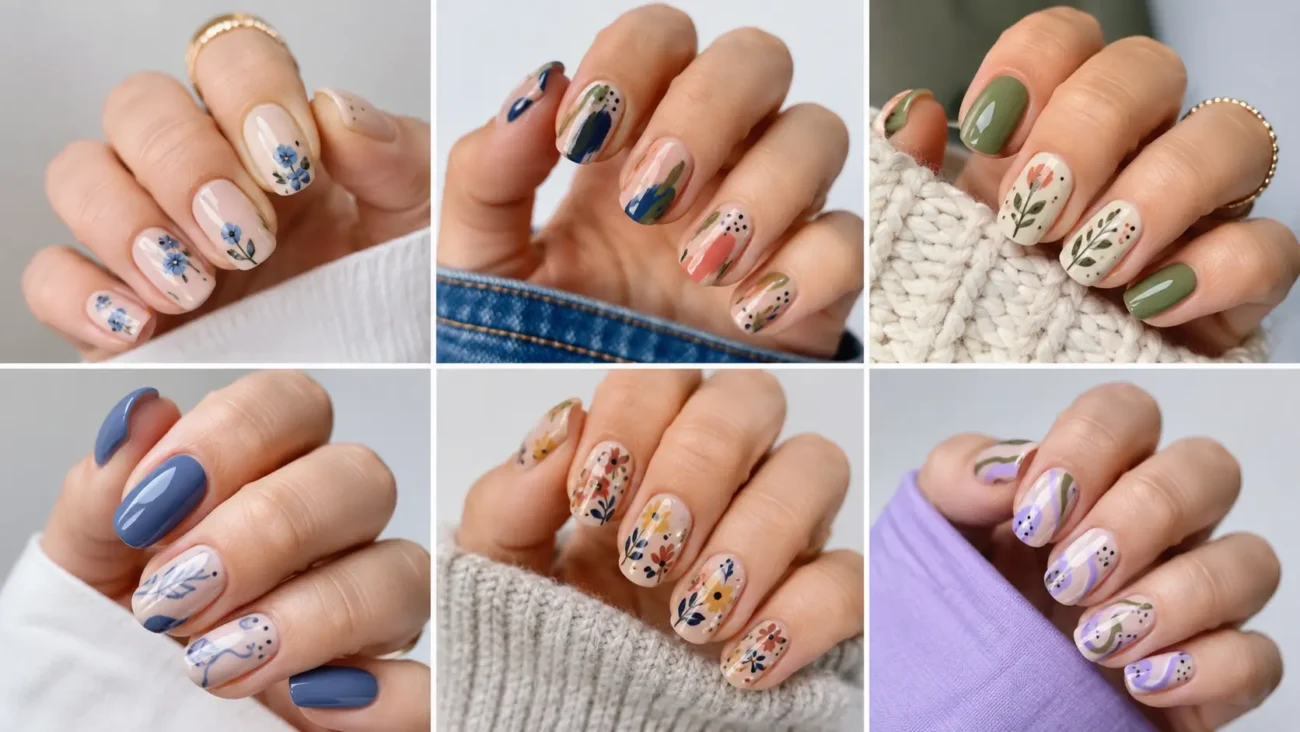
Nail styles feel especially original when the manicure borrows from decorative craft rather than repeating familiar flowers, tips, or chrome effects. Fine inlay, deep lacquer, engraved metal, and painted shadow can all be translated into wearable details for short or long nails. The strongest version keeps one material story across both hands while changing the placement on every finger.
Sheer bases, controlled texture, saturated color, and selective shine make the designs feel current without hiding the natural shape. The six styles below explore Pietra Dura, Pique inlay, Maki E lacquer, Mokume Gane metal grain, Niello engraving, and Grisaille painting.
Pietra Dura Nails With Flat Gemstone Inlay
Pietra Dura style uses precisely fitted stone shapes to create pictures and patterns without visible brushwork. On nails, the effect comes from flat jewel colors arranged inside a dark polished base.
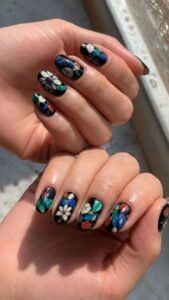
Black, malachite green, lapis blue, coral red, and creamy shell tones make the inlaid pieces appear rich while keeping the surface smooth.
Fit Curved Stone Shapes Together
Paint several rounded fragments that meet closely without overlapping. Give every piece a different contour, then repeat two colors across neighboring nails so the set remains connected.
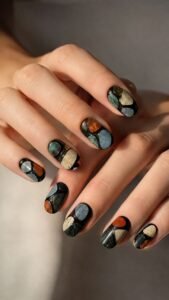
A black or deep brown base creates the strongest contrast. Leave a slim dark channel around each shape to make the sections appear individually cut and carefully fitted.
Build One Botanical Fragment
Create only part of a leaf, berry stem, or petal cluster instead of filling the entire nail with a complete picture. Crop the motif at one side and continue a smaller fragment on the next finger.
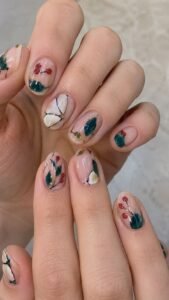
Using opaque color and clean edges gives the artwork the solid appearance of polished stone rather than soft painted florals.
Add Hairline Brass Dividers
Place a few extremely fine warm gold lines between selected pieces, keeping most joins dark and simple. The metallic detail should guide the eye through the inlay instead of outlining every shape.
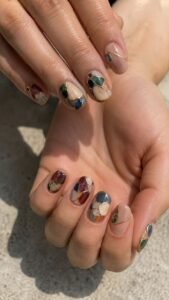
Repeat one small brass curve on a plain accent nail, then finish the full manicure with clear gloss to suggest a polished tabletop surface.
Pique Inlay Nails With Tiny Precious Marks
Pique inlay style places delicate metal or pale material into a dark base, creating patterns from dots, stars, and narrow lines. The manicure version feels detailed without requiring large illustrations.
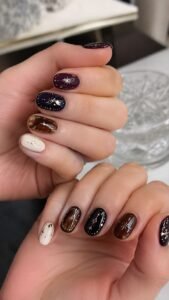
Espresso, black plum, tortoise brown, ivory, silver, and muted gold create a refined palette that works beautifully on short rounded or medium oval nails.
Scatter Pin Dots in Graduated Spacing
Begin with several closely placed dots near one corner, then increase the space between them as the pattern travels across the nail. Use ivory, silver, or pale gold over a deep glossy base. Keep every dot small and flat.
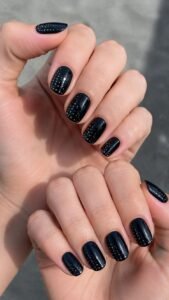
Changing the direction of the fade on each finger gives the manicure movement while preserving one repeated visual rule.
Form a Crescent From Inlaid Marks
Arrange tiny dots and short lines into a narrow crescent that follows one side of the nail. Allow the marks near the center to appear larger, then reduce their scale toward both ends.
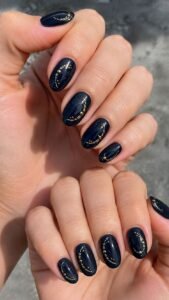
Use the complete crescent on two fingers and place only a short fragment elsewhere. This creates a collected appearance without copying the same motif ten times.
Contrast Matte Ground With Polished Inlay
Finish the dark base with a soft matte surface, then add clear gloss only over the pale inlaid details. The changing reflection makes the tiny marks more visible without additional color.
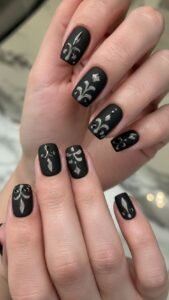
Keep the shapes level beneath a protective top layer and use the finish contrast sparingly so the pattern remains elegant rather than overly textured.
Maki E Lacquer Nails With Floating Gold Detail
Maki E style builds decoration over deep lacquer using fine metallic powder and delicate painted imagery. On nails, it creates a dark reflective surface with details that seem to float at different depths.
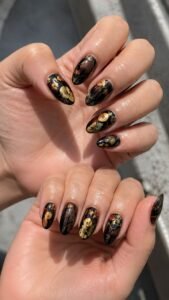
Black, oxblood, pine green, midnight blue, and warm gold work especially well, although silver can create a cooler interpretation.
Dust Gold Across One Moving Path
Apply a narrow trail of fine gold particles that begins densely on one nail and becomes lighter across the next fingers. Keep the edges irregular so the powder appears gently scattered rather than painted as a stripe.
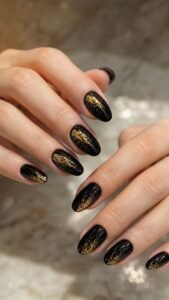
A small amount of the dark base should remain visible between particles, allowing the lacquer depth to show through.
Float One Small Motif Above the Lacquer
Paint a tiny fan, seed pod, folded leaf, or abstract cloud in muted gold or warm cream. Place the motif away from the center and surround it with open glossy color. Change the object across the hand while repeating the same scale and line weight.
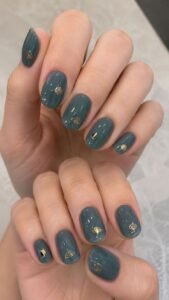
This approach creates variety without turning the manicure into a crowded illustrated set.
Bury Selected Details Under Clear Layers
Seal one metallic trail beneath a thin clear layer, then add a sharper detail over the surface. The difference in clarity makes some marks appear deeper inside the lacquer.
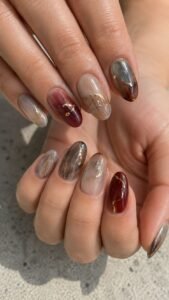
Use this layered effect on one or two accent nails and keep nearby fingers simpler. Smooth finishing is essential because the style depends on deep reflection rather than raised decoration.
Mokume Gane Nails With Flowing Metal Grain
Mokume Gane style combines layers of differently colored metal into flowing grain that can resemble wood, water, or folded fabric. A nail interpretation uses thin bands of copper, silver, charcoal, bronze, and rose gold.
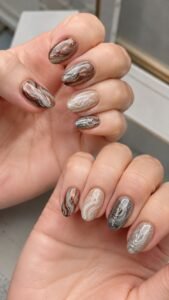
The pattern feels dramatic on almond shapes but can be cropped into compact waves for short square or rounded nails.
Pull Narrow Bands Into Soft Grain
Paint several close lines in related metallic shades, then guide them into long bends that travel in one direction. Keep each curve smooth and avoid forming perfect swirls.
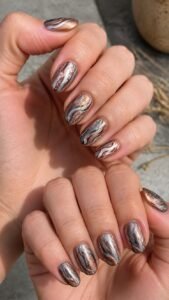
Dark lines between the metals add depth and help the grain remain visible. Change the bend slightly on every finger while maintaining the same overall flow.
Cut One Oval Through the Layers
Create a small oval area where the bands curve around a darker center, suggesting that the layered metal has been sliced to reveal its structure. Place the oval near the side or tip rather than directly in the middle.
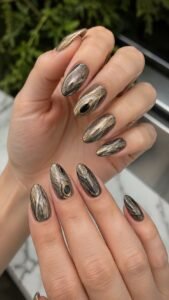
Repeat only part of the curved grain on other nails so the complete cut section remains a focal detail.
Mix Brushed and Polished Sections
Use a satin finish over most of the metal grain, then apply gloss to one narrow band or oval section. The polished area will catch light while the surrounding pattern remains softly brushed. Keep the texture visual and completely smooth.
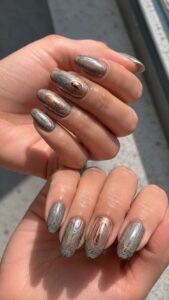
This controlled contrast gives the metal style dimension without relying on gems or bulky sculpting.
Niello Nails With Blackened Silver Engraving
Niello style combines bright metal with dark material pressed into engraved lines, producing crisp ornamental contrast. For nails, silver, pewter, black, deep green, and smoky violet create a cool structured palette.
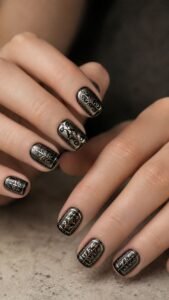
The design suits short square nails because small engraved fragments remain clear, while longer shapes allow borders and central panels to develop.
Draw a Blackened Engraved Vine
Paint a slim silver panel, then add a dark curling line with small leaves or hooked branches. Keep the motif narrow and allow sections to disappear beyond the edge. The black line should remain sharper than the surrounding metal.
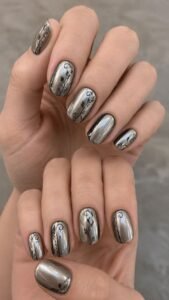
Use complete engraving on two accents and isolated vine fragments on the remaining nails.
Create a Dark Recessed Border
Add a thin black channel just inside a silver or pewter edge, leaving a narrow metallic rim visible outside it. Break the border at one or two points so the design feels handmade rather than mechanically perfect.
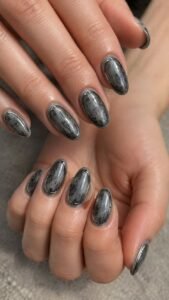
Rounded corners will follow the nail shape naturally and prevent the frame from resembling a standard outline manicure.
Polish One Raised Looking Crest
Place a small silver crest, shield, or abstract medallion inside a dark engraved field, using light and shadow to make it appear slightly higher. Keep the surface flat beneath top coat.
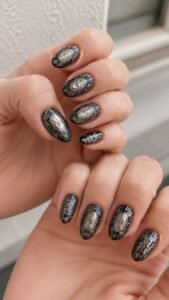
A brighter highlight along one side and a charcoal shadow on the other can create the illusion of relief without adding physical bulk.
Grisaille Nails With Painted Light and Shadow
Grisaille style uses shades of gray, cream, and black to create the illusion of sculpture through painting alone. It offers an artistic nail style without bright color or literal portraits.
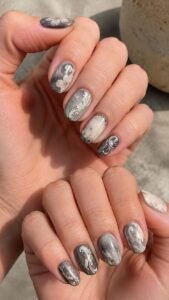
Soft stone, smoke, charcoal, and parchment work together on oval, almond, or short natural nails, while one muted accent color can warm the set.
Paint Folded Drapery in Monochrome
Use curved gray bands with pale highlights and deeper shadow lines to suggest folded fabric. Crop the folds so they enter from one edge and disappear before reaching the opposite side.
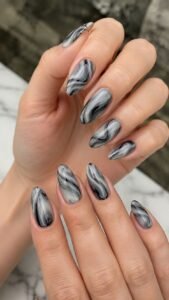
Keep the background simple and vary the direction across the hand. Fine transitions make the design look sculpted even though the surface remains completely smooth.
Carve a Pale Shape From Darkness
Begin with a smoky base and paint one cream form that emerges gradually through layered gray edges. Choose an abstract shell, ribbon loop, or rounded architectural fragment rather than a face.
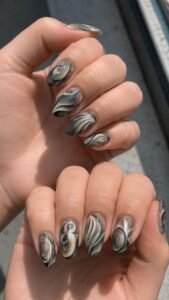
Keep the brightest highlight small and place it consistently on the same side across both hands so the imagined lighting remains believable.
Add One Muted Color Glaze
Brush a thin transparent wash of dusty rose, sage, or faded blue over a selected section of the grayscale painting. The underlying shadows should remain visible through the color.
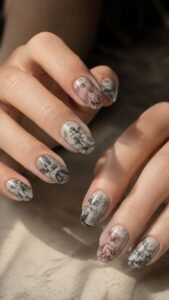
Use the glaze on only a few nails and repeat its shade as a tiny mark elsewhere. This restrained color gives the historic style a fresher, more personal finish.
Choose a Nail Style That Feels Collected Rather Than Copied
The most memorable nail styles use one clear craft language and translate it through proportion, finish, and color. Pietra Dura brings fitted gemstone shapes, while Pique inlay creates detail from tiny precious marks. Maki E adds floating metallic depth, Mokume Gane introduces flowing metal grain, and Niello delivers dark engraved contrast. Grisaille completes the collection with painted sculpture created entirely through light and shadow.
Choose the style that suits your nail length and daily routine, then simplify it through fewer accent nails or a quieter palette when needed. Related inspiration for nail colors, nail shapes, nail art, nail tips, extensions, stickers, manicure care, and outfit styling can help you build a complete look around the final design.