
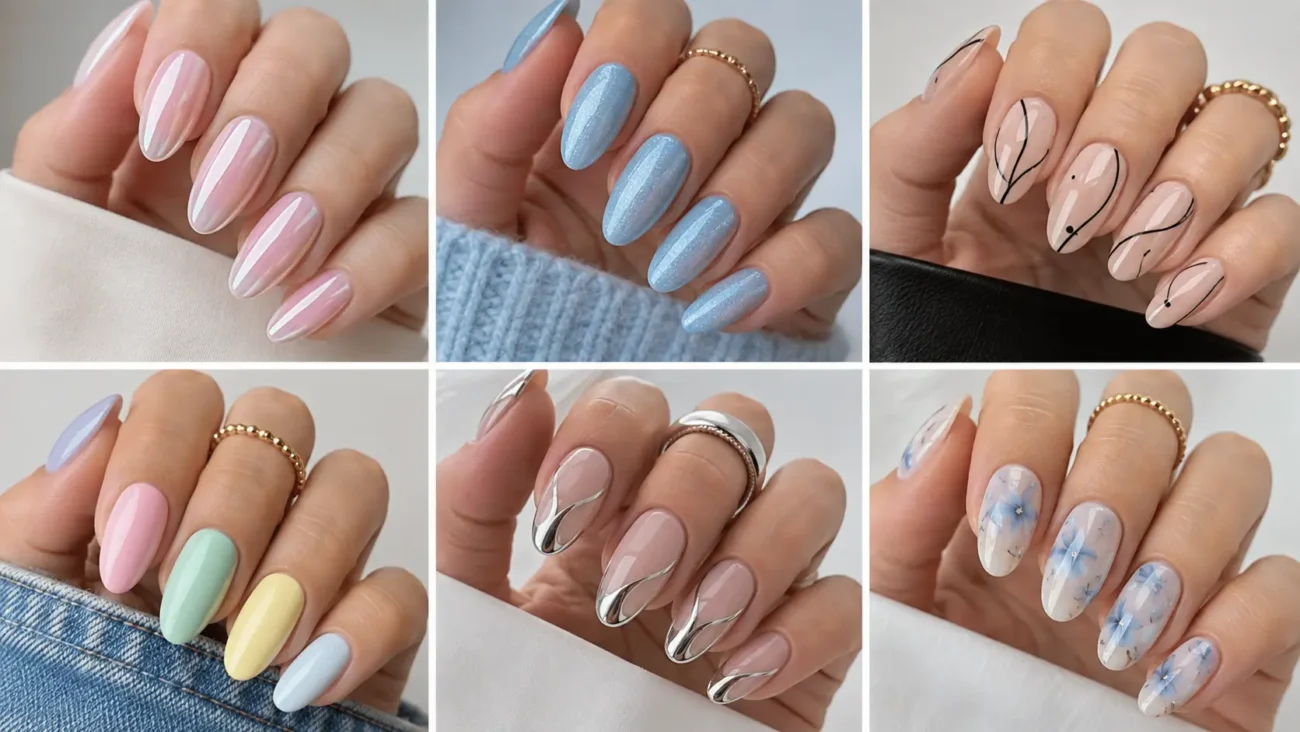
A memorable manicure begins with one clear visual idea rather than unrelated details. This nails inspo 2026 guide explores six themes that have not appeared in the earlier articles. Fingerprint contours bring line movement, broadcast test cards introduce saturated color, Braille panels create texture, pigment chips build earthy depth, acoustic tiles add structure, and microscope cells offer organic shapes.
Each theme includes three variations for short square, squoval, oval, almond, coffin, or ballerina nails. Keep the palette focused and leave enough quiet space for a polished finish.
Fingerprint Contour Nails With Personal Line Movement
Fingerprint contour nails use curved ridges, broken loops, and cropped whorls to create an intimate graphic manicure. Espresso, cream, clay, cobalt, and soft pink keep the lines visible without making the pattern harsh.
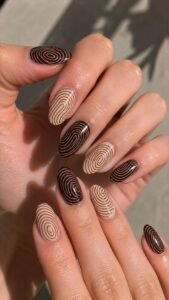
Short nails can carry one enlarged loop, while longer shapes can support a stretched whorl. Slightly uneven ridges make the artwork feel natural rather than mechanically printed.
Offset an Espresso Whorl Over Cream
Apply a warm cream base and draw one broad espresso whorl slightly away from the center. Build the shape from six curved lines that tighten as they move inward, but leave one side incomplete.
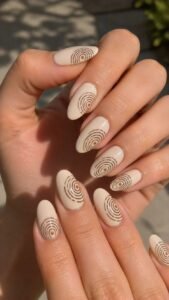
Add a clay point inside the smallest loop. The open edge prevents the pattern from looking like a target and gives the nail a quieter, more artistic finish.
Break a Cobalt Loop With Soft Pink
Paint the nail in muted soft pink and create one cobalt loop beginning near the cuticle. Interrupt the line twice with small areas of untouched pink, then continue it toward the outer side.
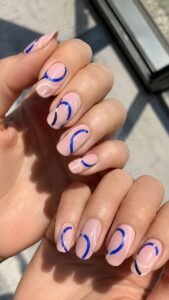
Add one cream ridge beside the longest section. The broken construction introduces movement while keeping the color combination bright enough for a fresh manicure.
Crop Ridge Lines Across the Flat Tip
Use a clay base and arrange four cream fingerprint ridges across the tip. Curve each line differently and let two disappear beyond the sidewalls. Add one narrow espresso line beneath the group for definition.
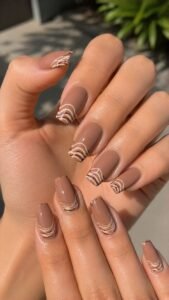
The cropped placement suits square, coffin, and ballerina shapes because it highlights the tip without becoming a familiar border design.
Broadcast Test Card Nails With Saturated Color Balance
Broadcast test card nails transform technical screen graphics into bold, polished art. Cobalt, tomato red, butter yellow, forest green, violet, charcoal, and cream can work together when every block has a defined place.
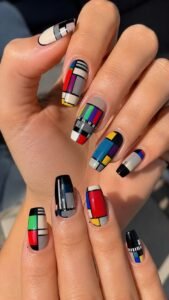
Square and coffin nails support structured panels, while rounded shapes soften the corners. Use one complete card as the focal point, then repeat only selected bars or calibration marks elsewhere.
Stack Color Bars Through the Center
Paint the nail charcoal and place four broad bars through the middle using cobalt, tomato red, butter yellow, and forest green. Change their widths and keep a cream gap between the second and third bar.
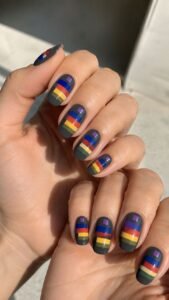
Add one violet square near the cuticle. The uneven arrangement feels more editorial than a standard rainbow and leaves the dark base visible around every edge.
Center a Calibration Circle on Violet
Use a violet foundation and paint one large cream circle slightly below the center. Divide the circle into three sections with charcoal lines, then fill one wedge with tomato red and another with cobalt.
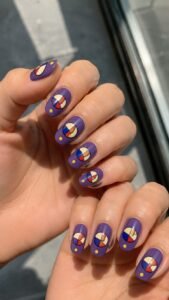
Leave the final section cream. A small butter yellow point near the outer edge adds contrast without turning the motif into a clock face.
Create a Signal Break at the Side
Apply forest green polish and build one cream panel entering from the outer side. Interrupt it with two charcoal blocks and one narrow cobalt section, leaving small green gaps between them.
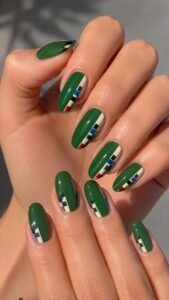
Add a tomato red marker close to the tip. The broken panel suggests a shifting screen signal while preserving enough solid green to keep the manicure wearable.
Braille Panel Nails With Tactile Dot Rhythm
Braille panel nails use low raised dots arranged in compact groups over clean color fields. The pattern should remain abstract and must not form readable words.
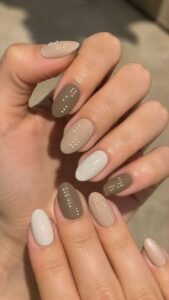
Matte bases make smooth dots more noticeable, while glossy companion nails keep the set balanced. Short nails suit one compact group, while longer shapes can hold two separated panels with open space between them.
Press Ivory Dots Into Ink Blue
Cover the nail in matte ink blue and place six low ivory dots in two uneven columns near the lower half. Shift the final dot slightly outward so the group does not resemble a strict grid.
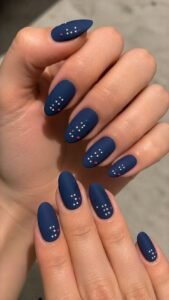
Add one tiny raspberry dot near the side. Keeping the tip plain lets the tactile panel stand out without covering the complete surface.
Float Sage Dots Over Warm Beige
Paint the nail warm beige and arrange five sage dots along a loose diagonal path. Make the center dot larger and the outer dots smaller, creating a gentle change in scale.
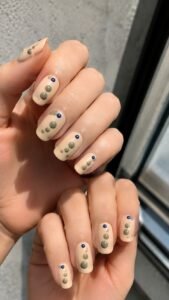
Add one ink blue point near the cuticle to anchor the arrangement. The open background gives the raised texture a light and modern appearance.
Divide Two Raspberry Dot Panels
Use an ivory base and create two small raspberry dot groups, one near the cuticle and one close to the opposite tip. Separate them with a wide untouched center. Add a thin sage block beside the upper panel without connecting it to the dots.
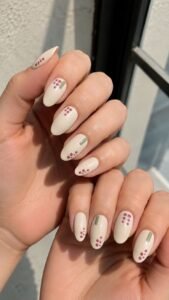
This split layout suits almond and oval nails because it follows their natural length without ordinary vertical lines.
Pigment Chip Nails With Earthy Layered Color
Pigment chip nails use crisp fragments, broken color edges, and stacked earthy shades. Terracotta, ochre, chalk white, olive, aubergine, and slate create depth while coordinating easily with neutral outfits.
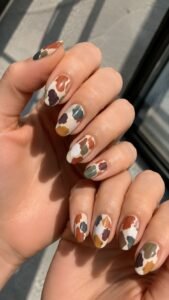
Every nail can show a different fragment size, but one repeated shade should connect the set. Flat color keeps the design smooth while layered placement provides the visual interest.
Overlap Terracotta and Ochre Fragments
Apply a chalk white base and place one terracotta fragment near the center with an uneven five sided outline. Add a smaller ochre piece partly over one corner, then place a narrow slate shadow beneath the overlap.
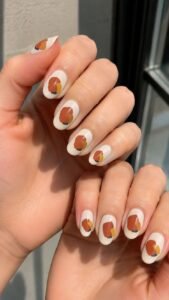
Keep the cuticle and tip mostly white. The isolated fragments feel collected and intentional rather than scattered like confetti.
Split Olive With an Aubergine Edge
Paint the nail warm beige and create one broad olive chip entering from the side. Add an aubergine layer beneath it, allowing only a narrow uneven edge to remain visible.
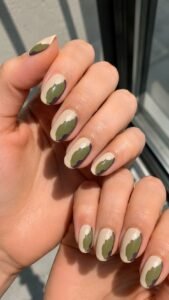
Place one chalk mark near the upper corner. The strong dark border gives the muted green more definition while preserving a clean neutral frame.
Stack Slate Chips Near the Cuticle
Use a soft terracotta base and arrange three slate fragments near the cuticle, changing their size and angle. Separate them with thin areas of visible terracotta, then add one small ochre piece above the group.
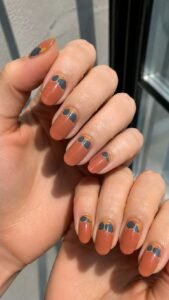
Keeping the artwork low on the nail leaves the tip open and makes shorter shapes appear longer.
Acoustic Tile Nails With Sculpted Soundproof Geometry
Acoustic tile nails use shallow wedges, grooved blocks, and offset panels to create controlled sculptural depth. Charcoal, dusty coral, pale gray, moss, and cream give the technical theme a softer fashion quality.
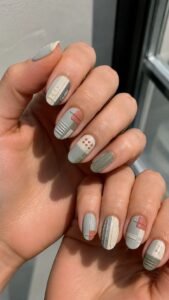
Keep every raised form low and smooth. One detailed accent can establish the idea, while nearby nails repeat only a groove, corner, or small tile.
Raise Three Charcoal Wedges Over Coral
Paint the nail dusty coral and build three low charcoal wedges through the center. Angle each one differently and leave narrow coral spaces between them.
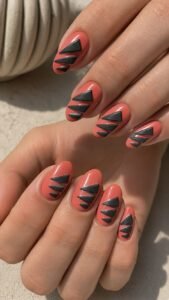
Add a pale gray highlight along the upper edge of the tallest wedge. The sculpted changes in height catch the light without requiring metallic finishes, stones, or glossy droplets.
Carve Parallel Channels Into Moss
Apply a matte moss base and create four shallow channels travelling diagonally across the upper half. Keep their lengths different and stop them before both sidewalls.
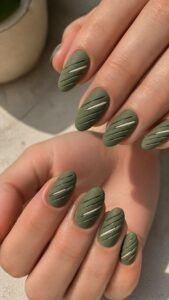
Fill one channel with cream and leave the others moss. The recessed pattern creates depth while the limited contrast keeps the manicure calm and easy to style.
Offset Cream Tiles Across Pale Gray
Use pale gray polish and place three low cream rectangles near one outer side. Shift every tile slightly upward and rotate the middle piece by a small amount. Add one dusty coral corner beneath the lowest tile.
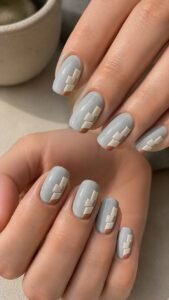
The uneven stack resembles a modular acoustic wall and gives short square nails a strong architectural feature.
Microscope Cell Nails With Abstract Organic Shapes
Microscope cell nails use membranes, clustered forms, and dividing shapes to create an organic manicure without flowers, fruit, or animal print. Cream, coral, teal, plum, and chartreuse keep every cell clear.
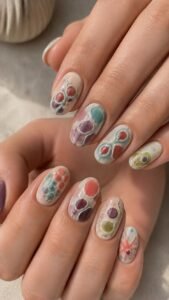
Rounded and oval nails complement the soft outlines, while square shapes create contrast. Simplified forms and open background areas make the set feel artistic rather than scientific.
Cluster Coral Cells Over Teal
Paint the nail deep teal and place four coral cells in a loose cluster near one side. Give each cell a different rounded outline and add a small cream center to only two of them. Leave narrow teal spaces between the forms.
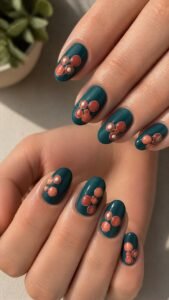
The uneven grouping creates natural movement while preventing the design from looking like ordinary polka dots.
Divide One Plum Cell Across Cream
Use a cream base and paint one large plum cell through the center. Split it with a curved teal line and place a chartreuse oval inside the smaller section. Add a soft coral shadow along one outer edge.
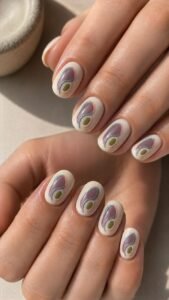
The internal division makes the single form detailed enough to stand alone on short nails without additional decoration.
Stretch a Chartreuse Membrane Along the Tip
Apply muted coral polish and create one chartreuse membrane across the tip with a gently uneven lower edge. Add three plum openings inside it, changing their width and position.
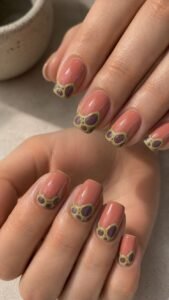
Keep a narrow coral border above the flat tip so the shape remains framed. This cropped viewpoint makes the organic form feel larger and highlights structured nail shapes.
Make the Next Manicure Recognizably Your Own
Fresh nail inspiration works best when a design can change without losing its identity. Fingerprint contours offer personal line work, while broadcast test cards bring controlled color. Braille panels add tactile detail, pigment chips create earthy contrast, acoustic tiles introduce sculpted geometry, and microscope cells provide organic movement. Select the theme that suits your nail length and routine, then change the supporting shades rather than replacing the complete concept. You can also explore related articles about short nails, acrylic shapes, manicure colors, nail care, outfits, jewelry, hand care, salon ideas, and seasonal beauty.