
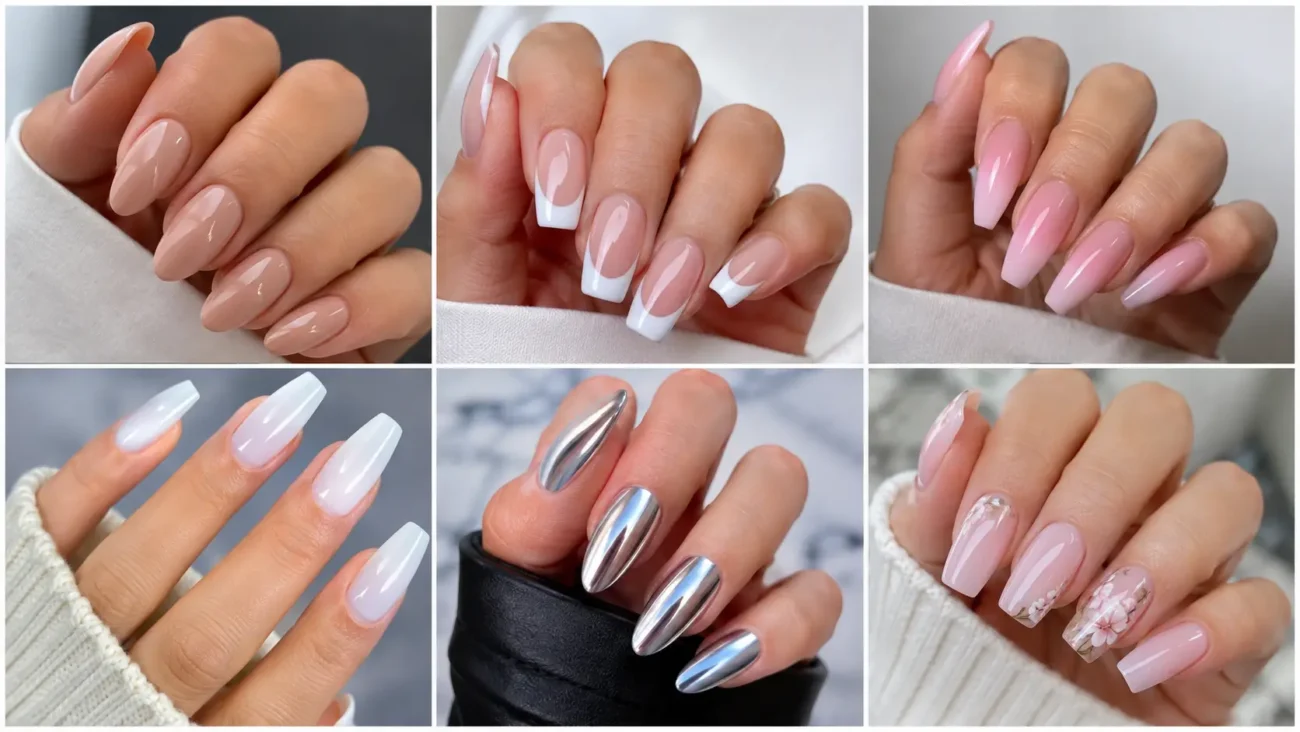
Acrylic nails provide enough structure for carved surfaces, embedded details, and dimensional accents that simple polish cannot easily support. The strongest nails acrylic ideas use that strength with control, allowing one concept to move across the hands without repeating the same picture.
The six themes below explore balloon sculpture, fossil relief, painted book edges, neon tubing, perfume atomizers, and sundial shadows. Each can be adapted for square, squoval, almond, coffin, or stiletto shapes while keeping its main visual story clear.
Balloon Sculpture Acrylic Nails With Inflated Curved Forms
Balloon sculpture nails use rounded acrylic lines and smooth loops to create forms that appear softly inflated. The details should remain low enough for comfortable wear while showing a noticeable curved profile.
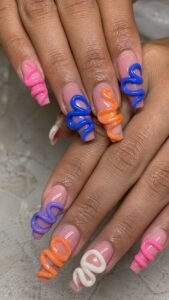
Candy pink, cobalt, tangerine, violet, and creamy white feel playful, while black or burgundy creates a dramatic finish. Long coffin and almond shapes provide room for connected loops, although one compact curve can suit short squoval nails.
Twist One Raised Tube Into a Loose Loop
Build a slim acrylic tube that begins near one side of the cuticle, curves through the center, and finishes in an open loop near the tip. Keep the thickness even so it looks inflated instead of painted.
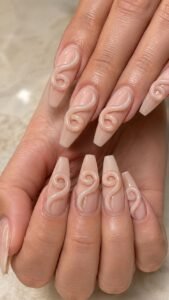
Add a darker shadow beneath one overlapping section, then leave the remaining surface quiet so the raised form receives full attention.
Shape Two Capsules Into a Soft Link
Place two rounded capsule forms beside each other and let their inner edges meet near the middle. Choose related colors such as raspberry and coral or cobalt and violet so both sections remain visible.
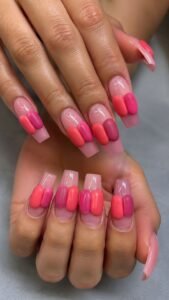
The connection should look flexible rather than rigid. A glossy base with satin capsules creates contrast without adding charms or extra artwork.
Finish the Tip With a Knotted Coil
Create a compact coil near the tip by wrapping one raised line around itself twice, then extending a short tail toward the side. The shape can suggest a tied balloon without becoming a literal animal.
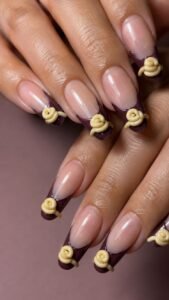
Use creamy yellow over deep plum or pale blue over warm brown, keeping the cuticle area open for balance.
Fossil Relief Acrylic Nails With Pressed Ancient Detail
Fossil relief nails use matte stone shades and shallow impressions to create the feeling of preserved objects inside a mineral surface. Carved depth replaces detailed painting, making acrylic ideal for the effect. Limestone, sandstone, charcoal, rust, and dusty green suit square, oval, or tapered coffin shapes.
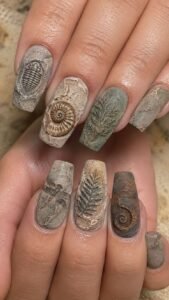
Each imprint needs softened edges and visible space around it so the design looks discovered rather than arranged as a repeated pattern.
Press an Ammonite Spiral Into Limestone
Cover the nail in warm limestone beige, then carve one broad spiral that tightens toward the center. Add shallow rib marks across the outer curve and place a deeper beige inside selected grooves.
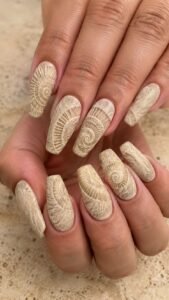
Let part of the spiral disappear beyond one side so it feels like a fragment uncovered from a larger stone surface.
Arrange Segmented Armor Across Charcoal
Use a muted charcoal base and build a low oval form through the center. Divide it into overlapping sections with narrow recessed lines, creating preserved armor plates. Add a soft gray highlight along one edge instead of outlining everything.
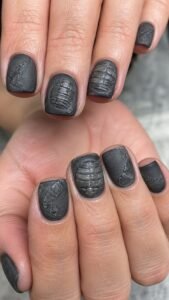
The compact structure works especially well on short square acrylics.
Reveal a Rust Colored Bone Fragment
Apply a dusty clay base and shape one slender rust fragment diagonally across the nail. Add two shallow joints and a pale sand shadow beneath one side so it appears embedded.
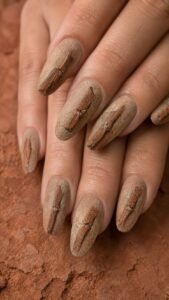
Avoid a complete skeleton or recognizable animal. The partial form keeps the idea sophisticated while supporting an earthy matte palette.
Painted Book Edge Acrylic Nails With Hidden Image Illusions
Painted book edge nails take inspiration from miniature illustrations revealed along the outer edges of closed pages. Narrow color bands and compressed scenery replace book covers or readable words.
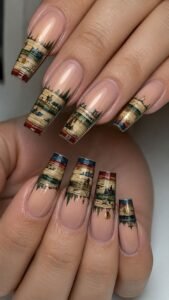
Acrylic length gives the image room to stretch across coffin or square shapes. Forest green, parchment, brick red, ink blue, and muted gold create a collected palette, while flat layered details keep the manicure smooth and polished.
Paint a Compressed Forest Along the Sidewall
Use a parchment base and place a narrow forest scene along one sidewall, beginning with deep green at the lower edge and lighter olive above it. Add three slim trunks without complete branches.
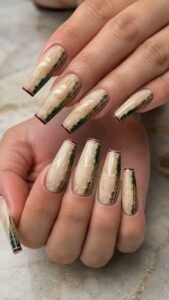
A brick red line near the tip can suggest a bound edge while the compressed placement keeps the scene subtle.
Hide a Tiny Doorway Inside Page Bands
Paint narrow cream and beige bands across the nail, varying their widths slightly. Insert one small dark blue doorway between two bands near the side, then add a muted gold point for the handle.
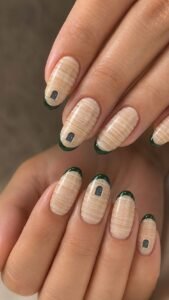
The detail should appear only at close range. A deep green tip gives the page arrangement a finished border.
Stretch a Sunset Across the Fore Edge
Create dusty peach, mauve, and ink blue bands travelling across the nail. Blend only where the colors meet so the layers still resemble page edges. Add one black ridge near the lower third and a pale cream circle partly behind it.
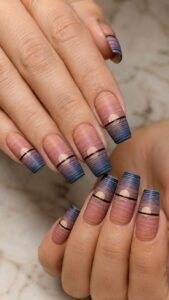
The result should feel like a hidden scene rather than a full landscape painting.
Neon Tube Acrylic Nails With Raised Electric Paths
Neon tube nails use smooth raised channels and concentrated color to imitate bent illuminated tubing. Each path should have a rounded acrylic profile and a soft darker border beneath it.
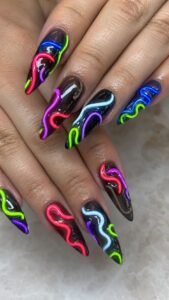
Acid green, hot coral, ultraviolet, electric blue, and bright white stand out against smoke gray, deep brown, or black. Long almond and stiletto shapes support extended paths, while one cropped curve can energize shorter nails.
Bend an Electric Blue Tube Into a Corner
Place one raised blue line near the cuticle, guide it upward, then turn it toward the outer side. Round the corner so the tube looks physically bent instead of drawn as a flat angle.
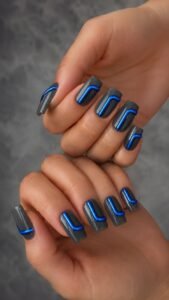
Add a narrow navy shadow beneath the lower edge and leave the smoky gray background mostly open.
Cross Coral and Violet Without Touching
Build one coral tube diagonally across the nail, then add a violet path moving in the opposite direction. Raise the second line slightly higher at the crossing so the colors stay separate.
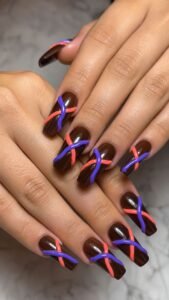
Crop both ends at the nail edges. A deep chocolate base makes the bright tubing feel richer than a standard black background.
Frame an Open Center With Acid Green
Create a loose acid green outline around the outer half of the nail while leaving the center open. Widen the path near the tip and narrow it toward the cuticle for an irregular rhythm.
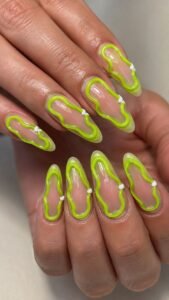
Add one bright white connector near the side as though two tube sections meet, creating dimension without a central image.
Perfume Atomizer Acrylic Nails With Polished Vanity Detail
Perfume atomizer nails translate faceted stoppers, squeeze bulbs, narrow tubes, and drifting mist into elegant acrylic details. Blush, blackcurrant, pale amber, ivory, and brushed silver create a dressed up finish without gems or pearl clusters.
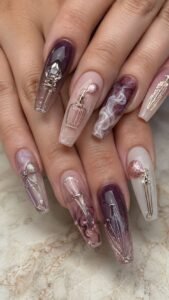
Almond and coffin nails provide room for vertical components, while a cropped stopper can suit shorter shapes. Every object should remain simplified so the set suggests fragrance rather than illustrating an entire vanity scene.
Build a Faceted Stopper Near the Cuticle
Shape a low geometric stopper close to the cuticle using translucent blush or pale amber acrylic. Divide it into three broad planes with slightly different tones so it appears polished.
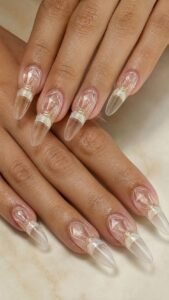
Add a narrow ivory neck beneath it, then stop before the center. The open tip keeps the sculpted detail balanced and practical.
Curve a Squeeze Bulb Along One Side
Use an ivory base and place one rounded blackcurrant bulb near the lower side. Extend a slim brushed silver tube upward in a gentle curve. Add two shallow grooves across the bulb to suggest soft material being pressed.
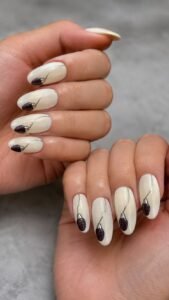
The side placement lengthens the nail while leaving enough open surface around the hardware.
Release a Mist Arc Across Amber
Apply a muted amber base and paint three pale ivory mist shapes moving outward from one small silver nozzle. Keep the forms broad and softly separated rather than using dots or glitter.
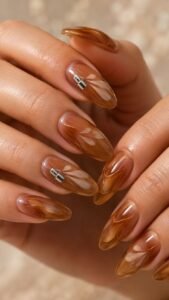
Make the first compact and the final one wider near the edge, creating a clear sense of fragrance spreading through the air.
Sundial Shadow Acrylic Nails With Sculpted Light Geometry
Sundial nails use raised pointers, curved hour paths, and directional shadows to create designs based on light and position. They avoid numbers and mechanical clock faces. Sand, terracotta, chalk white, bronze brown, and deep indigo form a warm architectural palette.
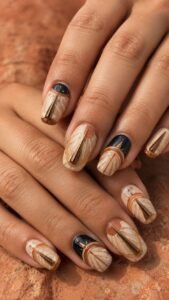
Acrylic supports a low central pointer while surrounding markings stay flat, making the concept suitable for compact square nails or longer almond shapes.
Raise a Terracotta Pointer Over Sand
Cover the nail in soft sand and build one narrow terracotta pointer rising slightly from the center. Angle it toward the upper side, then paint a longer bronze shadow in the opposite direction.
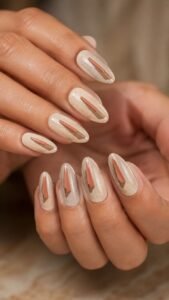
The difference between the raised pointer and flat shadow creates clear depth without stones, metallic outlines, or detailed illustration.
Curve Three Hour Marks Around Indigo
Use deep indigo as the base and paint three chalk white marks following part of a circle near one side. Place a small bronze triangle where the curve begins and leave the remaining area dark.
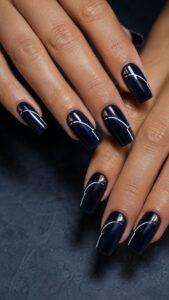
Vary the mark lengths so they appear measured by changing light rather than arranged as decoration.
Split Morning and Evening Across the Tip
Divide the tip into two uneven fields, one pale clay and one deep rust, then place a slim ivory pointer where they meet. Extend a short shadow into the lighter side and a longer one into the darker section.
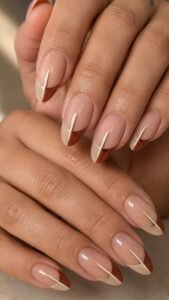
Keep the lower half translucent beige so the directional tip has enough breathing room.
Let Nails Acrylic Become the Strongest Detail in the Look
Nails acrylic designs feel most original when the material strength becomes part of the idea. Balloon sculpture uses rounded volume, fossil relief introduces carved ancient texture, and painted book edges reveal hidden scenes. Neon tubing brings raised electric movement, perfume atomizers add polished vanity details, and sundial shadows combine sculpted pointers with directional color. Choose one theme that fits the preferred length and routine, then adjust the palette without changing its construction. Related articles about acrylic nail shapes, short nail ideas, manicure colors, nail care, outfits, jewelry, and salon inspiration can complete the look.