
Nail art ideas become more memorable when inspiration comes from objects and surfaces that were never created for beauty. A fingerprint can become delicate linework, a laboratory strip can separate color into unexpected bands, and an aerial landscape can create a complete palette across both hands.
The strongest manicure does not need every nail to match exactly. Repeated color, scale, and finish can connect different details while allowing each finger to reveal something new. The six concepts below use transparent layers, compact graphics, controlled texture, and thoughtful negative space, making them adaptable for short square, rounded, oval, almond, or medium sculpted nails.
Fingerprint Transfer Nails With Forensic Whorls
Fingerprint transfer nails transform loops, arches, and whorls into fine patterns that feel personal without using letters or portraits. Black, smoke, rust, cobalt, and translucent cream create either a laboratory mood or a softer editorial finish.
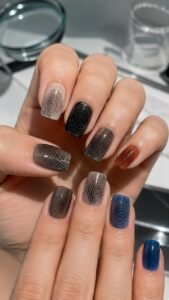
The design works beautifully on short nails because even a cropped print remains recognizable, while longer shapes provide room for wider ridge patterns.
Layer Clear Tape Lift Panels
Paint a partial fingerprint near one side, then place a transparent rectangular layer over it so the ridges appear preserved beneath clear tape. Add one tiny corner fold or pale border to separate the panel from the base.
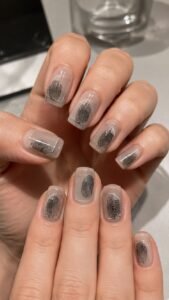
Shift the panel position across the hand while repeating the same print color for a connected manicure.
Stamp an Uneven Ink Pad Impression
Create one darker fingerprint with missing sections, smudged edges, and changing pressure rather than drawing every ridge perfectly. Deep navy over cloudy beige feels polished, while brown black over muted rose looks warmer.
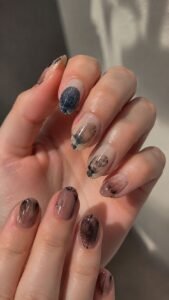
Keep nearby nails lighter and use only small print fragments so the strongest impression remains the clear focal point.
Continue One Ridge Across Two Nails
Draw a curved ridge beginning near the edge of one nail and continue the same line onto the neighboring finger. Add several parallel curves around it, keeping the spacing narrow and controlled.
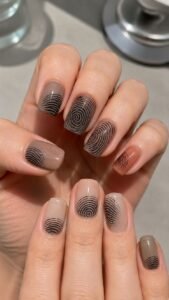
When the fingers rest together, the larger print becomes complete, giving the manicure an interactive detail without adding raised decoration.
Chromatography Strip Nails With Separated Pigment Bands
Chromatography strip nails take inspiration from color moving through absorbent paper and separating into unexpected tones. The design feels soft and scientific at the same time, using narrow vertical fields rather than ordinary gradients.
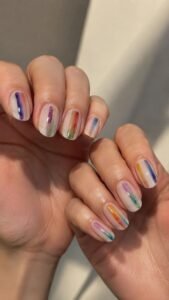
Violet, green, rust, blue, and yellow can share one manicure when cream or clear space surrounds every strip and prevents the palette from becoming crowded.
Build Rising Pigment Columns
Paint a slim cream strip through the center, then add small pools of translucent color that rise at different heights. Let one shade travel farther while another remains close to the base.
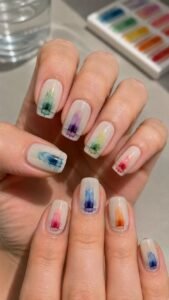
Soft edges make the pigments look absorbed into paper, while a glossy surrounding surface keeps the strip visually separate from the nail.
Mark the Solvent Front With a Fine Line
Add one delicate horizontal line near the upper portion of each strip to show where the liquid movement stopped. Use charcoal, white, or dark green depending on the pigment colors.
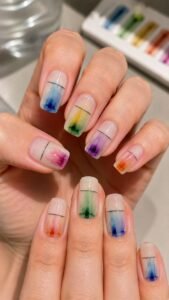
Keep the line at slightly different heights across the set, suggesting that every sample developed separately while still belonging to one controlled experiment.
Place a Dark Control Dot Near the Base
Position one compact dot at the lower end of selected strips, leaving a faint halo where the pigment begins to spread. Black cherry, indigo, or deep olive can anchor brighter bands above.
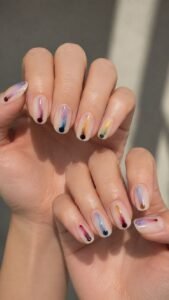
Repeat the control dot on only a few nails and leave the others focused on lighter separated colors for visual balance.
Baggage Scanner Nails With Translucent Hidden Objects
Baggage scanner nails use transparent color fields and overlapping silhouettes to suggest the mysterious view inside a travel case. Electric blue, amber, green, violet, and smoky gray create the familiar layered effect without copying real security imagery.
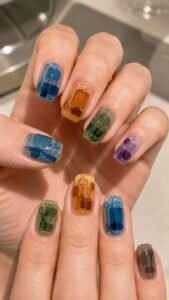
Each finger can contain a different group of objects, making this concept ideal for a personalized mix and match manicure.
Stack Everyday Object Silhouettes
Layer simplified shapes such as sunglasses, a comb, headphones, a key, or a tiny bottle inside one translucent color panel. Allow the objects to overlap so new shades appear where they meet.
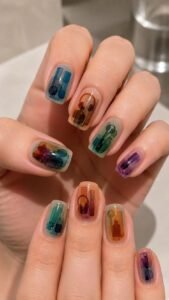
Keep the outlines soft and the scale small, letting the viewer discover each item gradually instead of seeing a crowded illustrated scene.
Circle One Item With an Alert Outline
Choose one hidden object and surround it with a narrow red or orange rectangle, leaving the rest of the scan unchanged. The bright outline creates a focal point and gives the manicure a subtle story.
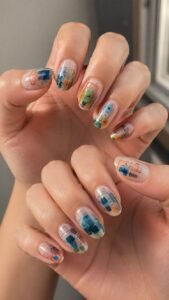
Repeat only a tiny alert corner on another finger so the strong color remains controlled across both hands.
Frame the Scan With Conveyor Edges
Add two slim dark bars near opposite sides of the nail to suggest the borders of a moving scanner screen. Keep the center transparent and allow one object to disappear partly beneath an edge.
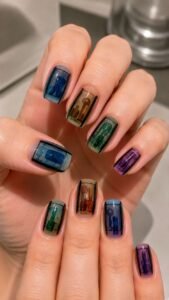
Change the direction on selected nails so the imagined luggage appears to travel through the manicure rather than remain completely still.
Embossed Soap Bar Nails With Clean Sculpted Surfaces
Embossed soap bar nails combine softened rectangles, pressed symbols, and translucent color for a manicure that looks fresh yet unexpectedly tactile. Cream, pale aqua, lavender, blush, and soft amber support the clean mood.
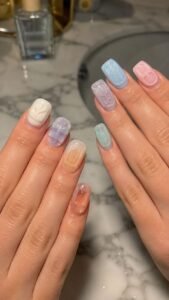
Low sculpted gel keeps the forms wearable, while satin and gloss can distinguish solid soap from clear glycerin sections.
Press a Simple Maker Mark Into the Center
Build a low rounded rectangle, then add one recessed circle, leaf, initial, or abstract symbol in the middle. Use the same color throughout so shadow reveals the mark naturally.
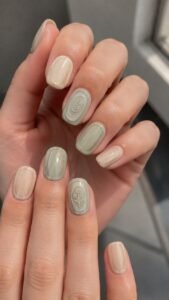
Place the complete stamp on one accent nail and repeat only a shallow border on nearby fingers to keep the set refined.
Bevel the Corners Like a Fresh Bar
Shape a raised panel with gently angled edges instead of a sharp block. The center should remain smooth while the outer bevel catches light from several directions.
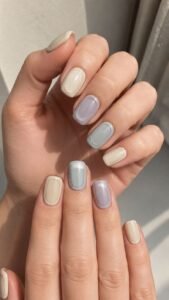
Oat cream, mist blue, or muted lilac makes the sculpted surface easy to see without requiring glitter, gems, or contrasting linework.
Reveal a Clear Glycerin Window
Create a translucent section through one side of the soap shape, allowing the base color to remain visible beneath it. Add a tiny suspended dot or curved fragment inside the clear area for depth.
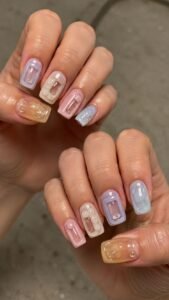
A glossy window beside a satin solid section makes the material difference noticeable whenever the hands move through light.
Footwear Tread Nails With Graphic Grip Patterns
Footwear tread nails turn the underside of sneakers and boots into bold graphic texture. Instead of using fashion logos, the manicure focuses on grooves, pressure zones, and repeated grip shapes.
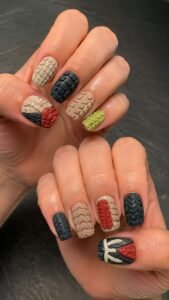
Charcoal, cream, clay, red, and muted lime create sporty contrast. Short square nails suit compact sole fragments, while longer nails allow the pattern to travel vertically.
Carve a Herringbone Grip Section
Build a low textured panel containing angled lines that meet along one narrow center channel. Keep the grooves shallow and evenly spaced so they resemble engineered tread rather than ordinary chevrons.
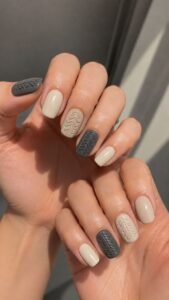
Use charcoal over a matte cream base or reverse the colors for a cleaner graphic result that remains comfortable during daily wear.
Add a Circular Heel Pressure Zone
Place one rounded tread area near the cuticle or tip and fill it with rings, segmented blocks, or curved notches. Change the position across selected nails while keeping the scale consistent.
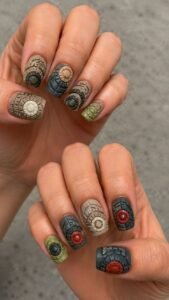
A dark outer circle with a brighter center creates depth and gives the manicure a recognizable pressure point without covering the full surface.
Insert One Reflective Safety Patch
Add a narrow reflective sticker or metallic gel section inside part of the tread pattern, similar to a safety detail built into athletic footwear. Silver, lime, or pale orange can brighten a darker base.
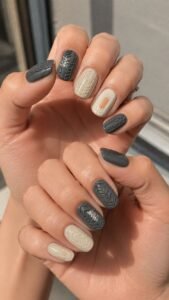
Use the reflective patch on only two nails and repeat its color through one small flat mark elsewhere.
Salt Pond Aerial Nails With Mineral Color Blocks
Salt pond aerial nails draw from geometric evaporation pools seen from above, where water shifts through coral, lilac, rust, teal, and pale mineral white. Narrow dividing banks organize the color while irregular shapes keep the manicure organic.
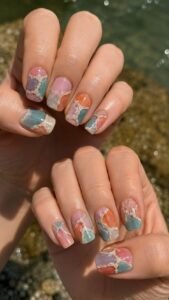
This idea works especially well across both hands because every nail can show a different portion of one imagined landscape.
Divide the Surface Into Uneven Water Cells
Create three or four irregular sections separated by slim cream, gray, or clay lines. Fill each cell with a translucent mineral shade and allow a little base color to remain near the edges.
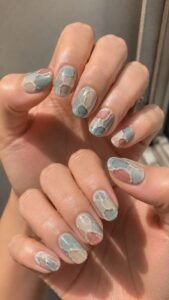
Change the cell shapes across the manicure while repeating the same palette so the nails appear connected like pieces of one aerial view.
Crystallize One Pale Salt Edge
Add a narrow textured rim along one pool using tiny opaque dots and short angular marks. Keep the relief low and concentrate it on one side where water appears to have receded.
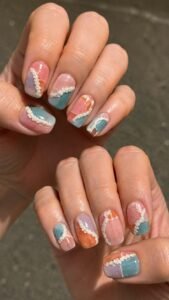
White over faded pink or pale blue creates a mineral effect that feels detailed without becoming similar to a fully jeweled manicure.
Deepen a Single Brine Pool
Choose one cell for a richer transparent shade such as wine purple, dark teal, or burnt orange, then surround it with paler pools. The concentrated color becomes the visual anchor and makes nearby sections appear brighter.
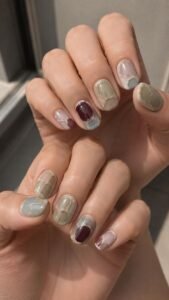
Repeat a much smaller amount of the deep shade on another finger to balance both hands.
Let the Most Unexpected Detail Inspire Your Next Manicure
The strongest nail art ideas often come from patterns people normally overlook. Fingerprints create personal linework, while chromatography strips turn color separation into delicate bands. Baggage scanner imagery introduces translucent hidden objects, embossed soap bars add clean sculptural texture, and footwear tread brings graphic grip patterns. Salt pond landscapes finish the collection with mineral color viewed from above. Choose the concept that fits your preferred length, then simplify it through fewer accent nails or a quieter palette when needed. Related inspiration for nail colors, nail shapes, extensions, stickers, manicure care, and outfit styling can help you plan a complete look around the final design.