
Nail ideas feel most memorable when the design reveals something new each time the hands move. A smooth surface can hide transparent depth, while a tiny raised detail can make a short manicure look carefully constructed. The strongest sets also respect the nail shape, leaving enough open space for every symbol, line, and texture to remain clear.
The six concepts below explore camera apertures, spirit levels, mechanical keyboards, makeup compacts, glass blocks, and enamel pin boards. Each direction can be adapted for short square, rounded, oval, almond, or medium sculpted nails, giving you fresh inspiration without repeating familiar flowers, French tips, chrome borders, or earlier manicure themes.
Camera Aperture Nails With Precise Circular Movement
Camera aperture nails use overlapping iris blades, focus markings, and small recording details to create a polished technical design. Black, graphite, silver, smoke, and one bright accent color give the manicure a sleek mood.
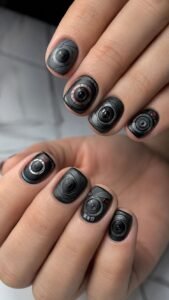
Keep the circular forms compact on short nails, or allow them to open wider across oval and almond shapes.
Build an Iris Blade Rosette
Paint five or six curved blade shapes around a dark central opening, allowing every piece to overlap the next. Use related gray tones so the rosette has depth without becoming busy.
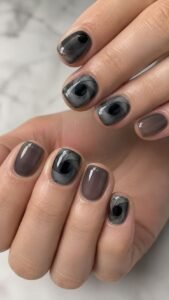
Shift the opening slightly toward one side on selected nails, then leave nearby fingers in smoky sheer polish. A glossy seal makes the blades appear enclosed beneath camera glass.
Trace a Focus Scale Around the Edge
Add a narrow arc near the outer edge and place several tiny marks along it at changing distances. One small number or dot can identify the active setting without making the design look like a full label.
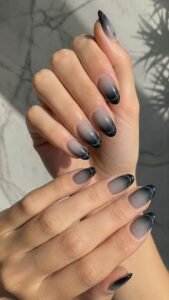
White markings over charcoal feel crisp, while black over pale gray creates a softer version. Keep every mark delicate and evenly painted.
Add One Red Recording Detail
Place a single red circle near the cuticle or side wall of one accent nail, then repeat a much smaller red mark on another finger. The bright detail creates a visual pause among the neutral camera colors.
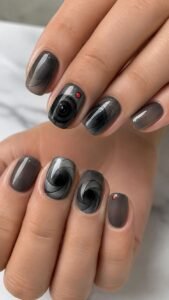
Surround it with generous open space and avoid adding other red artwork, allowing the recording symbol to feel deliberate and instantly noticeable.
Spirit Level Nails With Floating Liquid Balance
Spirit level nails turn transparent capsules, alignment marks, and suspended bubbles into clean nail art with subtle movement. Lime, amber, clear blue, graphite, and cream create a fresh workshop palette.
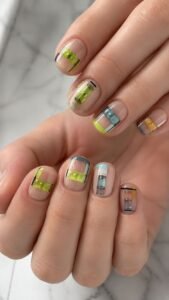
The design works especially well over sheer polish because the bubble can appear to float inside the manicure rather than sit on top.
Create a Clear Liquid Capsule
Paint a long rounded capsule through the center of the nail and fill it with transparent yellow green or pale amber. Add one small clear oval inside to represent the air bubble.
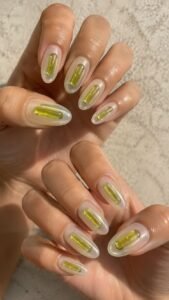
Keep the surrounding base milky or colorless so the capsule remains easy to see. A raised clear layer can add depth while staying smooth enough for daily wear.
Mark the Perfect Alignment Zone
Place two fine vertical lines around the center of the capsule, leaving a narrow space where the bubble should rest. Use black, white, or dark green depending on the base color.
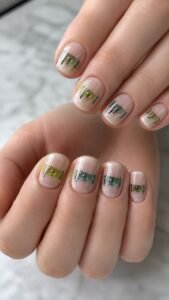
Keep the lines equal in height across every nail, even when the capsule changes position. This repeated measurement detail gives the manicure a precise and connected appearance.
Let the Bubble Travel Across the Hand
Move the clear bubble from the left side on the first accent nail toward the right side on the final one. When the fingers rest together, the sequence appears to show changing balance.
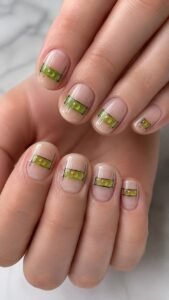
Use complete capsules on two or three nails and shortened sections on the others. Repeating the same liquid tint keeps the travelling effect organized.
Mechanical Keyboard Nails With Tactile Keycap Detail
Mechanical keyboard nails combine raised squares, tiny legends, and controlled backlighting for a manicure that feels playful and structured. Cream, black, lavender, muted teal, and translucent gray create a versatile palette.
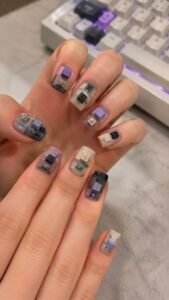
Short square nails naturally resemble compact keycaps, while longer shapes can carry several buttons without losing clarity.
Build Low Translucent Keycaps
Place one or two softly raised square shapes on selected nails, rounding the corners slightly so they feel comfortable. Use cloudy clear, pale lavender, or smoked gray gel and leave a narrow border of base color around each key.
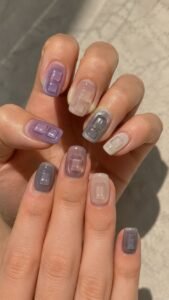
Tiny highlights along the upper edge make the pieces appear molded rather than painted flat.
Add Custom Shortcut Legends
Paint simple symbols such as a star, arrow, heart, moon, or small letter in the center of each keycap. Keep the legends consistent in size and choose signs that reflect your interests instead of copying a standard keyboard.
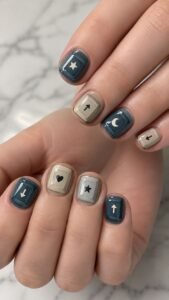
Black over cream feels graphic, while white over dark teal produces stronger contrast. Seal the markings beneath clear gloss.
Light One Accent Key From Below
Use transparent color beneath one keycap to create a soft backlit effect. Electric blue, rose, lime, or violet can glow through a cloudy upper layer while the surrounding keys remain neutral.
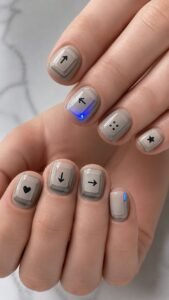
Repeat the accent color as a tiny side mark on another nail. Limiting the glow to one or two keys keeps the set polished.
Pressed Powder Compact Nails With Beauty Counter Charm
Pressed powder compact nails take inspiration from divided makeup pans, embossed surfaces, and mirrored lids. Rose beige, cocoa, mauve, cream, and silver create a refined palette that suits short and medium lengths.
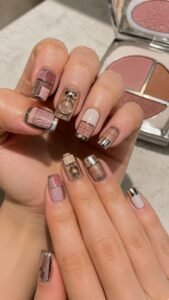
Combining satin polish with selective shine helps every section resemble a different cosmetic texture.
Divide the Nail Into Powder Pans
Create two or three rounded sections separated by narrow metallic lines, as though the nail contains a miniature face palette. Fill each pan with a related tone, moving from pale cream to rose and cocoa.
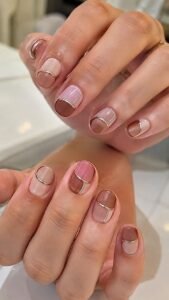
Keep the shapes broad and simple so the color remains wearable. A satin finish gives the sections a soft pressed powder appearance.
Emboss One Pan With a Raised Mark
Add a low relief crescent, initial, shell, or abstract emblem to one color section. Use the same shade as the background so shadow reveals the design rather than strong contrast.
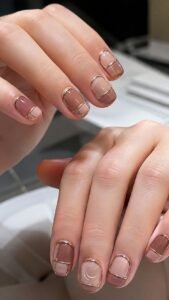
Place the raised mark on only one accent nail and keep the other pans smooth. This small dimensional detail makes the compact reference feel realistic.
Reflect Light With a Mirror Segment
Paint one curved silver or pale reflective section near the cuticle, leaving the powder colors across the remaining surface. Keep the mirror shape clean and avoid intense glitter that could hide its edge.
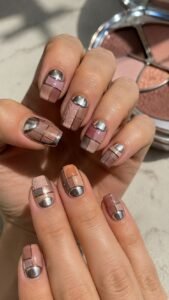
A narrow dark outline can separate it from the cosmetic pans. The reflective segment brightens the manicure whenever the hands turn.
Glass Block Nails With Frosted Architectural Depth
Glass block nails use translucent squares, cloudy surfaces, and glowing seams to create a manicure inspired by textured architecture. Clear white, aqua, blush, smoke, and pale green work beautifully together.
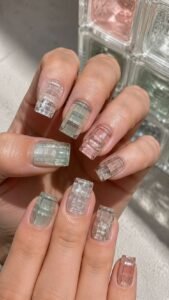
Short nails can hold one large block, while longer shapes allow several sections to form a luminous wall.
Form Rounded Frosted Squares
Build low square sections with softened corners and cover them in cloudy clear gel. Leave a narrow transparent line between each block so the nail base appears like mortar or a window seam.
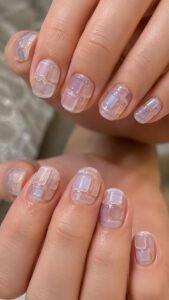
Change the block size across the fingers while repeating one tint. Light moving through the raised surfaces creates gentle depth without glitter or metallic powder.
Tint Selected Blocks With Jelly Color
Fill one or two sections with transparent aqua, rose, green, or violet while leaving the surrounding blocks frosted. The color should appear suspended inside the structure rather than painted heavily on top.
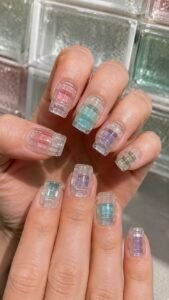
Repeat each tint at least twice across the hands so the varied blocks still feel connected. Keep nearby details minimal to preserve the airy effect.
Create a Lit Corner Block
Add a pale white or golden glow beneath one corner section, fading it before the light reaches the neighboring blocks. The illuminated area can sit near the cuticle on one nail and near the tip on another.
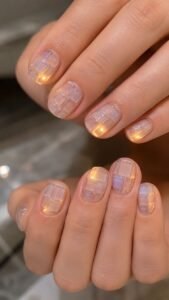
A glossy upper layer strengthens the impression that light is travelling through thick architectural glass.
Enamel Pin Board Nails With Collected Personality
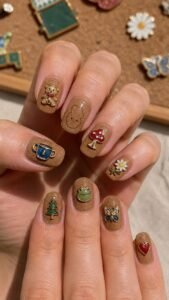
Enamel pin board nails turn tiny domed badges, matte backing, and missing pin outlines into a playful mix and match manicure. Cork brown, dark green, cream, cherry, blue, and gold create a collected palette.
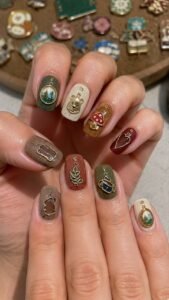
Each nail can carry a different badge while repeated outlines and finishes keep the set visually connected.
Create Low Domed Badge Shapes
Build small circles, shields, stars, or irregular emblems using low raised gel. Fill them with two or three solid colors and add a narrow metallic border. Keep most nails limited to one badge so the background remains visible.
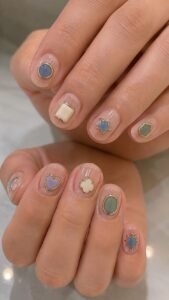
Changing the shapes across the set creates variety without making the manicure feel crowded or random.
Contrast Glossy Pins With a Matte Board
Use a warm brown, olive, or muted beige matte base to resemble a pin board, then seal only the badges with high shine. The finish contrast makes every pin appear attached to a separate surface.
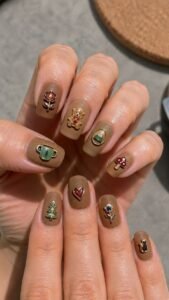
Tiny shadow marks beneath selected badges can add depth, but they should remain soft and consistent with the direction of light.
Leave One Missing Pin Outline
Paint a faint empty outline where a badge appears to have been removed, then add two tiny puncture dots inside it. Place the missing shape on one accent nail and repeat its color elsewhere through a complete badge.
This unfinished detail gives the collection a story and encourages a closer look without requiring extra decoration.
Choose the Nail Idea That Keeps Revealing Something New
The best nail ideas combine an unusual reference with careful scale, spacing, and finish. Camera apertures create circular movement, while spirit levels introduce transparent balance. Mechanical keyboards bring tactile structure, makeup compacts add beauty counter charm, and glass blocks create frosted depth. Enamel pin boards finish the collection with playful personality and controlled dimension. Choose the concept that fits your preferred nail length and daily routine, then reduce it to a few accent nails when you want a quieter manicure. Related inspiration for nail colors, nail shapes, extensions, stickers, manicure care, and outfit styling can help you plan a complete look before your next appointment.