
Acrylic nails designs can offer much more than added length or one solid polish color. Acrylic creates a stable surface for raised forms, recessed lines, fitted panels, and carefully shaped details that remain visible across almond, square, coffin, ballerina, and squoval nails. The six ideas below explore camera apertures, pulley systems, corset construction, rattan caning, suspension bridges, and vending spirals.
Each concept includes three different interpretations, allowing the artwork to change across both hands without repeating one complete image. Choose a focused palette, adjust the scale for your preferred length, and allow selected areas of the base to remain visible so the finished manicure feels artistic, balanced, and comfortable.
Camera Aperture Acrylic Nails With Rotating Blade Geometry
Camera aperture nails turn overlapping shutter blades, circular openings, and focus controls into sleek geometric art. Acrylic supports shallow layered sections that can appear fitted together without becoming bulky. Charcoal, smoky lilac, silver gray, coral, and cream create a modern palette that suits square, almond, or coffin shapes.
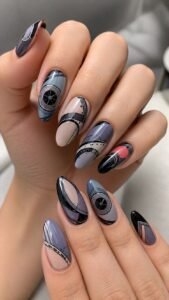
One complete aperture can establish the theme, while nearby fingers feature cropped blades, control marks, or offset openings. Keeping the center shapes broad allows the design to remain clear without painting a realistic camera.
Close Charcoal Blades Around a Lilac Center
Apply a smoky lilac base and build six shallow charcoal blades around one small cream opening. Overlap every blade slightly so the inner edges form a controlled spiral. A narrow silver gray highlight along two sections will separate the layers without outlining the complete shape.
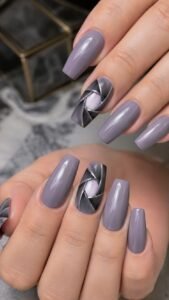
Position the aperture slightly below the center, leaving the tip open and allowing the rotating geometry to become the main feature.
Shift a Coral Shutter Toward One Side
Cover the nail in soft cream and create one cropped shutter entering from the outer side. Use coral for the overlapping blades and place a charcoal opening near the edge rather than in the middle. Add one small silver control block beneath the visible circle.
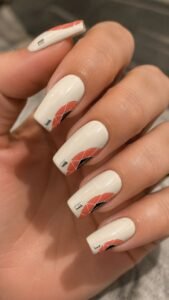
The unusual position makes the aperture appear larger than the nail while giving short square and squoval acrylics a bold focal point.
Frame the Tip With Silver Blade Sections
Paint the nail deep charcoal and arrange four silver gray blade sections across the tip. Let their pointed inner edges form part of an unfinished circle while the outer edges follow the nail shape. Add one coral wedge between two blades for controlled contrast.
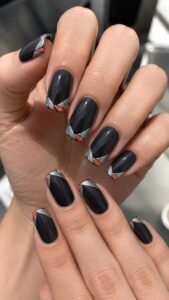
Keeping the lower surface solid charcoal prevents the curved structure from resembling a familiar tip design and gives the flat edge a technical finish.
Pulley Rig Acrylic Nails With Grooved Wheel Tension
Pulley rig nails use rounded wheels, fitted grooves, tensioned cords, and compact hooks to create mechanical movement. The acrylic surface can hold low circular forms and narrow channels while remaining smooth enough for everyday wear.
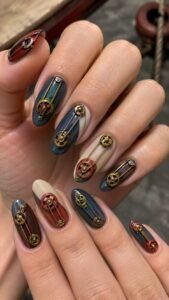
Slate blue, aged brass, brick red, ivory, and dark brown create an industrial palette with warmth. Longer shapes can carry a complete tension path, while shorter nails can focus on one wheel, attachment point, or cropped hook.
Set an Aged Brass Wheel Into Slate
Begin with a slate blue base and place one low aged brass wheel near the upper half. Carve a shallow groove around its outer edge and add a dark brown center point. Guide one ivory cord around part of the wheel before allowing it to leave through the side.
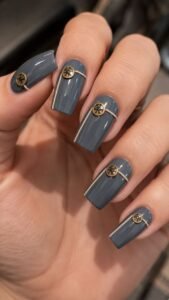
The cropped cord path creates tension while the open blue area keeps the mechanical detail polished rather than crowded.
Stretch Two Brick Cords Between Small Wheels
Use a warm ivory foundation and sculpt two compact dark brown wheels at opposite corners. Connect them with parallel brick red cords that cross the center without touching. Add a small brass collar where each cord meets a wheel.
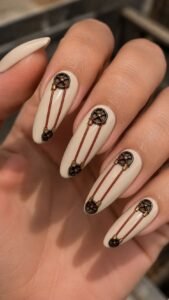
The stretched arrangement follows the nail length and gives almond or coffin acrylics a purposeful sense of movement without ordinary lines or decorative chains.
Suspend an Ivory Hook From the Cuticle
Paint the nail deep brick red and add one short brass cord descending from the cuticle. Finish it with a low ivory hook that curves toward the side, then place a small slate shadow beneath its inner edge.
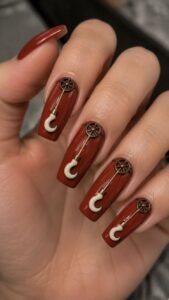
A cropped brown wheel near the upper corner can suggest the hidden pulley above. Leaving the tip mostly red gives the hanging form room to remain clear.
Corset Boning Acrylic Nails With Tailored Fashion Structure
Corset inspired acrylic nails use fitted channels, curved waist seams, eyelet panels, and controlled lacing to create a fashion focused manicure. The design should suggest garment construction rather than painting a complete corset on every finger. Plum, blush, espresso, cream, and muted copper create a sophisticated palette.
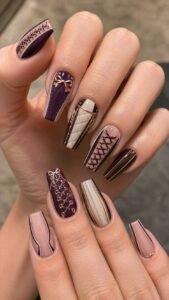
Square and coffin shapes support structured panels, while almond nails soften the fitted curves. Shallow acrylic ridges can make the boning visible without adding bulky decorations.
Raise Plum Boning Channels Over Blush
Apply a satin blush base and build three slim plum ridges from the cuticle toward the tip. Curve the outer two slightly inward near the center, then allow them to open again toward the upper edge.
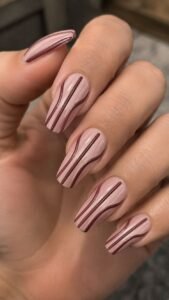
Add a narrow espresso shadow beside each ridge. The controlled shaping suggests corset boning and emphasizes the nail silhouette without relying on ordinary vertical stripes.
Lace a Cream Side Panel With Copper
Paint the nail deep espresso and add one narrow cream panel along the outer side. Place four muted copper eyelets inside it, then connect them with a plum cord that crosses in broad sections.
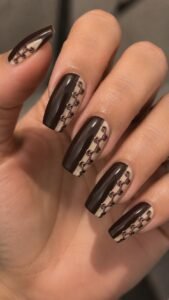
Stop the panel before the tip so the dark base remains visible around it. The side placement makes short acrylic nails appear longer while keeping the fashion detail refined.
Shape a Curved Waist Seam Across the Tip
Use a muted plum foundation and paint one broad blush seam across the upper third. Lower the middle of the curve and lift both sides so the line resembles a fitted waist rather than a simple border.
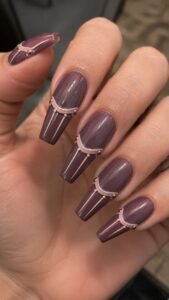
Add two short cream boning marks beneath it and one copper fastening point near the side. The curved construction gives coffin and ballerina tips a softer, tailored finish.
Rattan Caning Acrylic Nails With Open Lattice Relief
Rattan caning nails bring woven furniture patterns to acrylic through open diamonds, curved strips, and framed lattice sections. Honey brown, sage, coral, black, and warm cream create a natural palette with enough contrast for compact details.
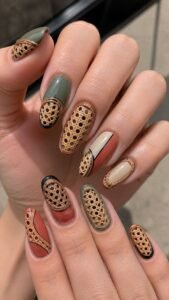
Acrylic can form shallow raised strips that appear woven over and under one another. The strongest sets use one complete lattice panel, then continue the theme through cropped corners, curved binding, or enlarged crossing sections.
Weave Honey Diamonds Over Sage
Paint the nail muted sage and arrange thin honey brown strips into three open diamond shapes through the center. Raise alternating crossings slightly so the pattern appears genuinely woven.
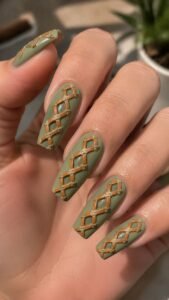
Leave a generous sage border around the lattice and finish one intersection with a small cream binding point. The open spaces prevent the texture from becoming heavy and suit medium square or coffin nails.
Curve a Black Cane Strip Around Cream
Apply warm cream polish and create one broad black cane strip that curves from the cuticle toward the outer edge. Cross it with three shorter honey sections, placing each at a different angle. Add a subtle coral underside where one crossing lifts above another.
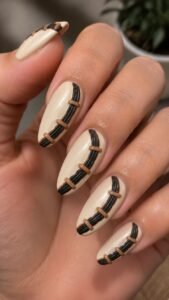
The curved arrangement feels handcrafted and gives oval or almond acrylics a softer interpretation of woven structure.
Enlarge One Coral Crossing at the Tip
Use a deep sage base and place two wide coral strips across the tip, allowing one to pass visibly over the other. Add honey shadows beneath the lower strip and frame the visible crossing with a narrow cream edge.
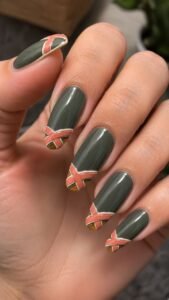
Keep the remainder of the nail solid sage. Enlarging one section makes the caning inspiration readable without repeating a full lattice across every finger.
Suspension Bridge Acrylic Nails With Cable Architecture
Suspension bridge nails translate towers, hanging cables, deck lines, and anchor points into elegant architectural art. Navy, ivory, signal red, concrete gray, and muted gold provide clean contrast without requiring a detailed city scene.
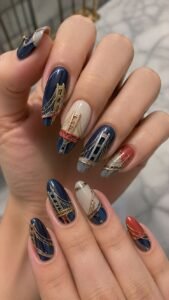
The acrylic surface can hold low tower forms and fine raised cables, making the design especially effective on longer coffin or almond nails. Shorter shapes can feature a cropped tower, one sweeping cable, or a compact deck section.
Raise an Ivory Tower Against Navy
Cover the nail in deep navy and build one narrow ivory tower slightly away from the center. Divide its upper opening with a small navy section and place a muted gold anchor point near the base.
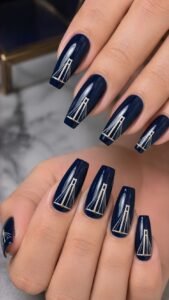
Two fine ivory cables can descend toward opposite sidewalls. Keeping the tip dark preserves the height of the tower and gives the acrylic nail a strong architectural identity.
Sweep a Gray Cable Across Sheer Nude
Use a sheer nude foundation and guide one raised concrete gray cable from the cuticle side toward the opposite tip. Add three short navy suspension lines beneath it, ending each at an invisible deck path.
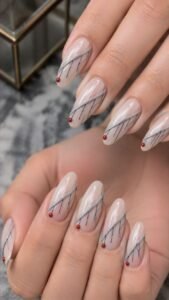
A small signal red anchor near the lower corner introduces controlled color. The open base makes the sweeping structure feel lighter and particularly elegant on almond nails.
Build a Red Deck Along the Flat Tip
Paint the nail soft gray and create one narrow signal red deck directly above the flat tip. Support it with two navy blocks and add four ivory suspension marks rising at different heights. Stop the marks before they connect to a complete upper cable.
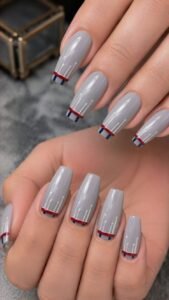
The cropped construction highlights square, coffin, and ballerina tips while allowing the lower architecture to remain the clear focal point.
Vending Spiral Acrylic Nails With Playful Mechanical Motion
Vending spiral nails use rotating coils, product capsules, release gates, and display windows to create a playful mechanical theme. Cobalt, coral, cream, pistachio, and charcoal build a bright palette without becoming childish.
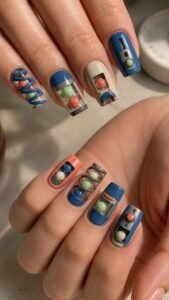
Acrylic can hold low spiral channels and rounded capsules while keeping the surface practical. A complete coil can appear on one finger, while others show a cropped product slot, control gate, or partially released shape.
Coil Cobalt Around a Coral Capsule
Apply a cream base and create one cobalt spiral through the center, using three broad turns with visible space between them. Place a coral capsule inside the lower section and allow it to overlap one part of the coil.
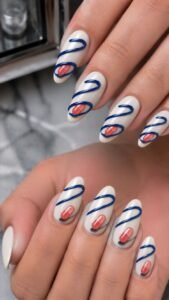
Add a small charcoal shadow beneath the capsule. The captured shape creates motion while the light foundation keeps every mechanical element readable.
Frame a Pistachio Display Window
Paint the nail charcoal and place one pistachio rectangle near the upper half. Round its corners and add a cream interior panel containing one small coral block. A narrow cobalt edge along the lower side can suggest the window frame.
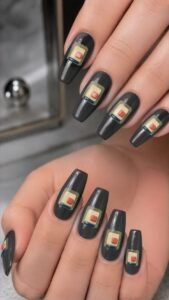
Leave the cuticle and tip dark so the compact display appears illuminated without using glitter, chrome, or transparent glass effects.
Open a Cream Release Gate Near the Tip
Use a cobalt foundation and build one low cream gate across the tip. Divide it with a charcoal center opening and place a pistachio capsule partly entering the gap. Add a coral control point near one side and a short cream hinge at the other.
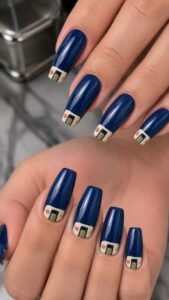
The close viewpoint gives shorter acrylic nails a strong graphic feature while connecting with the spiral details elsewhere.
Let Acrylic Nails Designs Make Construction Part of the Style
The most original acrylic nails designs use the strength of the material as part of the visual idea. Camera apertures create rotating blade geometry, while pulley rigs introduce tension and movement. Corset boning brings tailored fashion structure, and rattan caning adds open woven relief. Suspension bridges create architectural height, while vending spirals finish the collection with playful mechanical motion. Choose the theme that suits your preferred length and daily routine, then adjust the palette without changing its central construction. You can also explore related articles about acrylic nail shapes, short manicure ideas, coffin nails, nail colors, salon care, outfit styling, jewelry combinations, hand care, and beauty inspiration.