
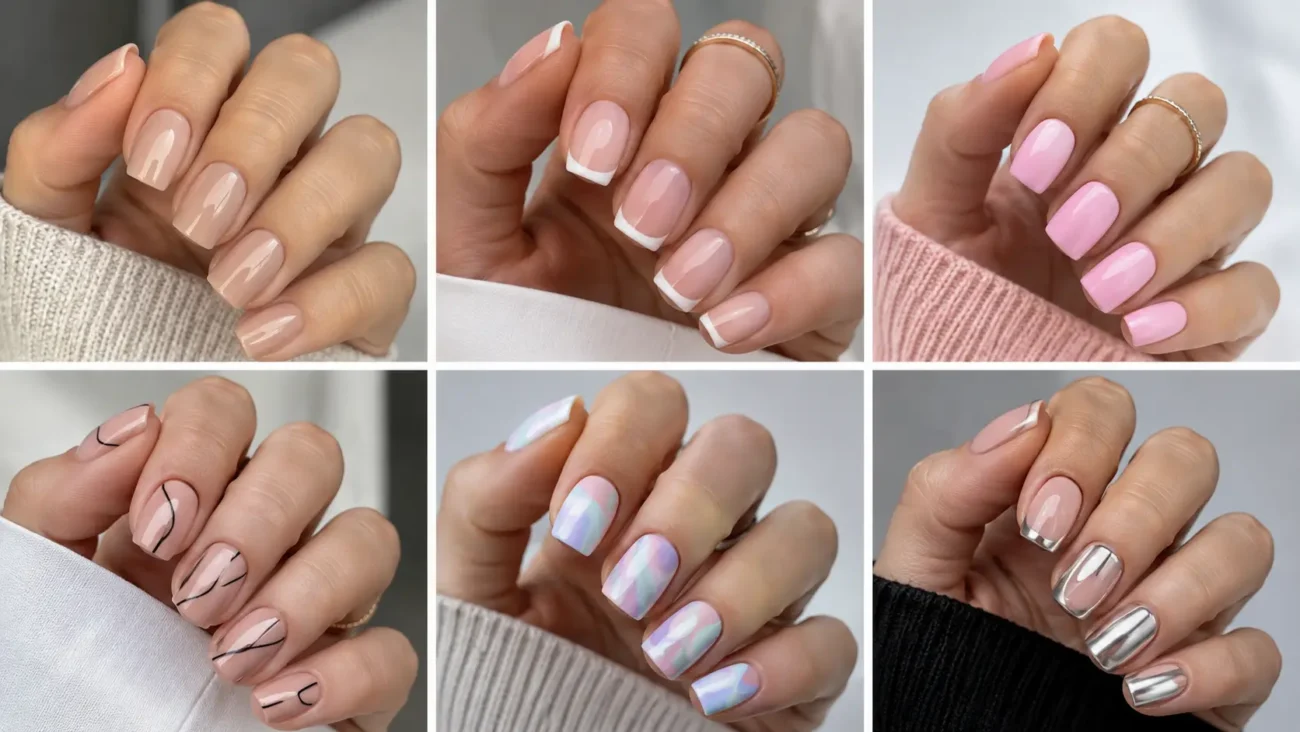
Short coffin nails combine tapered sides with a neat flat tip, creating a bold shape without dramatic length. Detailed art stays clear on this compact surface when every element follows the outline and leaves enough breathing room. Short nails are increasingly treated as small canvases for expressive graphics, while coffin shapes remain popular for their structured finish.
The ideas below explore folding rulers, fountain pen nibs, parachute panels, domino pieces, harmonica reeds, and insulated picnic flasks. Each theme includes three interpretations, allowing the manicure to feel connected without placing the same picture on every finger. Choose a focused palette and scale each detail carefully so the short shape remains balanced.
Folding Ruler Nails With Hinged Graphic Movement
Folding ruler nails use joint circles, measured blocks, and changing angles to complement the straight tip of short coffin nails. Mustard, brick red, cream, charcoal, and faded blue create a workshop inspired palette without looking severe.
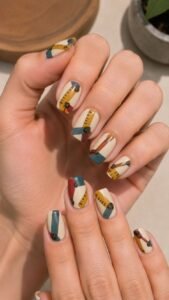
Each nail can show a different tool section, allowing the design to travel across both hands. Keep the markings broad and abstract rather than adding readable measurements.
Bend Two Cream Sections Around a Red Joint
Paint a charcoal base and place two cream rectangles meeting at an open angle near the center. Add one brick red circle where the sections connect, then place a smaller charcoal point inside it.
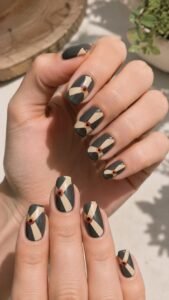
Let one rectangle leave through the side and the other approach the flat tip. The angled arrangement emphasizes the tapered silhouette without curves, glitter, or repeated striping.
Stack Mustard Blocks Beside the Sidewall
Use a warm beige foundation and arrange three mustard blocks in a narrow group close to one side. Separate them with small charcoal gaps and shift the middle block slightly inward.
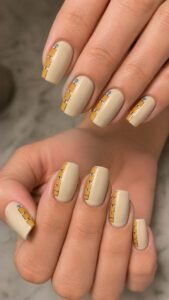
Add one faded blue joint near the cuticle to interrupt the warm palette. The compact arrangement leaves most of the nail open and gives the shape a longer appearance.
Crop a Hinged Corner Across the Tip
Cover the nail in faded blue and paint one cream ruler section entering diagonally from the tip. Attach a shorter piece with a dark circular hinge, allowing it to point toward the outer corner.
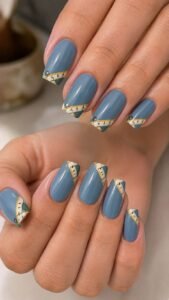
Add one mustard edge to the lower section for definition. Showing only the connected corner keeps the design bold enough for a short surface.
Fountain Pen Nib Nails With Inked Precision
Fountain pen nib nails bring tapered metal shapes, split points, ink channels, and grip sections to a compact manicure. Deep teal, oxblood, parchment, black, and brushed brass create an elegant writing inspired palette.
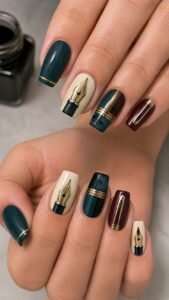
The pointed nib contrasts with the flat coffin tip, making the shape feel more intentional. Distribute separate pen parts across different fingers instead of repeating one complete object.
Center an Oxblood Nib Over Parchment
Apply a parchment base and paint one broad oxblood nib pointing toward the tip. Divide the center with a narrow black channel and add a small brass circle near the lower edge.
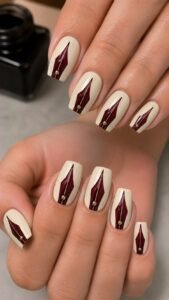
Leave a clear border around the shape so the outline remains sharp. The centered placement works because the nib echoes the narrowing sides.
Release a Teal Ink Pool From One Corner
Use a soft cream foundation and place one irregular teal pool near the outer corner. Extend a slim black line toward a cropped brass nib entering from the side.
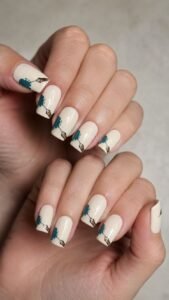
Keep the ink edge firm rather than blended, allowing the shape to feel freshly placed on paper. The open center prevents the darker colors from making the nail appear shorter.
Build a Ribbed Grip Near the Cuticle
Paint the nail deep black and add a short oxblood grip section beginning at the cuticle. Divide it with four wide parchment grooves and finish the upper edge with one narrow brass collar.
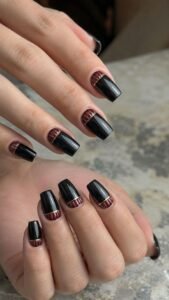
Stop the detail before the middle. This lower placement leaves the flat tip visible and gives the manicure a polished equipment inspired finish.
Parachute Panel Nails With Tensioned Color Sections
Parachute panel nails use stretched fabric shapes, suspension points, and directional seams to create airy movement. Coral, cobalt, cream, olive, and pale gray form a bright but controlled palette.
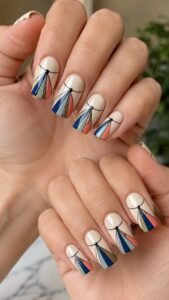
Broad sections remain clearer than tiny lines on compact lengths. The tapered sides make the panels appear pulled outward without requiring clouds, sky scenes, or literal figures.
Fan Coral and Cream Panels From the Cuticle
Begin with pale gray and create four broad panels spreading upward from one cobalt point near the cuticle. Alternate coral and cream while leaving slim gray divisions between them.
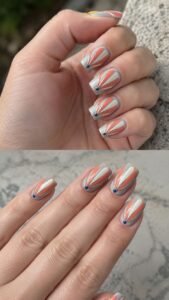
Allow the outer panels to disappear through both sides. The expanding arrangement makes the nail look wider near the tip while preserving its clean flat edge.
Pull Olive Cords Toward a Side Harness
Paint the nail cobalt and draw three olive cords travelling from different points near the tip toward one cream harness at the lower side. Keep the cords straight and vary their length so the design suggests tension rather than rays.
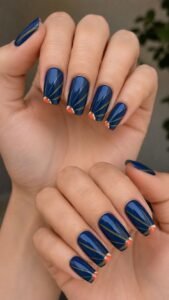
A coral block beneath the harness adds warmth and creates a clear finishing point.
Fold a Cobalt Canopy Across the Flat Tip
Use a sheer beige base and place one curved cobalt canopy across the tip, divided into three sections by cream seams. Add a small coral vent in the center and let the outer edges follow the coffin corners. Keep the canopy shallow so the lower nail stays visible.
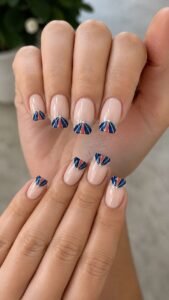
This arrangement celebrates the flat tip instead of hiding it.
Domino Tile Nails With Balanced Graphic Contrast
Domino tile nails use divided rectangles, compact pips, and offset pairings to create bold art that fits short coffin shapes. Ivory, black, tomato red, pistachio, and lilac offer a playful alternative to classic monochrome.
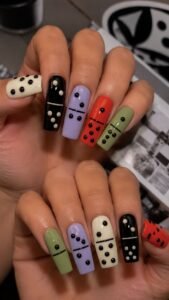
Tiles can appear cropped, rotated, or partly overlapped so the set never resembles a repeated game board. Large pips and open background space keep every detail readable.
Split an Ivory Tile With Tomato Red
Paint a pistachio base and add one ivory rectangle through the center, dividing it with a narrow tomato red line. Place two large black pips above the division and one below, keeping their spacing uneven.
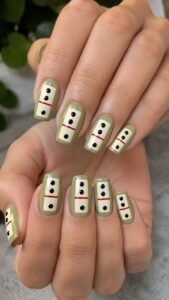
Crop the upper edge slightly at the tip. The central shape follows the coffin outline and gives short nails a crisp graphic focus.
Overlap Lilac and Black Half Tiles
Use a soft beige foundation and place one lilac half tile entering from the left side. Add a smaller black half tile from the opposite corner, allowing them to overlap near the middle.
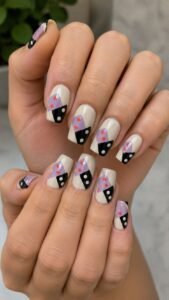
Use cream pips on black and tomato pips on lilac. The changing colors create depth while the incomplete tiles prevent the theme from feeling literal.
Turn One Pip Into a Cuticle Accent
Cover the nail in deep black and place a large ivory circle near the cuticle, then add two smaller pistachio pips moving toward one side. A short ivory division line can enter from the tip without crossing the full surface.
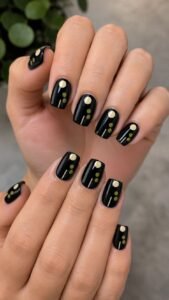
This reduced version connects with the detailed tiles while leaving the shape sleek and easy to coordinate.
Harmonica Reed Nails With Compact Musical Structure
Harmonica reed nails use narrow air slots, rounded covers, note markers, and screw details to create a musical manicure without repeating microphones, records, or cassettes. Burnished copper, denim blue, cream, dark brown, and muted orange give the theme a warm vintage quality.
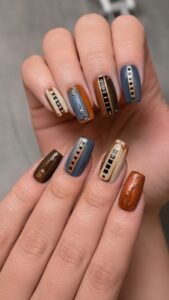
The rectangular instrument structure suits short coffin nails, while cropped viewpoints keep every finger visually different.
Line Copper Air Slots Across Denim Blue
Apply denim blue polish and arrange five burnished copper slots across the lower half. Make the center slots slightly longer and round every end. Add one tiny cream screw point near the side rather than framing the group.
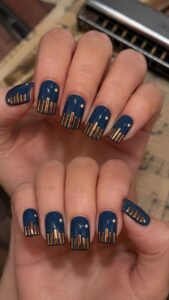
The broad openings remain visible on short nails and create rhythm without ordinary stripes or a keyboard pattern.
Slide a Cream Note Marker Toward the Tip
Paint the nail dark brown and place one narrow cream panel along the center. Add a muted orange marker inside it, shifted closer to the tip, and place two small copper points at the lower edge.
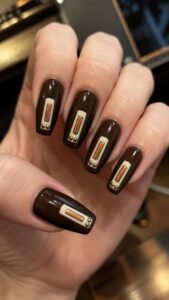
Keep the panel shorter than the nail. The vertical arrangement adds structure while the tapered brown sides frame the lighter detail.
Crop a Rounded Cover Along One Side
Use a muted orange base and paint one curved copper cover entering from the outer side. Add three dark air openings beneath the curve and a small denim blue plate near the tip.

Let the cover disappear beyond the edge so the object appears larger. This close viewpoint gives the manicure strong mechanical character without excessive line work.
Insulated Flask Nails With Picnic Ready Color Blocking
Insulated flask nails turn ribbed caps, wrapped labels, pouring lips, and stacked bands into cheerful short coffin designs. Tomato red, butter cream, forest green, sky blue, and cocoa create a nostalgic outdoor palette without food, flowers, or picnic checks.
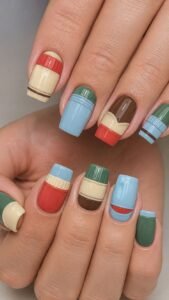
Cropped sections suggest the cylindrical object more effectively than a complete illustration. Flat color and controlled shadows keep the manicure smooth.
Wrap a Butter Cream Label Around Tomato Red
Paint the nail tomato red and add one broad butter cream band through the middle, curving its edges slightly. Place a small forest green block inside without lettering.
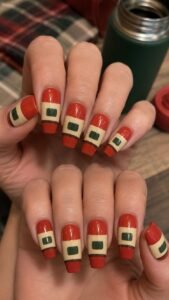
Add one cocoa shadow beneath the lower curve to suggest the label wrapping around a cylinder. The wide section balances the narrow sides of the coffin shape.
Stack a Ribbed Green Cap at the Cuticle
Use a sky blue base and create one forest green cap beginning at the cuticle. Divide it with four butter cream grooves, then add a narrow tomato red collar above.
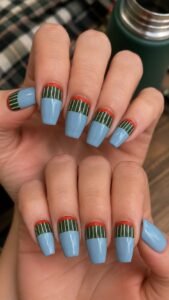
Stop the cap before the center so the brighter blue remains visible. This placement provides detail without crowding the flat tip.
Pour a Cream Stream From a Cropped Lip
Apply cocoa polish and paint one sky blue flask lip entering from the upper corner. Extend a smooth butter cream stream diagonally toward the center, ending it before the cuticle.
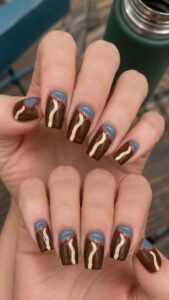
Add a narrow tomato red edge around the lip for contrast. The angled stream creates movement while keeping the object abstract and fashionable.
Let Short Coffin Nails Show More Than Their Length
Short coffin nails can carry strong art when each design respects the tapered sides, compact surface, and clean flat tip. Folding ruler joints create angular movement, while fountain pen nibs add elegant precision. Parachute panels bring stretched color, and domino tiles offer bold graphic balance. Harmonica reeds introduce musical structure, while insulated flask details finish the collection with nostalgic color blocking. Choose the theme that suits your outfits and routine, then adjust the palette while keeping its construction clear. You can also explore related articles about coffin nail shapes, short manicure ideas, acrylic care, nail colors, outfit styling, jewelry combinations, and salon inspiration.