
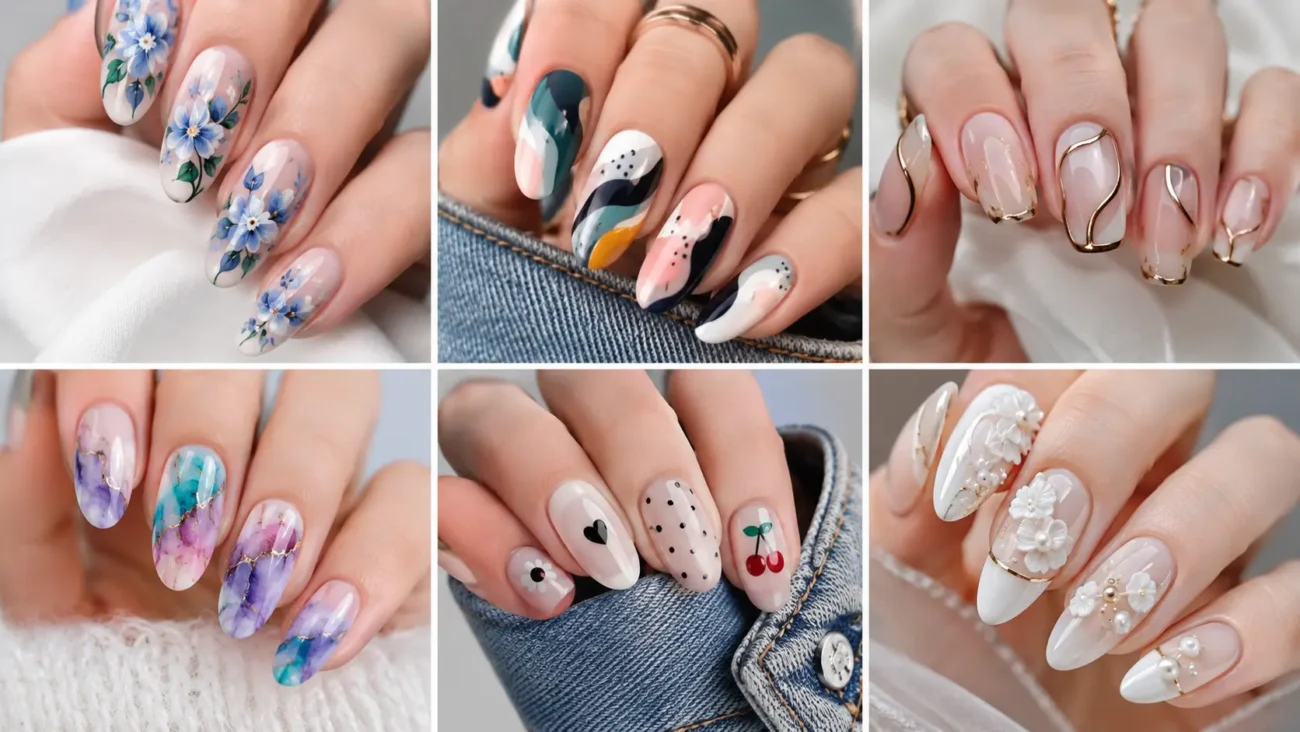
Creative nails art can make the hands feel like a carefully styled part of an outfit rather than a separate beauty detail. Sheer bases, miniature artwork, raised gel, magnetic velvet effects, pearly finishes, and thoughtfully limited decorations are shaping the strongest manicure directions, while short natural nails are also becoming expressive canvases for detailed designs.
The ideas below move beyond familiar flowers, hearts, cherries, clouds, marble, French tips, ordinary chrome, aura centers, animal markings, and simple glitter. Instead, they explore soap film rings, lace gloves, velvet comets, perfume atomizers, ceramic crackle, and holographic security threads. Each theme includes three distinctive variations that can be adapted for short square, rounded, oval, or almond nails.
Soap Film Nails With Floating Iridescent Rings
Soap film nails transform clear polish into delicate circles with shifting rainbow edges and transparent centers. The design captures the weightless appearance of bubbles without covering the hands in childish illustrations or oversized decorations.
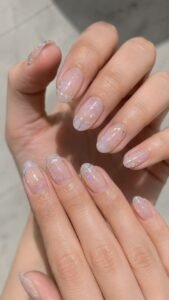
Clear gel, pearl white, pale violet, aqua, and flashes of pink create the strongest light movement while keeping the natural nail visible. Rounded and oval nails complement the circular details, while short square shapes can feature cropped rings entering from different edges.
Float One Rainbow Ring Over Clear Pink
Begin with a sheer pink base that smooths the natural nail without hiding it completely. Paint one thin circular ring near the center using tiny touches of lavender, aqua, pale yellow, and cool pink, allowing the shades to blend softly where they meet.
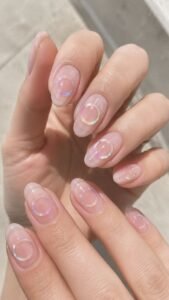
Keep the middle transparent and add one narrow white reflection along the upper curve so the ring appears glossy and weightless rather than painted flat.
Cluster Pearl Bubbles Near the Cuticle
Apply a nearly clear foundation, then arrange three or four low pearl circles close to the cuticle of one accent nail. Change the size of every circle and allow two of them to overlap slightly, creating the appearance of bubbles collecting before they drift apart.
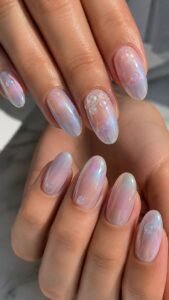
Add a tiny silver reflection inside selected shapes, while nearby fingers carry one isolated pearl bubble or remain completely clear.
Stretch a Smoke Bubble Across the Tip
Paint the nails with a translucent smoke gray tint and create one large cropped ring that curves across the tip. Outline part of the circle with muted blue and soft violet, then leave the opposite side almost invisible so the shape appears to fade into the background.
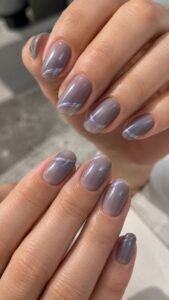
A narrow glossy highlight can follow the inner edge, while surrounding smoke nails remain smooth and free from extra artwork.
Lace Glove Nails With Sheer Embroidered Detail
Lace glove nails bring delicate mesh, scalloped edges, and fine thread patterns to translucent bases. Black lace creates a dramatic evening mood, while ivory, blush, and powder blue make the same idea feel softer and easier to wear during the day.
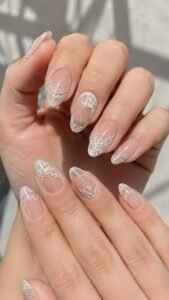
The artwork should remain open and airy so sections of the natural nail appear between the embroidered lines. Almond nails provide room for longer patterns, while short rounded nails can carry one cropped cuff or a small mesh panel.
Shape an Ivory Scallop Along the Side
Begin with a sheer beige base and paint three soft ivory arches travelling along one side of an accent nail. Add tiny connecting loops between the arches and place one small dot inside each curve, leaving the center of the nail open.
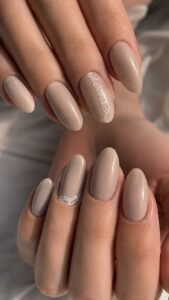
Continue the ivory shade as a single scalloped corner on another finger, while smooth beige nails keep the embroidery looking refined and uncluttered.
Build Black Mesh Over a Bare Base
Apply a glossy clear pink foundation, then draw several fine black lines that cross diagonally across the lower half of the nail. Place a tiny black point where selected lines meet, but avoid filling every intersection because generous spacing makes the mesh appear lighter.
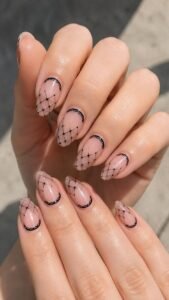
Finish the edge with one curved black band near the cuticle, creating the impression of a lace glove cuff without covering the full nail.
Embroider Powder Blue Thread Curves
Paint the nails with a translucent milky base and create two powder blue curves that move from the cuticle toward the outer edge. Add small loops along one curve and fine white stitches beside the other, allowing the details to overlap in only one area.
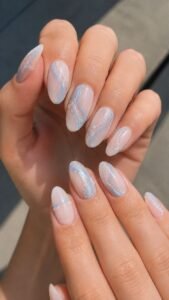
Use the full embroidered arrangement on one finger, then carry two simple blue loops onto another nail for a softer connection across the hand.
Velvet Comet Nails With Magnetic Light Trails
Velvet comet nails use magnetic polish to create concentrated streaks that appear to travel through deep color. Unlike an ordinary cat eye line placed directly through the center, these trails begin as bright points and gradually widen or fade as they move across the nail.
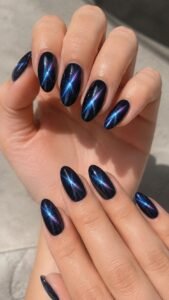
Cobalt, plum, forest green, bronze, and midnight gray give the reflective particles enough depth to remain visible. Almond shapes make the trails appear long and graceful, while short nails can display one cropped burst near the side.
Pull a Cobalt Trail From the Cuticle
Apply a deep cobalt magnetic polish and guide the brightest reflective particles toward one point near the cuticle. Stretch the light diagonally toward the tip, allowing it to become wider and softer as it travels across the blue surface.
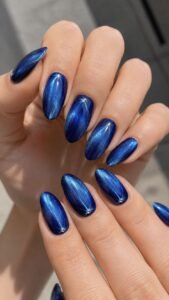
Add one tiny silver point at the beginning of the trail, while nearby nails carry shorter cobalt streaks placed in different directions for natural movement.
Cross Two Plum Light Paths
Begin with a dark plum base containing fine magnetic shimmer, then create two narrow light trails that cross close to one corner. Keep one path bright and defined while allowing the second to appear softer, giving the design depth instead of creating a simple letter shape.
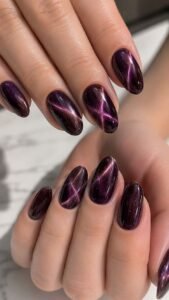
Surround the crossing point with untouched dark color, then use one curved plum streak on another finger to continue the dramatic velvet effect.
Curve an Olive Comet Around the Edge
Paint the nails in a deep olive magnetic shade and pull the reflective shimmer into a curved line following the outer edge. Concentrate the glow near the tip, then let it disappear gradually as it approaches the cuticle.
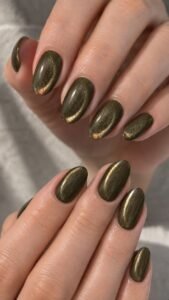
A warm bronze point can sit at the brightest end, while solid olive velvet nails around the accent create a rich manicure that changes whenever the hands move.
Perfume Atomizer Nails With Polished Glass Details
Perfume atomizer nails take inspiration from frosted bottles, metallic pumps, transparent liquid, and fine clouds of fragrance. Blush, pale amber, clear blue, silver, and glossy black create an elegant beauty palette without requiring logos or readable labels.
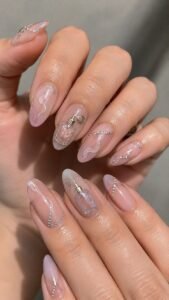
Square nails can hold compact bottle shapes, while oval and almond nails look graceful with curved glass panels and drifting mist. Limiting the complete atomizer to one finger keeps the manicure fashionable rather than overly literal.
Frost a Blush Bottle Over Clear Polish
Begin with a transparent pink base and paint one softly frosted blush rectangle near the center of an accent nail. Round the upper corners and leave a clear strip through the middle so the bottle appears made from tinted glass.
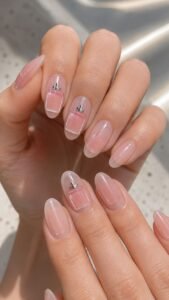
Add a small silver cap above the shape and one white reflection along the side, while nearby nails carry translucent blush blocks or remain glossy and bare.
Press a Silver Pump Near the Cuticle
Apply a creamy nude base and construct a miniature silver pump close to the cuticle using one narrow rectangle and a shorter horizontal piece. Extend a fine black line from the pump toward the center, suggesting the hidden tube inside a perfume bottle.
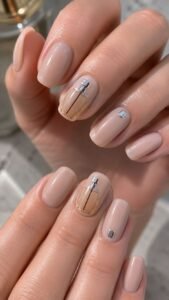
Place one transparent amber section beneath the metal detail, then echo the silver shade as a tiny cap on another nail without rebuilding the full design.
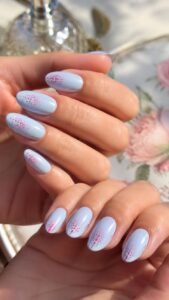
Scatter Rose Mist Across Pale Blue
Paint the nails with a sheer pale blue foundation and place several tiny rose pink dots moving diagonally from one corner. Make the dots larger near the starting point and gradually reduce their size so they resemble a fine fragrance mist floating across the surface.
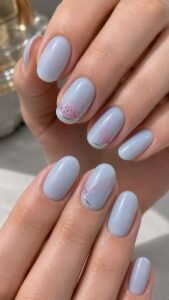
Add one slim silver curve near the edge to suggest part of an atomizer tube, while solid pale blue fingers keep the drifting detail easy to see.
Ceramic Crackle Nails With Delicate Glazed Lines
Ceramic crackle nails recreate the fine irregular lines that appear inside aged decorative glaze. The design differs from marble because the lines form small connected sections rather than broad flowing veins, giving the nails a handcrafted and collected appearance.
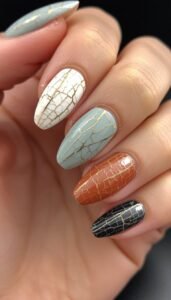
Porcelain white, celadon green, dusty blue, terracotta, and dark ink provide several distinctive color stories. Short nails can carry a small cluster of cracks near one corner, while longer shapes offer space for a wider network with controlled open areas.
Draw Ink Cracks Over Porcelain White
Apply a smooth porcelain white base and add several extremely fine dark ink lines beginning near one side of the nail. Allow each line to divide into two smaller paths, creating irregular sections without filling the entire surface.
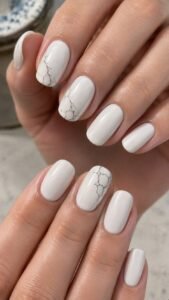
Keep the opposite half mostly white and place a faint gray shadow beside selected lines, while nearby nails remain solid porcelain for a clean gallery inspired finish.
Break Celadon Glaze Near the Cuticle
Paint the nails with a muted celadon green and create a small network of cream lines close to the cuticle. Let the cracks spread outward for only a short distance before disappearing into the smooth green surface.
Add one tiny bronze point inside a single section, then repeat two cream branches near the side of another finger to connect the artwork without covering every nail.
Layer Terracotta Beneath Cream Glaze
Begin with a warm terracotta base and place an uneven cream panel across part of an accent nail. Draw narrow terracotta lines through the cream section so the deeper color appears to show through fine openings in the glaze.
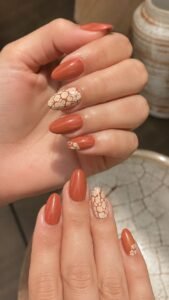
Keep the edges of the cream area softly irregular, then use one smaller cracked panel near the tip of another nail while the remaining fingers stay glossy terracotta.
Holographic Security Thread Nails With Futuristic Fine Lines
Security thread nails combine translucent color, narrow reflective strips, miniature symbols, and shifting holographic details. The idea takes inspiration from the hidden lines inside valuable printed paper, but the finished manicure remains abstract and does not imitate real currency or official documents.
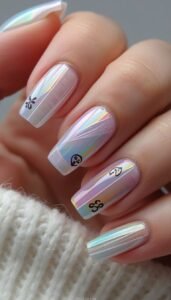
Silver, violet, teal, clear pink, and smoky beige keep the design futuristic without becoming excessively bright. Short square nails suit straight threads, while almond nails allow the reflective lines to curve gently across the surface.
Suspend a Silver Thread Inside Clear Pink
Apply a sheer pink base and place one extremely narrow silver strip vertically through the center of an accent nail. Cover it with clear gel so the line appears suspended inside the manicure rather than resting on top.
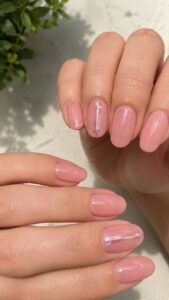
Add three tiny translucent squares beside the thread using pale violet, then keep the surrounding nails clear pink with only one silver point near the cuticle.
Shift a Teal Strip Across Smoky Beige
Paint the nails with a translucent smoky beige polish and add one narrow teal holographic strip travelling diagonally across the surface. Leave a small break near the center and reconnect the line slightly higher, creating the appearance of a thread seen through layered material.
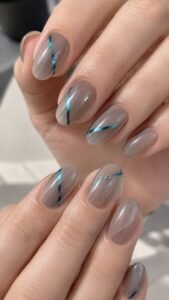
Add one fine silver mark beside the opening, while another finger carries a shorter teal section entering from the tip.
Frame Micro Symbols With Violet Light
Begin with a milky clear foundation and create one slim violet reflective line close to the outer edge. Beside it, paint three miniature abstract symbols using silver, teal, and pale pink, keeping each mark simple and separated by open space.
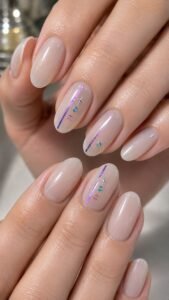
Use the complete arrangement once, then place one violet line and a single symbol on another finger so the futuristic detail remains balanced and readable.
Let Your Nails Art Become the Detail Everyone Notices
Memorable nails art feels strongest when every shade, texture, and small accent supports one recognizable story. Soap film rings bring transparent rainbow movement, while lace gloves introduce delicate embroidered detail. Velvet comets create shifting magnetic light, perfume atomizers add polished beauty character, ceramic crackle brings handcrafted texture, and security threads finish the collection with futuristic reflection. Choose the concept that suits your nail length, wardrobe, and daily routine, then simplify or expand its details until the manicure feels completely personal. You can also explore related articles about short nail designs, simple nail art, nail colors, manicure care, outfit inspiration, jewelry styling, hairstyles, and beauty ideas to create a complete look around your next appointment.