
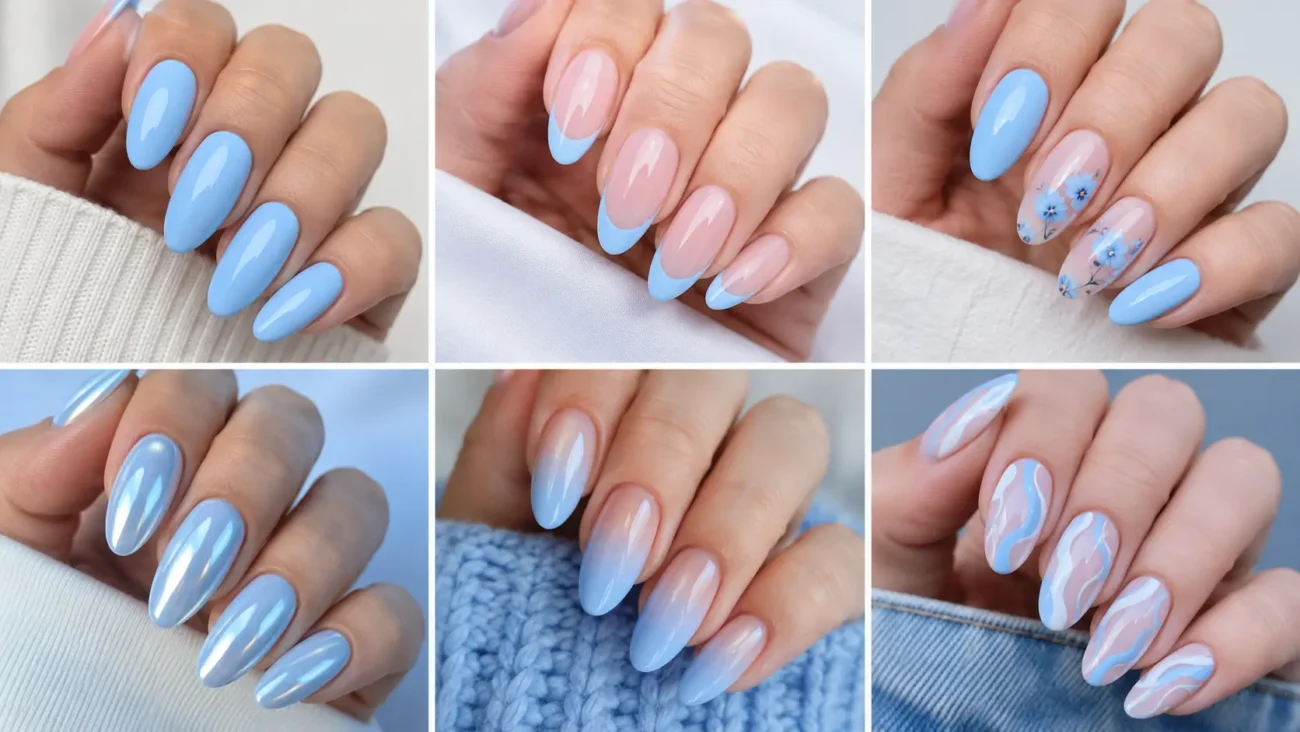
Light blue nails bring a clean and refreshing quality to the hands, but thoughtful artwork can make the shade feel far more personal than a simple coat of polish. Creamy sky blue, powder blue, fog blue, and translucent blue finishes can look soft or expressive depending on the shape, texture, and surrounding details. Short practical shapes, glossy surfaces, dimensional accents, and carefully controlled patterns are giving pale blue manicures a fresh visual direction.
The ideas below move beyond familiar clouds, snowflakes, flowers, butterflies, French tips, ocean waves, chrome, marble, and ordinary glitter. Instead, they explore cameo relief, ice trays, seersucker fabric, diary locks, mechanical pencils, and domino tiles. Each theme includes three variations for short square, rounded, oval, or almond nails.
Cameo Relief Light Blue Nails With Raised White Portrait Detail
Cameo relief nails combine powder blue polish with smooth white shapes that appear gently carved above the surface. The design takes inspiration from decorative portrait plaques, molded borders, and small ornamental frames without requiring complicated facial artwork.
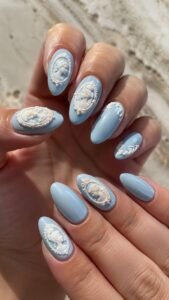
Oval and almond nails naturally support the curved silhouette, while short nails can carry a cropped frame or one raised profile. Keeping the white gel low and controlled allows the manicure to feel elegant and wearable rather than heavy.
Shape a White Profile Over Powder Blue
Begin with a creamy powder blue base, then create one small white profile near the center of an accent nail. Keep the forehead, nose, lips, and chin simplified so the design resembles a decorative silhouette rather than a realistic portrait.
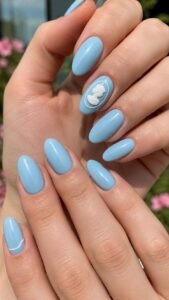
Surround the profile with a thin oval frame and leave enough blue visible around it. Use the complete cameo once, then repeat only a small white curve on another nail to connect the artwork without copying the full portrait.
Frame a Cameo With Tiny Pearl Dots
Paint the nails in a soft sky blue shade and place one smooth white oval slightly above the center. Add miniature white dots around the outer edge, keeping them evenly spaced so they resemble a molded pearl border. Inside the frame, create one simple curved shape or leave the center blue for a lighter interpretation.
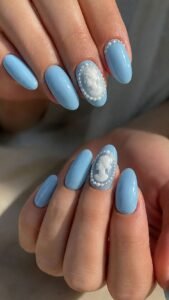
Surrounding nails can remain glossy sky blue, while one finger carries only three pearl dots near the cuticle for a delicate matching detail.
Crop the Relief Along One Corner
Apply a translucent light blue base and place a raised white frame entering from one side of the nail. Allow only part of the oval and decorative border to remain visible, as though the cameo continues beyond the edge. Add a pale gray shadow beside selected white sections to make the relief appear more dimensional.
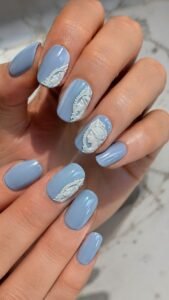
Repeat a smaller cropped corner on another finger, while smooth blue nails balance the sculpted details and preserve a clean modern finish.
Ice Cube Tray Light Blue Nails With Frosted Square Texture
Ice cube tray nails turn pale blue polish into neat frozen compartments through raised squares, translucent centers, and softly frosted borders. Clear gel, milky blue, icy white, and the smallest touch of silver create a cool palette that appears clean rather than overly seasonal.
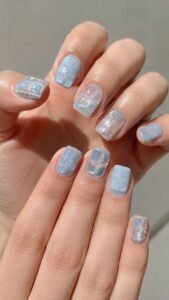
Short square nails naturally suit the compact grid, while almond nails can feature cropped compartments positioned diagonally. Mixing transparent and opaque surfaces gives the design depth without relying on familiar icicles or snowflake artwork.
Build Frosted Compartments Over Clear Blue
Begin with a translucent light blue foundation, then create four low square outlines across one accent nail using clear builder gel. Add a soft milky blue haze around the inner edges while leaving the centers transparent.
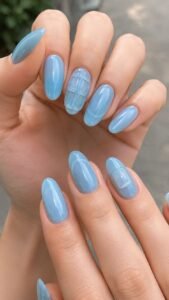
The compartments should remain slightly uneven so the surface looks formed rather than printed. Use the full grid on one nail and place only one raised square near the cuticle of another, allowing the surrounding glossy blue fingers to keep the manicure simple.
Melt One Clear Cube at the Corner
Paint the nails in creamy sky blue and add one transparent raised square close to the outer corner. Extend a small clear gel trail from the lower edge so the cube appears to be slowly melting across the surface.
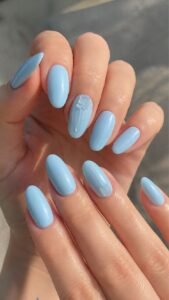
Add one tiny white reflection near the top and keep the remaining area open. Repeat a smaller clear drop on another nail, while solid blue fingers support the frozen concept without repeating the complete cube arrangement.
Edge the Tray With Brushed Silver
Apply a pale fog blue base, then paint one narrow silver frame around a group of three translucent squares. Keep the metallic border smooth and softly reflective instead of covering it with sparkling particles.
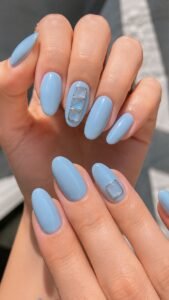
Add a fine white highlight inside selected compartments to create a chilled appearance. On another finger, repeat only one silver corner and a single blue square. This restrained metallic detail makes the design feel polished while preserving the cool softness of the light blue palette.
Seersucker Light Blue Nails With Airy Fabric Texture
Seersucker nails translate lightweight fabric into narrow raised stripes, puckered sections, and soft white spacing. Light blue, cloud white, and pale gray create a clean pattern that feels connected to warm weather clothing without becoming an ordinary striped manicure.
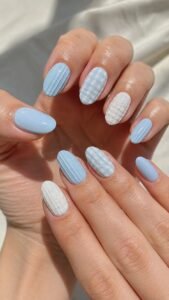
Square and rounded shapes support the structured lines, while almond nails make the texture appear softer and more fluid. Alternating smooth and gently raised surfaces allows the fabric effect to remain visible even when the colors stay delicate.
Raise Blue Stripes Over Cloud White
Begin with a cloud white base and paint several narrow light blue lines from the cuticle toward the tip. Add a low clear ridge over every second blue line so the surface develops a subtle puckered texture.
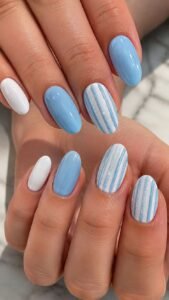
Keep the spacing slightly irregular and leave the white sections smooth. Use the detailed fabric pattern on two nails, then alternate solid light blue and white across the remaining fingers to give the manicure a crisp and coordinated appearance.
Fold a Seersucker Panel From the Side
Apply a soft powder blue base and create one white fabric panel entering from the side of an accent nail. Add three slim blue lines inside the panel, then curve the outer edge gently so it appears folded over the base.
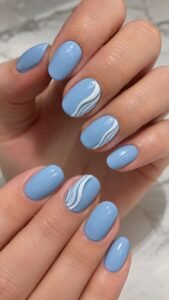
Place one pale gray shadow beneath the fold to create depth without using bulky gel. On another finger, repeat only the curved white edge, while glossy powder blue nails keep the fabric inspired artwork from becoming too busy.
Add Tiny Button Stitching Near the Cuticle
Paint the nails with alternating light blue and white vertical lines, keeping the pattern limited to the lower half of selected fingers. Place one tiny white button near the cuticle and add two small blue marks through its center to suggest stitching.
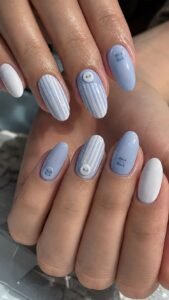
The button should remain flat and delicate so it does not overpower the fabric pattern. Repeat the stitch marks without the full button on another nail, creating a subtle connection across the manicure.
Diary Lock Light Blue Nails With Private Vintage Character
Diary lock nails combine pale blue covers, tiny metallic closures, page corners, and narrow binding details to create a manicure with quiet personal character. Dusty blue, cream, silver, and muted lavender produce a soft palette that feels nostalgic without becoming childish.
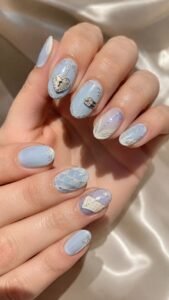
Square nails support the book cover shapes, while oval nails can feature cropped locks or curved page edges. Limiting the complete diary design to one accent allows the small mechanical details to remain clear and carefully composed.
Fasten a Silver Lock Over Dusty Blue
Begin with a smooth dusty light blue base and place one small silver rectangle near the center of an accent nail. Add a narrow curved loop above it and one tiny dark point in the middle to suggest a key opening.
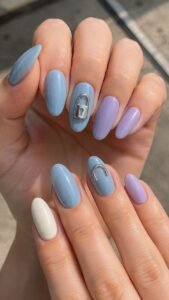
Keep the lock low and polished rather than heavily raised. Repeat only the curved silver loop on another blue nail, while cream and lavender fingers soften the metallic detail and complete the vintage color story.
Turn a Cream Page From the Tip
Paint the nails in a clear pale blue shade and add one cream triangular section folding inward from the tip. Draw two tiny gray lines inside the cream area so it resembles the corner of a diary page rather than a simple geometric block.
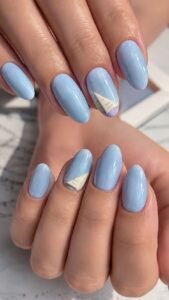
Place a narrow lavender shadow beneath the fold for gentle depth. On another finger, repeat a smaller page corner near the side, allowing the remaining blue surface to stay glossy and open.
Bind the Edge With Lavender Loops
Apply a creamy sky blue base and paint one slim lavender line along the outer side of the nail. Add four small curved loops crossing the line at even intervals to imitate a delicate diary binding. Keep the center of the nail free from decoration so the side detail remains easy to see.
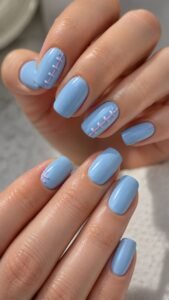
Use the complete binding on one accent and repeat two loops near the cuticle of another, while solid blue nails create a calm background.
Mechanical Pencil Light Blue Nails With Precise Silver Details
Mechanical pencil nails use smooth blue barrels, silver click tops, ribbed grips, and fine graphite marks to create a sleek stationery inspired manicure. Pale blue, brushed silver, charcoal, and clear polish keep the design modern and controlled. Long nails can carry a full pencil shape, while short square nails look polished with cropped grips or a small metal clicker.
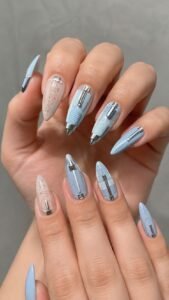
Changing the placement across the hand prevents the narrow mechanical elements from appearing like repeated ordinary stripes.
Build a Silver Click Top Near the Cuticle
Paint one accent nail in creamy light blue and add a small brushed silver rectangle near the cuticle. Place a narrower silver section above it and add one white reflection along the side so the detail appears metallic.
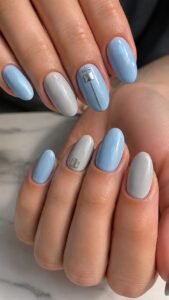
Draw a short charcoal line below the click top to suggest the beginning of the pencil barrel. On another nail, repeat only the silver rectangle, while the remaining fingers stay glossy blue or soft gray.
Wrap a Ribbed Grip Around the Tip
Begin with a translucent powder blue base and paint a pale gray section across the tip. Add several narrow vertical lines inside the gray area, keeping them closely spaced so they resemble the grip of a mechanical pencil.
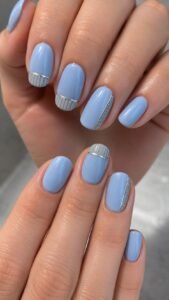
Place one thin silver border where the grip meets the blue base. Repeat a smaller ribbed panel along the side of another finger, while smooth light blue nails balance the compact technical texture.
Extend a Graphite Line Across Clear Polish
Apply a clear pink base and paint one narrow light blue pencil barrel entering diagonally from the side. Add a tiny silver cone at the end and continue it with one fine charcoal line travelling toward the opposite corner.
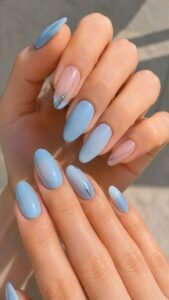
Keep the line delicate and slightly uneven so it resembles a hand drawn graphite mark. On another nail, repeat only a short charcoal stroke over light blue polish, connecting the detailed accent to the simpler fingers.
Domino Tile Light Blue Nails With Playful Dot Arrangements
Domino tile nails turn light blue polish into compact game pieces through divided panels, small dots, and smooth rounded edges. Baby blue, white, navy, and clear gloss create enough contrast for the pattern to remain readable without making the hands look overly graphic.
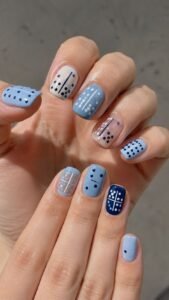
Short square nails naturally suit the tile shape, while oval nails can feature cropped pieces entering from one side. Using different dot arrangements across the fingers gives the manicure variety while preserving one connected visual theme.
Divide a Baby Blue Tile With White
Begin with a creamy baby blue base and paint one narrow white line across the center of an accent nail. Add two small navy dots above the line and three below it, keeping the circles smooth and evenly spaced. Leave a thin blue border around the entire arrangement so the nail resembles one complete tile.
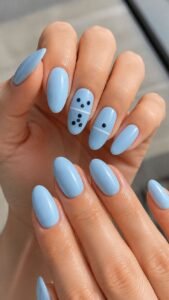
On another finger, use only the dividing line and one dot, while solid baby blue nails maintain a softer overall appearance.
Crop a White Domino From the Side
Paint the nails in a translucent light blue shade and place one rounded white rectangle entering from the outer edge. Divide the visible section with a thin pale blue line and add a small navy dot near each end.
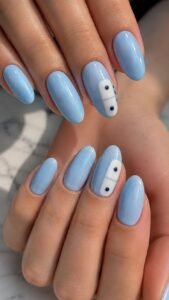
Keep much of the natural blue base exposed so the tile appears to rest over the nail. Repeat a smaller white corner on another finger, giving the set a playful detail without filling every surface with dots.
Scatter Falling Tiles Across Two Nails
Apply a milky white foundation and paint two small light blue rectangles at different angles across one accent nail. Add simple navy dot arrangements inside each piece and leave clear space between them so the tiles remain distinct.
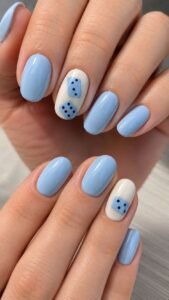
On the next finger, place one cropped blue tile near the tip to suggest the sequence continuing across the hand. Solid powder blue nails around the accents will keep the falling arrangement controlled and stylish.
Let Light Blue Nails Become the Detail That Refreshes Everything
A memorable light blue manicure does not need to depend on familiar seasonal pictures or repeat one basic pastel finish. Cameo relief creates elegant raised artwork, while ice cube trays introduce clear frozen texture. Seersucker patterns add airy fabric character, diary locks bring personal vintage detail, mechanical pencils create precise metallic structure, and domino tiles finish the collection with playful graphic spacing. Choose the theme that suits your nail length and normal routine, then adjust the artwork, shade, or texture until the design feels completely personal. You can also explore related articles about blue nail designs, short nail ideas, pastel nail colors, manicure care, outfit inspiration, jewelry styling, hairstyles, and beauty ideas to build a complete look around your next appointment.