
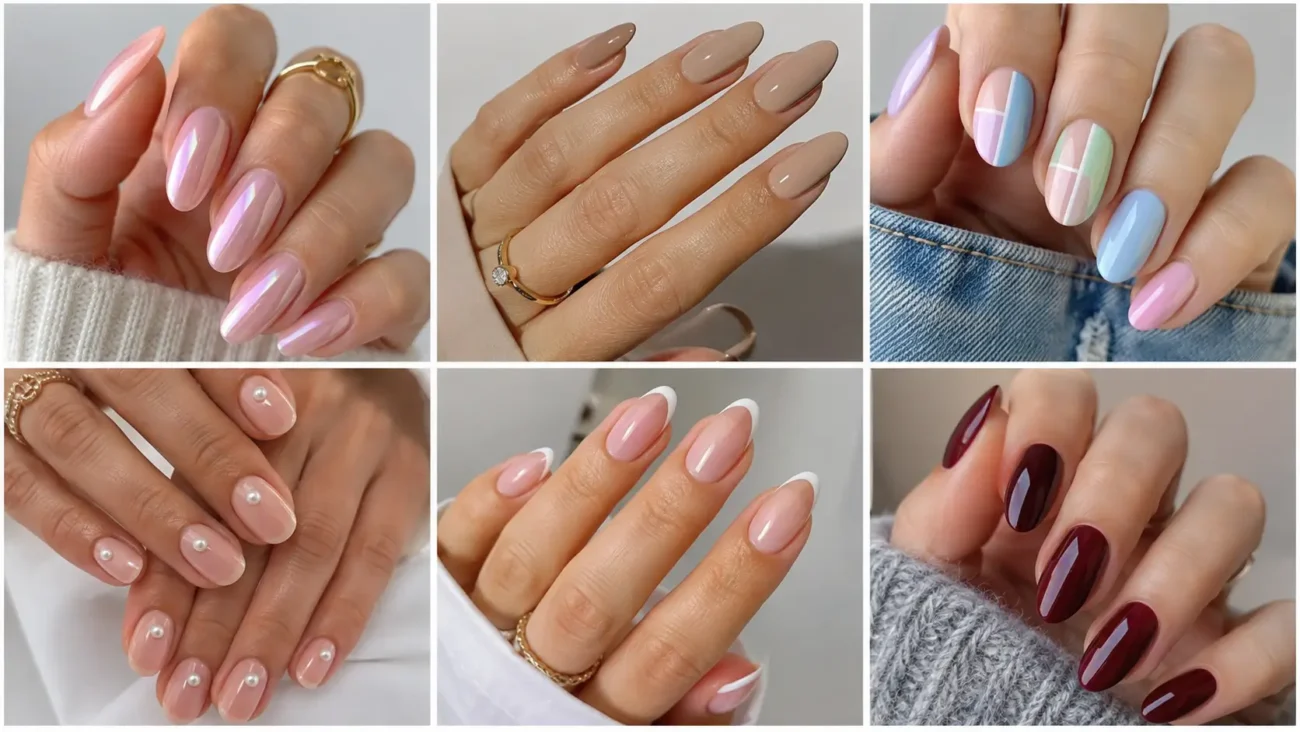
A fresh manicure can become the finishing detail that makes an outfit feel more thoughtful, polished, and personal. The strongest nails inspiration combines clean shapes with translucent color, tiny graphic details, soft texture, and carefully placed dimension instead of covering every nail with unrelated decoration.
Sheer finishes, short natural shapes, vertical line work, micro details, clouded whites, vivid blues, and controlled texture give simple and artistic manicures equal room to stand out.
Folding Fan Nails With Graceful Layered Movement
Folding fan nails use curved panels, narrow ribs, and alternating color sections to create movement across the fingertips. Coral, sky blue, plum, cream, and muted gold can make the design feel decorative without becoming too busy.
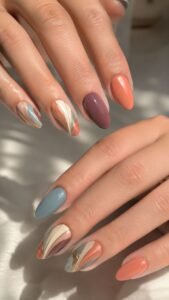
Almond and oval nails give the fan panels room to spread, while short square nails can show one cropped section entering from the side. Keeping some nails solid allows the folded shapes to remain the clear focus of the manicure.
Open Coral Panels Across a Cream Base
Begin with a warm cream base, then paint three coral panels opening from one lower corner toward the opposite edge. Separate each section with a slim burgundy line so the shapes look folded rather than striped.
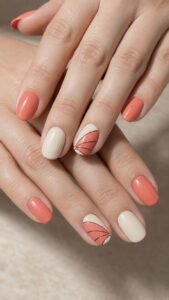
Add one tiny muted gold point where the panels meet, then keep nearby nails solid coral or cream to support the detailed accent without repeating it.
Layer Sky Blue Ribs Near the Tip
Paint a sheer pink foundation and create four narrow sky blue sections spreading outward from the center of the tip. Place fine white lines between the sections and leave small areas of the natural base visible so the fan appears light and open.
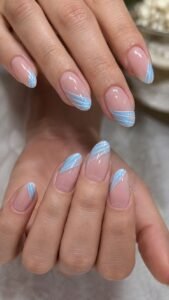
On another nail, repeat only two blue panels entering from one side, which keeps the hands connected while giving each finger a different arrangement.
Fold Plum and Blush Sections Together
Use a translucent blush base, then alternate plum and dusty pink panels across one accent nail. Curve the outer edges gently and place a deeper wine shadow beside selected folds to create depth without adding raised decoration.
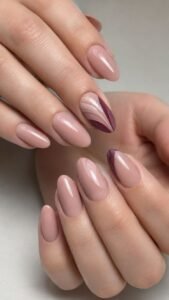
Repeat the plum shade as a single curved corner on another finger, while the remaining nails stay glossy blush for a soft and balanced finish.
Film Negative Nails With Translucent Graphic Frames
Film negative nails turn transparent polish, small frame openings, and compact edge marks into a sleek editorial manicure. Smoke brown, teal, black, cream, and amber create a retro palette that still feels clean and modern.
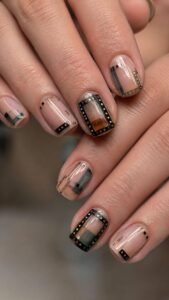
Square nails naturally support the rectangular frames, while rounded nails can carry cropped sections that soften the stronger geometry. One complete film strip is enough to establish the idea, while simpler surrounding nails prevent the pattern from looking crowded.
Place Amber Frames Over a Clear Base
Apply a clear or barely pink foundation, then paint two small amber rectangles with transparent centers across one accent nail. Add tiny black squares along one edge to suggest the perforations of a film strip, keeping the marks evenly spaced and very small.
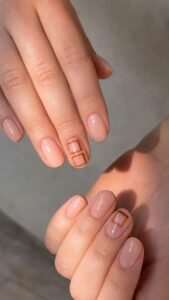
On another finger, use only one cropped amber frame near the cuticle and surround it with glossy nude nails for a lighter interpretation.
Build a Teal Strip Along One Side
Begin with a milky cream base and paint a narrow teal strip travelling vertically along one side of the nail. Divide it into three small windows using fine black lines, then add a tiny clear opening inside each section so the design keeps its translucent quality.
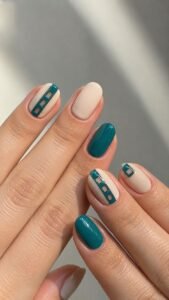
Repeat one teal window near the tip of another nail, while solid teal and cream fingers make the complete set feel intentional.
Create a Smoke Brown Contact Sheet
Paint selected nails in sheer smoke brown and add four tiny cream rectangles arranged in a compact grid. Keep a narrow brown border between every shape and place one black point in a corner to introduce a subtle photographic detail.
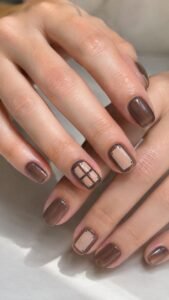
Use the full contact sheet on one finger only, then echo the cream rectangles as single accents on nearby nails so the visual story remains clear.
Wax Seal Nails With Sculpted Glossy Character
Wax seal nails use rounded color pools, pressed symbols, and smooth raised gel to give a manicure a rich handcrafted appearance. Tomato red, deep berry, caramel, forest green, and warm cream provide several ways to adapt the idea to different wardrobes.
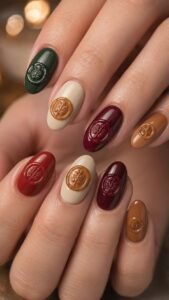
Short rounded nails suit one compact seal near the cuticle, while longer almond shapes can carry a larger off center impression. The best result comes from keeping the raised areas low and surrounding them with open space.
Press a Berry Seal Into Sheer Pink
Start with a translucent pink base and place one rounded berry shape slightly below the center of an accent nail. Add a shallow raised gel layer and press a simple curved mark into the middle so the seal looks formed rather than painted flat.
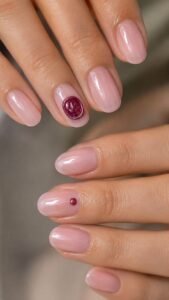
Repeat only a small berry drop near the cuticle of another finger, leaving the remaining nails sheer to make the sculpted accent feel refined.
Melt Caramel Wax From the Side
Apply a warm cream base, then create one irregular caramel pool entering from the side of the nail. Allow the edge to spread unevenly and add a small circular impression near the widest part, followed by one glossy highlight that suggests freshly cooled wax.
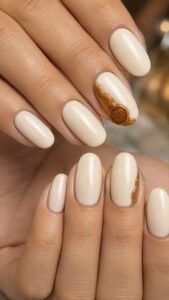
On another finger, paint a thinner caramel edge without the central mark, which connects the idea without copying the complete design.
Shape a Forest Green Initial Mark
Paint a soft beige foundation and add a deep forest green seal near the tip. Instead of using a readable letter, place two simple intersecting curves in the center to create the feeling of a personal mark without forming a name.
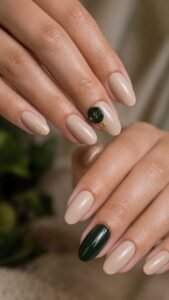
Add one muted gold point beside the seal and use glossy green on one surrounding nail to carry the rich color across the hand.
Rattan Weave Nails With Warm Natural Texture
Rattan weave nails translate curved cane strips and open woven spaces into a manicure that feels warm, tactile, and fashion focused. Honey beige, chestnut, cream, olive, and soft black create enough contrast for the pattern to remain visible on both short and long nails.
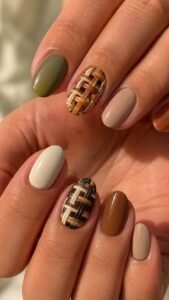
The weave should stay loose and carefully spaced rather than covering the full surface with a dense checker pattern. Mixing one detailed woven nail with smooth neutral colors gives the manicure a more expensive and wearable appearance.
Cross Honey Strips Over Milky Cream
Begin with a milky cream base and paint three narrow honey beige lines moving diagonally across one accent nail. Add two chestnut lines travelling in the opposite direction, allowing them to pass over and under selected sections to create a woven effect.
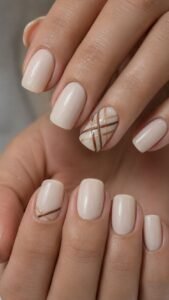
Keep wide cream spaces between the strips and repeat only one crossing near the cuticle of another finger for a lighter matching detail.
Curve Olive Cane Around the Edge
Apply a sheer beige foundation, then paint two slim olive curves following one side of the nail. Connect the curves with four short horizontal marks, leaving the center open so the design resembles the edge of a woven chair rather than a complete basket pattern.
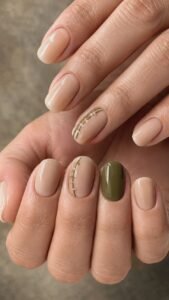
Use solid olive on one nail and warm beige on the others to give the unusual accent a calm fashion palette.
Add a Black Binding Detail
Paint the nails in soft tan and create a small woven panel near the tip using cream and chestnut lines. Add one narrow black curve around the outer edge to suggest a finished binding and make the natural shades appear sharper.
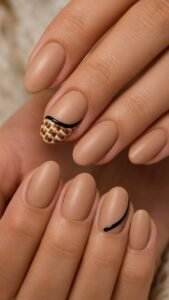
Repeat the black line alone on another tan nail, while a satin top layer softens the base and glossy binding adds controlled material contrast.
Elevator Panel Nails With Polished Number Lights
Elevator panel nails combine metallic surfaces, glowing circles, narrow labels, and orderly spacing to create an unexpected modern manicure. Brushed silver, charcoal, cream, cherry red, and cool blue give the design a clean city inspired mood.
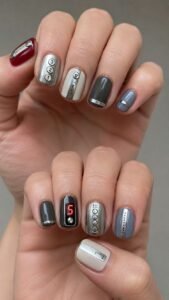
Short square nails suit the compact button arrangement, while oval nails soften the industrial shapes and make the theme more wearable. Using only a few lights on each accent keeps the idea graphic instead of overly literal.
Light One Cherry Button on Silver
Apply a soft brushed silver base and paint three small charcoal circles in a vertical row. Fill the center circle with glossy cherry red and add a tiny white reflection near one edge so it appears illuminated.
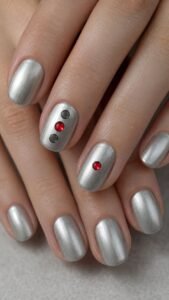
Keep the other buttons dark, then repeat a single red circle on another silver nail to make the glowing detail the strongest point of the manicure.
Arrange Cream Buttons Over Charcoal
Paint one accent nail in deep charcoal and add four small cream circles with generous spacing between them. Place a tiny silver point beside each circle and give one button a pale blue center to create a quiet change in the pattern.
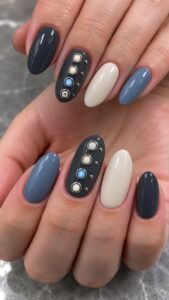
Surround the accent with solid charcoal, cream, and blue nails so the arrangement feels sleek enough for everyday outfits.
Add a Narrow Floor Display
Begin with a muted gray base and place one slim black rectangle near the cuticle. Inside it, paint two tiny cream marks and one upward pointing red shape that suggests a floor display without using readable numbers.
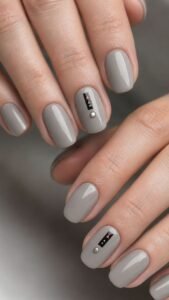
Add one silver button below the panel and keep the rest of the nail open, allowing the small mechanical detail to remain clear and carefully placed.
Postage Stamp Nails With Perforated Border Details
Postage stamp nails use framed color blocks, tiny corner marks, and delicate perforated edges to create a collected paper inspired manicure. Cloud white, faded blue, coral, olive, and dusty lavender keep the design bright while preserving a softly printed appearance.
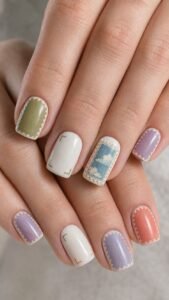
Square nails can hold a complete stamp shape, while almond and oval nails look beautiful with cropped frames entering from the edge. Avoid readable place names or copied illustrations so the manicure stays decorative, original, and easy to personalize.
Frame a Coral Stamp on Cloud White
Paint the nails with an airy cloud white base and add one small coral rectangle near the center. Surround it with a fine cream border, then place tiny evenly spaced dots around the outer edge to imitate perforations without creating a heavy outline.
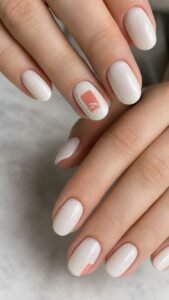
Add one simple curved white mark inside the coral panel and repeat a cropped corner of the stamp on another finger.
Layer Faded Blue and Olive Blocks
Begin with a sheer nude base and place one faded blue stamp slightly above an olive rectangle so the shapes overlap at one corner. Give each block a different perforated edge and leave the centers mostly open, using only a few abstract lines for visual interest.
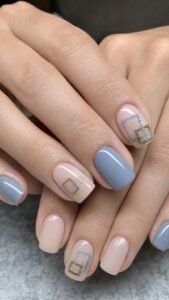
On a nearby nail, repeat the olive shade as one small framed square, while the remaining fingers stay nude or faded blue.
Place a Dusty Lavender Cancellation Mark
Apply a pale cream base and create one dusty lavender stamp near the side of an accent nail. Draw two thin charcoal curves passing over one corner to suggest a cancellation mark, keeping the lines soft and decorative rather than forming text.
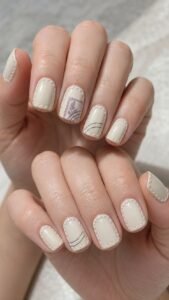
Use the complete arrangement once, then echo the charcoal curves on another cream nail so the printed effect travels naturally across the manicure.
Turn Your Next Manicure Into a Style Detail Worth Remembering
Fresh nails inspiration becomes more memorable when every color, line, and finish belongs to one clear visual story. Folding fans bring graceful movement, while film negatives introduce transparent graphic structure. Wax seals create sculpted character, rattan weaving adds warm texture, elevator panels offer polished city detail, and postage stamps finish the collection with softly framed color. Choose the idea that matches your nail length and personal wardrobe, then simplify the details for daily wear or expand them for a more expressive appointment. You can also explore related articles about short nail ideas, nail colors, manicure care, outfit inspiration, jewelry styling, hairstyles, and beauty ideas to build a complete look around your next set.