
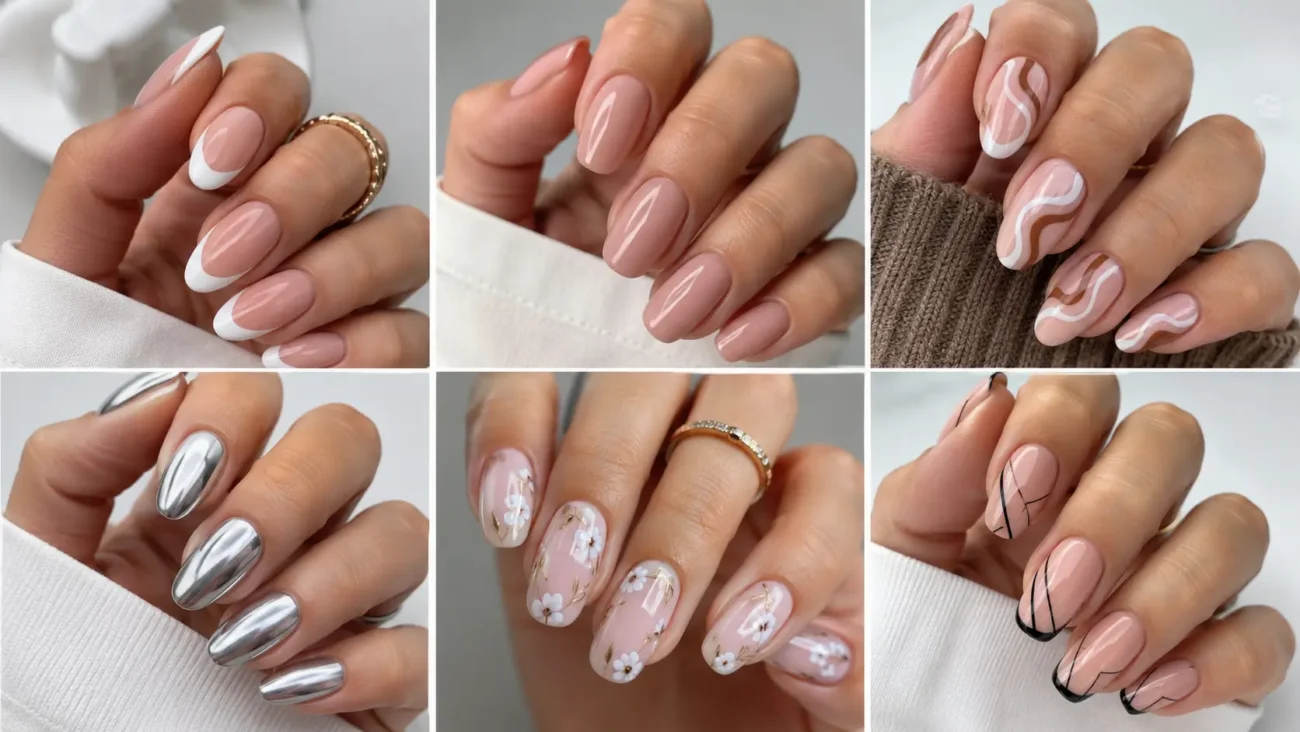
A thoughtful nails design can turn the hands into an expressive part of a complete fashion look. The strongest manicures do more than place one popular color across every nail. They combine finish, spacing, texture, and carefully selected details so the entire set carries one clear personality. Sheer glass color, raised gel lines, aquatic blues, matcha green, tiny decorations, soft animal markings, and practical short shapes are giving nail art a fresh sense of movement.
The ideas below move beyond familiar hearts, flowers, cherries, flames, marble, French tips, chrome fades, and aura centers. Instead, they explore reeded glass, matcha tea tins, tidal reflections, fawn shadows, mosaic windows, and beaded curtains. Every theme includes three distinctive variations for short square, rounded, oval, or almond nails.
Reeded Glass Nails With Clear Vertical Texture
Reeded glass nails bring decorative glass panels to the fingertips through transparent color and slim raised lines. Clear gel can be layered over smoke gray, sea green, pale blue, or amber polish to build narrow ridges that change as the hands move.
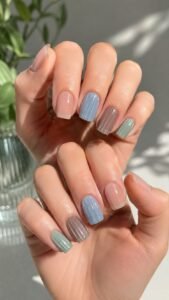
Short square nails make the vertical structure look crisp, while almond nails give the lines a softer flow. Keep the detailed texture on selected fingers and leave the remaining nails smooth so the contrast becomes the main attraction.
Build Clear Ridges Over Smoke Gray
Begin with a translucent smoke gray base that allows part of the natural nail to remain visible. Add narrow clear gel lines from the cuticle toward the tip, keeping the spacing close but slightly uneven.
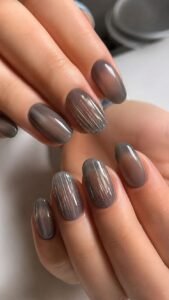
A fine white reflection beside one or two ridges will make the texture easier to notice. Leave surrounding nails smooth with the same gray tint to create a clean contrast between flat and patterned glass.
Tint the Glass With Sea Green
Use a sheer sea green polish as the foundation, then create clear raised ribs across two accent nails. One nail can carry complete vertical lines, while another shows only four ridges entering from the side.
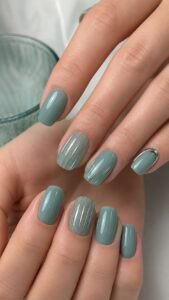
Add a slim silver edge to one finger for a small architectural detail. Smooth sea green nails between the textured accents will keep the manicure coordinated and easy to style with pale clothing and silver accessories.
Add an Amber Reflection Along the Edge
Paint the nails with a nearly clear beige base and place transparent ridges over the surface. Add one narrow amber line beside the outer ridge on selected nails, making it look like golden light is passing through glass.
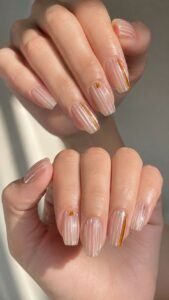
Repeat the amber shade as a small rectangle near the cuticle of another finger. A glossy finish will connect the smooth and textured nails without adding charms or crowded artwork.
Matcha Tea Tin Nails With Powdered Green Character
Matcha tea tin nails combine muted green, brushed silver, cream, and forest accents to create a manicure inspired by finely ground tea and compact metal containers. The design focuses on powdery surfaces, curved rims, small label shapes, and whisked movement rather than literal cups.
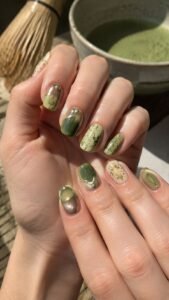
Rounded and square nails support the tiny tin details, while oval nails soften the deeper green shades. Keeping the palette within two green tones helps every accent remain clear and polished.
Dust the Surface With Matcha Powder
Apply a muted matcha base, then place lighter green pigment near one side of the nail. Blend the outer edge gently so the color resembles fine powder rather than a centered gradient.
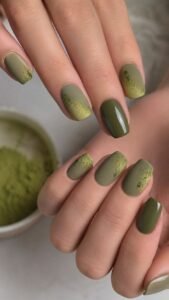
Add two or three darker green specks inside the lighter area using irregular spacing. A matte finish strengthens the powdered appearance, while one glossy solid nail adds contrast and keeps the complete set from feeling flat.
Frame a Silver Tea Tin Rim
Paint one accent nail in soft green and add a narrow silver curve near the edge, suggesting the rolled rim of a tea tin. Place a smaller silver oval close to the cuticle on another nail to echo the lid without repeating the complete arrangement.
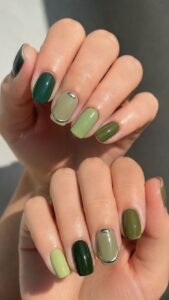
Alternate deep forest green and pale matcha across the remaining fingers. Keep the silver smooth and reflective instead of covering it with heavy glitter.
Sweep Cream Whisk Marks Across Green
Begin with a deep matcha base, then paint several thin cream curves moving in one direction. Allow the lines to overlap near one edge and open toward the opposite side, resembling the marks created by a whisk.
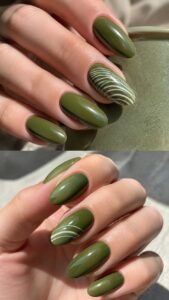
Use the complete pattern once and repeat only two cream arcs on another finger. Solid glossy green nails around the accents will balance the movement and preserve the tea inspired color story.
Tidal Reflection Nails With Watery Layered Depth
Tidal reflection nails capture sunlight moving across shallow blue water without relying on literal shells, fish, or beach illustrations. Transparent aqua, coastal blue, clear gel, pearl white, and deep teal create a surface that appears different from every angle.
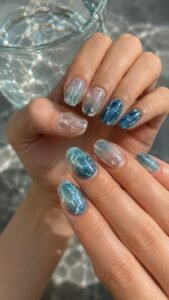
The design works on short nails because one reflective area can still create strong impact. Longer shapes provide more space for overlapping water pockets, curved light, and subtle raised drops.
Layer Aqua Windows Over Clear Nails
Start with a clear or sheer pink foundation, then paint irregular aqua shapes across selected areas. Leave narrow transparent spaces between the blue sections so they resemble shallow pools divided by moving reflections.
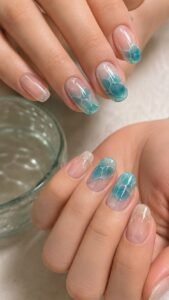
Add a second layer of deeper blue inside one or two shapes to create changing depth. Keep the edges visible rather than fully blended. Clear glossy nails between the accents will make the aqua sections appear suspended.
Trace White Light Across Coastal Blue
Apply a smooth coastal blue polish, then draw one or two fine white lines that bend gently across the surface. Break the lines in selected places so they resemble reflected light rather than ordinary stripes.
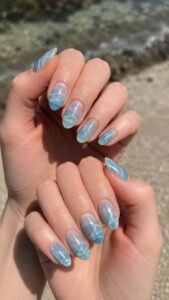
Add a tiny clear gel drop where two white sections nearly meet. Short nails can carry one curved reflection near the tip, while almond nails can support a longer path moving toward the side.
Create a Deep Teal Water Pocket
Paint a translucent aqua base, then add one irregular deep teal area near the side of an accent nail. Surround the darker section with a narrow clear border so it looks like a deeper pocket inside shallow water.
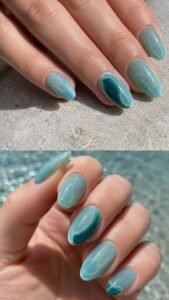
Place a pale blue highlight over one edge and repeat the teal shade as a small crescent on another finger. High shine will give the layered colors a convincing liquid appearance.
Fawn Shadow Nails With Soft Natural Markings
Fawn shadow nails offer a quieter interpretation of animal inspired art through delicate speckles, cropped brown shadows, and open cream areas. Beige, biscuit brown, cocoa, and muted gold create a natural palette that moves easily between casual clothing and dressier looks.
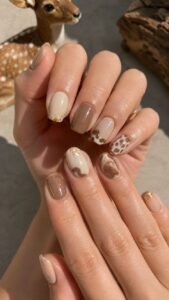
The pattern feels most modern when the marks stay small and surrounded by open space. Use the complete design on one or two fingers so the manicure looks expressive without becoming repetitive.
Scatter Cocoa Speckles Over Beige
Apply a smooth beige base and place tiny cocoa dots across one side of the nail. Vary their size and distance so the pattern appears organic instead of arranged like regular polka dots.
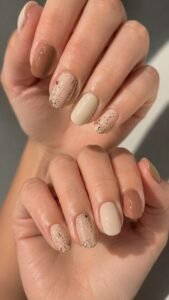
Move a few speckles toward the center while leaving most of the beige visible. Repeat a smaller group near the cuticle of another nail. Solid biscuit brown and sheer cream fingers will support the detailed accents.
Sweep a Cocoa Shadow From the Side
Paint the nails in translucent cream, then add one cocoa shape entering from the side. Let the edge curve unevenly and soften slightly toward the center, resembling a natural shadow instead of a perfect color block.
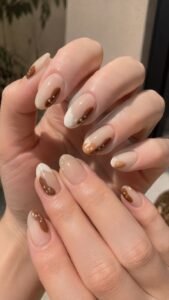
Place three tiny beige marks inside the brown section. On another finger, reverse the arrangement by using a biscuit base with one cream shape near the tip.
Place a Golden Mark Near the Cuticle
Begin with a pale biscuit base and create a loose group of tiny brown speckles near the center. Add one small muted gold oval near the cuticle so it catches light without becoming the largest detail.
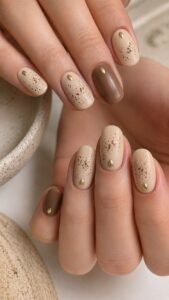
Repeat only the gold mark on one solid brown nail to connect the accents. A satin base will keep the natural palette soft, while glossy gold provides a subtle dressed up finish.
Mosaic Window Nails With Tiny Jewel Panels
Mosaic window nails combine small sections of translucent color with narrow clear spaces that resemble assembled glass panels. Sapphire, raspberry, amber, lavender, and emerald can appear over a clear or milky base, while a fine charcoal outline gives each section definition.
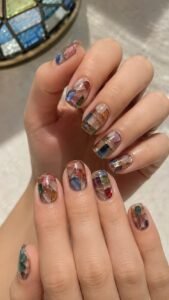
Square nails naturally frame geometric layouts, but oval shapes can carry cropped arches and irregular pieces. Leaving transparent areas around the colors prevents the miniature pattern from looking heavy.
Arrange Jewel Squares With Clear Spaces
Paint a clear base, then place four or five tiny translucent squares near one corner. Use sapphire, raspberry, amber, and emerald while leaving a narrow clear line between every piece.
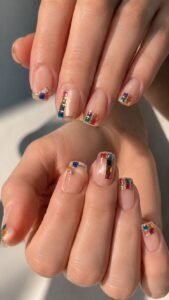
Change the arrangement across the hand by creating a vertical group on one nail and a compact square group on another. Finish with a thick glossy layer so the pieces look sealed beneath polished glass rather than sitting on top.
Build a Cropped Arch Near the Tip
Create a small arch beginning at the tip of an accent nail, then divide it into three or four colored panels. Use lavender in the center with blue and amber on the sides, separated by fine charcoal lines.
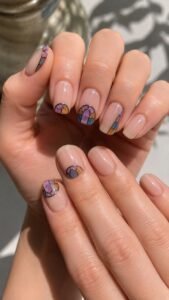
Keep part of the arch beyond the edge so it appears cropped. Repeat one colored panel near the side of another finger, while milky nude nails soften the stronger jewel colors.
Float Irregular Pieces Over Milky Pink
Apply a milky pink foundation and add several irregular translucent pieces across the center. Include a small triangle, rounded rectangle, and narrow curved shape, leaving visible pink space between them.
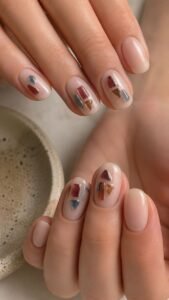
Use only three shades, such as ruby, smoky blue, and honey amber. On short nails, reduce the arrangement to two diagonal pieces. The softer base makes this interpretation wearable while preserving its artistic mosaic character.
Beaded Curtain Nails With Floating Color Drops
Beaded curtain nails translate hanging strands and miniature beads into a design that moves visually from the cuticle toward the tip. Clear bases, thin metallic lines, tiny colored dots, and low glass like drops create detail without requiring oversized charms.
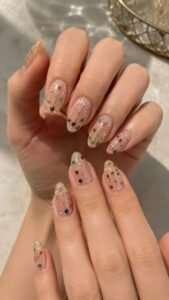
Long almond nails can carry several hanging strands, while short nails need only one line placed slightly away from the center. Smooth sheer fingers around the detailed accents will keep every tiny bead visible.
Hang One Color Strand From the Cuticle
Begin with a sheer nude base and draw one thin silver line from the cuticle toward the middle. Place three tiny colored dots along it using blue, raspberry, and amber. Leave different spaces between the dots so the strand appears individually assembled.
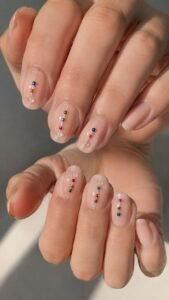
Add one clear gel drop at the end. Repeat the idea on another nail with a shorter line and a different order of colors.
Cluster Tiny Beads Along One Side
Paint the nails with a transparent pale pink base, then arrange a narrow group of miniature beads along one side. Combine two translucent colors with one metallic point, leaving small clear spaces throughout the cluster.
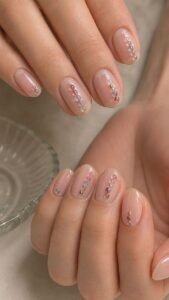
On another finger, place only three dots near the side to echo the main accent. The vertical arrangement can make short rounded nails appear longer without covering the clean center of the nail.
Finish With a Clear Teardrop Bead
Use a milky beige base and place one slim gold line beginning near the cuticle. Add two tiny colored circles along the line and finish with a low clear teardrop near the center.
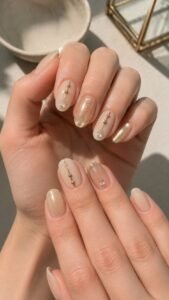
A second finger can carry only the teardrop over a transparent base, while the remaining nails stay beige or soft gold. The repeated clear detail connects the manicure even when each layout changes.
Choose the Nails Design That Fits Your Personal Style
A memorable manicure becomes stronger when every detail supports one clear idea. Reeded glass creates controlled transparent texture, while matcha tea tin nails combine powdered green with compact silver accents. Tidal reflections introduce glossy blue depth, and fawn shadows offer a softer approach to animal markings. Mosaic windows bring carefully placed jewel color, while beaded curtains add delicate movement through suspended details. Choose the theme that suits your nail length, outfits, and normal routine, then simplify or expand the accents until the finished set feels personal. You can also explore related articles about short nail designs, nail colors, manicure care, outfit styling, jewelry ideas, hairstyles, and seasonal beauty inspiration to complete the look around your next manicure.